
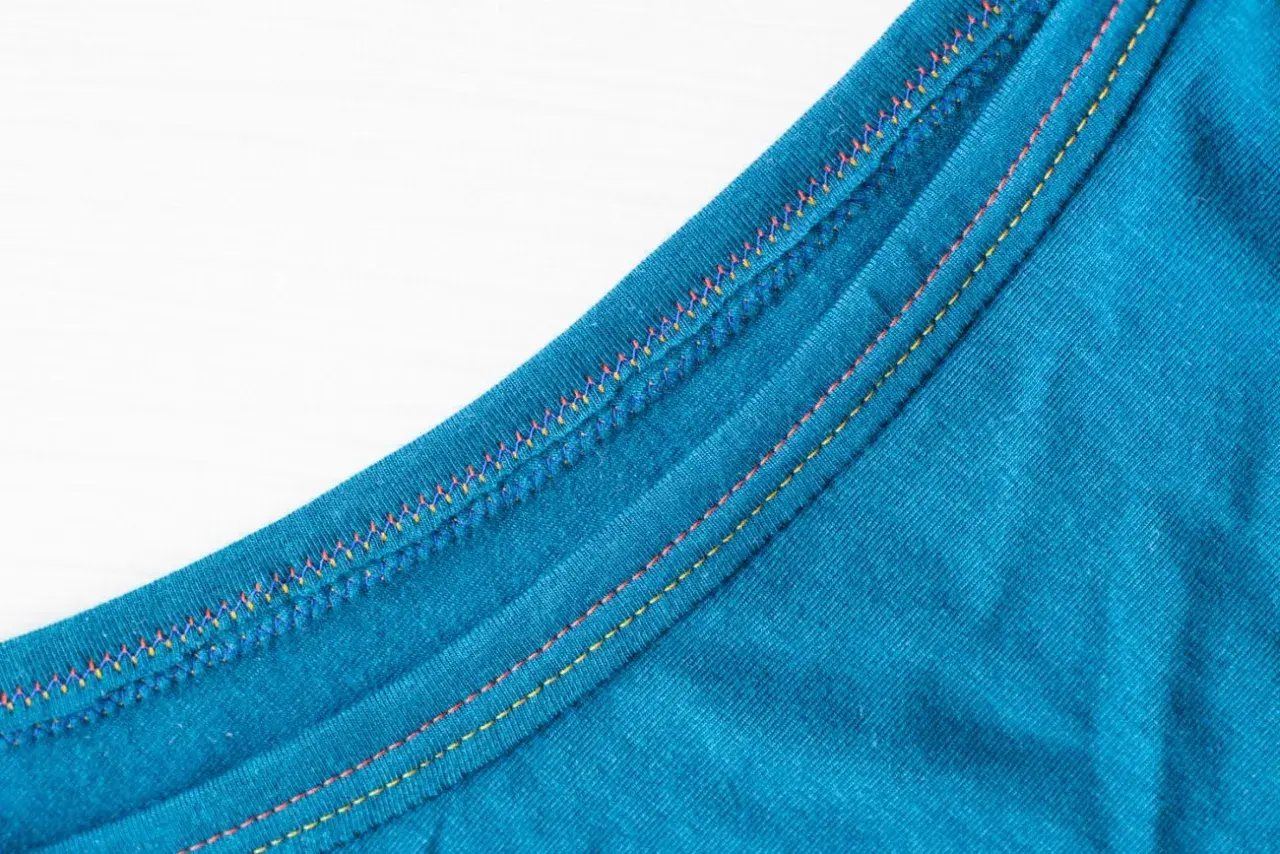
A double needle topstitch is one of the simplest ways to get a clean, ready-made look on hems, seams, and visible construction details. It creates two parallel rows on the right side of the fabric and, on many machines, a zigzag on the reverse that still allows the seam to move a little. In this article, I’ll show you what the stitch really does, how to set up your machine, which fabrics handle it best, and where the common problems start.
What you need before you try twin-needle stitching
- Two spools of thread are usually better than one, because the needles need separate thread paths.
- A machine that can sew a zigzag is the right starting point, but stitch width still has to stay within the needle-plate clearance.
- For woven fabrics, a topstitch twin needle such as 2.5/80 or 3.0/90 is a sensible starting point.
- For knits, a stretch twin needle is usually the safer choice, often in sizes like 2.5/75 or 4.0/75.
- If the fabric tunnels between the rows, I lower the upper tension by one step and test again.
- The underside matters as much as the top: if the back looks messy, the setup is not finished yet.
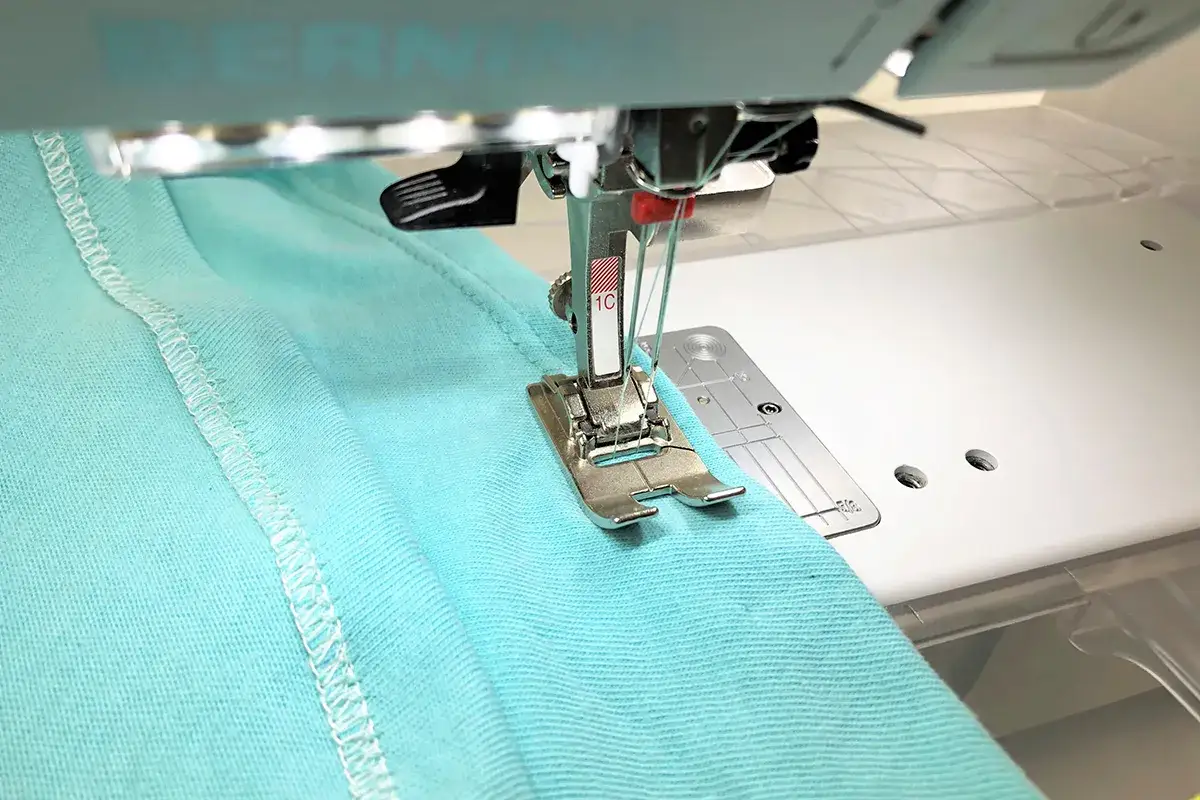
How the stitch works on fabric
In practical terms, I think of this as a domestic-machine answer to a coverstitch look. The twin needle makes two lines at once, which gives the outside of the garment a polished, tailored finish, while the reverse side usually forms a zigzag that helps the seam keep a little give. That combination is exactly why it works so well on knit hems, neckbands, cuffs, and any place where you want the stitching to be visible without making the fabric rigid.
| Stitch option | What you see | Best use | Main limit |
|---|---|---|---|
| Twin-needle stitching | Two parallel lines on top, zigzag underneath | Hems, necklines, decorative seams, denim details | Needs careful tension and width control |
| Coverstitch | Professional parallel top rows with a looper underside | Frequent knitwear hemming and sportswear | Requires a dedicated machine |
| Single topstitch | One visible line | Jeans, bags, bulky seams, simple detailing | Less stretch-friendly and less decorative |
Getting the machine ready without fighting tension
The cleanest results come from a calm, methodical setup. I never thread a twin needle and immediately commit to the garment piece; I treat the first sample as part of the job, not as an extra.
- Choose the right needle type for the fabric. I use a standard topstitch twin for woven fabrics and a stretch twin for jersey, rib, or anything with elastane.
- Check the spacing. Narrower spacing is usually easier on close seams and small hems, while wider spacing can look bolder on decorative topstitching. On many home machines, 2.0-3.0 mm is the useful range to think about first.
- Thread from two spools. If your machine has an extra spool pin or spool stand, use it. The two threads should feed separately and smoothly.
- Keep the bobbin thread ordinary. I do not load the bobbin with heavy topstitch thread; regular bobbin thread is usually enough because it sits on the underside and does the job without adding bulk.
- Use the machine’s twin-needle setting if it has one. That setting often limits incompatible stitches and reduces the chance of a needle strike.
- Test on the same fabric stack you plan to sew. If the real garment has interfacing, seam allowances, or ribbing, the test sample should include them too.
One adjustment I reach for often is upper tension. If the fabric starts to tunnel between the two rows, I lower the upper tension by one full step and test again. I also slow down over thick seam crossings, because the needle is more likely to deflect there than on a flat area. With the machine behaving properly, the next question is which projects genuinely reward the stitch.
Which fabrics and projects benefit most
This stitch is not a universal answer, but it is excellent in the right places. I get the most consistent results on medium-weight wovens and on stable knits that need a neat finish without losing stretch. The trick is matching the needle, spacing, and thread to the fabric rather than forcing one setup to do everything.
| Project | Why it works | What I would start with | Watch for |
|---|---|---|---|
| T-shirt hems | Keeps the hem looking RTW while preserving stretch | Stretch twin needle, regular thread in the bobbin | Tunnelling if the upper tension is too high |
| Neckbands and cuffs | Gives a clean finish on curved and slightly bulky areas | Stretch twin needle with moderate spacing | Skipped stitches at thick seam joins |
| Denim topstitching | Creates bold parallel lines that look intentional | Topstitch twin needle with stronger topstitch thread | Needle strike on thick cross-seams |
| Shirt plackets and yokes | Adds structure and visible detail without looking heavy | Topstitch twin needle, slightly longer stitch length | Uneven lines if the layers shift while stitching |
| Decorative seam lines | Turns a plain seam into a design feature | Narrow to medium spacing, thread matched to fabric weight | Too-wide spacing on fine fabric can look clumsy |
For knits, I am especially cautious. The stitch should stretch with the garment, but only if the needle, thread, and tension are all behaving. If the fabric is very delicate, very sheer, or very bulky at the seam line, I test more aggressively or switch to a different finish. That leads straight into the mistakes that usually spoil the result.
The mistakes that ruin the finish
Most bad results come from a small number of predictable errors. The good news is that they are easy to diagnose once you know what to look for.
- Using the wrong needle type - a standard twin needle on jersey may skip stitches or snap, while a stretch twin needle usually handles the fabric better.
- Ignoring the machine’s width limit - if the needle spacing is too wide for the stitch or the plate opening, the needles can hit metal and break.
- Over-tight upper tension - this is the classic cause of tunnelling, where the fabric puffs up between the two rows.
- Using heavy thread everywhere - thick top thread is useful in the needles, but loading the bobbin with it usually adds bulk without improving the look.
- Rushing across seam crossings - even a good setup can fail if the machine is forced over too much bulk too quickly.
- Skipping the test seam - I have almost never seen a first-pass twin needle finish look perfect without a sample run first.
When a coverstitch machine earns its keep
I would not tell every sewist to buy a coverstitch machine. For occasional hems, visible seams, and the odd jersey project, a twin needle on a regular sewing machine is usually enough. The upgrade makes sense when you sew knitwear often enough that you are repeating the same hem finish again and again, or when you want the underside to look more professionally finished with less trial and error.The practical difference is simple: a coverstitch is built for this job, while a twin needle is a clever workaround that can do a very good version of it. If you mainly sew woven garments, shirts, children’s clothes, or mixed projects, I would keep the twin needle in regular use and invest elsewhere first. If your projects are mostly stretch garments and you want fast, repeatable hems, the dedicated machine starts to make more sense.
There is no shame in either route. I use the twin needle when I want flexibility and reach for a coverstitch only when the workload justifies it. The fabric and the project should decide, not the other way around.
A quick checklist before you sew the real garment
- Confirm that the fabric suits the stitch and that your machine can handle the selected width.
- Install the correct twin needle for the job, then thread both paths carefully and separately.
- Run at least one sample on the same fabric layers you will sew in the final piece.
- Check the front for neat parallel lines and the back for an even zigzag without looping or drag marks.
- Lower upper tension by one step if the fabric tunnels, then test again before changing anything else.
- Slow down over bulky seams and raise the needle before pivoting at corners.
- When the job is done, swap back to a single needle and reset the machine for your next project.
My rule is straightforward: use the twin needle when you want a clean, stretchy, decorative finish on a domestic machine, but respect its limits on bulk and width. If the sample looks balanced on both sides of the fabric, the final seam usually behaves the same way, and that is the difference between a good finish and a frustrating one.
