
Hemming can decide whether a garment looks polished or simply unfinished. With a sewing machine, the job becomes a controlled finishing step instead of a slow hand stitch, and the result can be almost invisible or deliberately visible depending on the fabric and the finish. This article covers the settings, methods, and small habits that keep the edge straight, flat, and durable.
The best hemming method depends on fabric weight, stretch, and visibility
- Use a simple turned hem for everyday garments, curtains, and sturdy home sewing.
- Choose a blind hem when you want the stitches to disappear from the right side.
- Use a narrow or rolled hem for lightweight fabrics that fray easily.
- Match the needle, stitch length, and presser foot to the fabric before you sew.
- Pressing matters as much as stitching if you want the hem to sit flat.
- A test strip saves more time than unpicking a bad hem later.
What machine hemming actually changes
A hemming sewing machine setup is not a separate machine at all; it is the ordinary machine used with the right fold, foot, and stitch so the edge sits flat and looks intentional. I treat hemming as a finishing process, not a shortcut. It changes how the fabric hangs, how much weight sits at the bottom, and how clean the inside looks after wear and washing.
I reach for machine hemming on trousers, skirts, shirts, curtains, and table linen whenever I want speed and consistency. I still prefer hand finishing for very fine silk, couture work, or any project where a completely invisible finish is worth the extra time. Once that decision is clear, the next step is choosing the finish that fits the fabric instead of forcing every hem into the same method.
Choosing the hem finish that fits the fabric
I decide on the hem finish before I touch the pedal, because the fabric usually tells me what will work. The wrong finish is where hems start to look bulky, stretched, or obvious, even if the stitching itself is neat. Janome’s stitch guide describes blind hemming as a catch stitch that takes tiny bites from the garment side, and that is exactly the right mental model when you are trying to keep the right side clean.
| Method | Best for | What it looks like | Main limitation |
|---|---|---|---|
| Simple turned hem | Cotton, linen, curtains, general repairs | A visible line of topstitching near the fold | Can show more clearly on fine fabrics |
| Blind hem | Trousers, skirts, wool blends, dress garments | Nearly invisible from the right side | Needs careful alignment and practice |
| Narrow or rolled hem | Viscose, chiffon, fine cotton, scarves | A tiny, neat edge with very little bulk | Fiddly on curves and slippery fabrics |
| Twin-needle hem | Jersey, sweatshirt fleece, knit tops | Two parallel rows on the right side | Needs stretch-safe settings and even feeding |
My rule is simple: if I want the hem to disappear, I use a blind hem; if I want a tidy visible finish on a light fabric, I use a narrow hem; if the garment needs stretch, I move toward a twin needle. That choice makes the rest of the job much easier, because the machine settings can then support the fabric instead of fighting it.
Setting up the machine for a cleaner edge
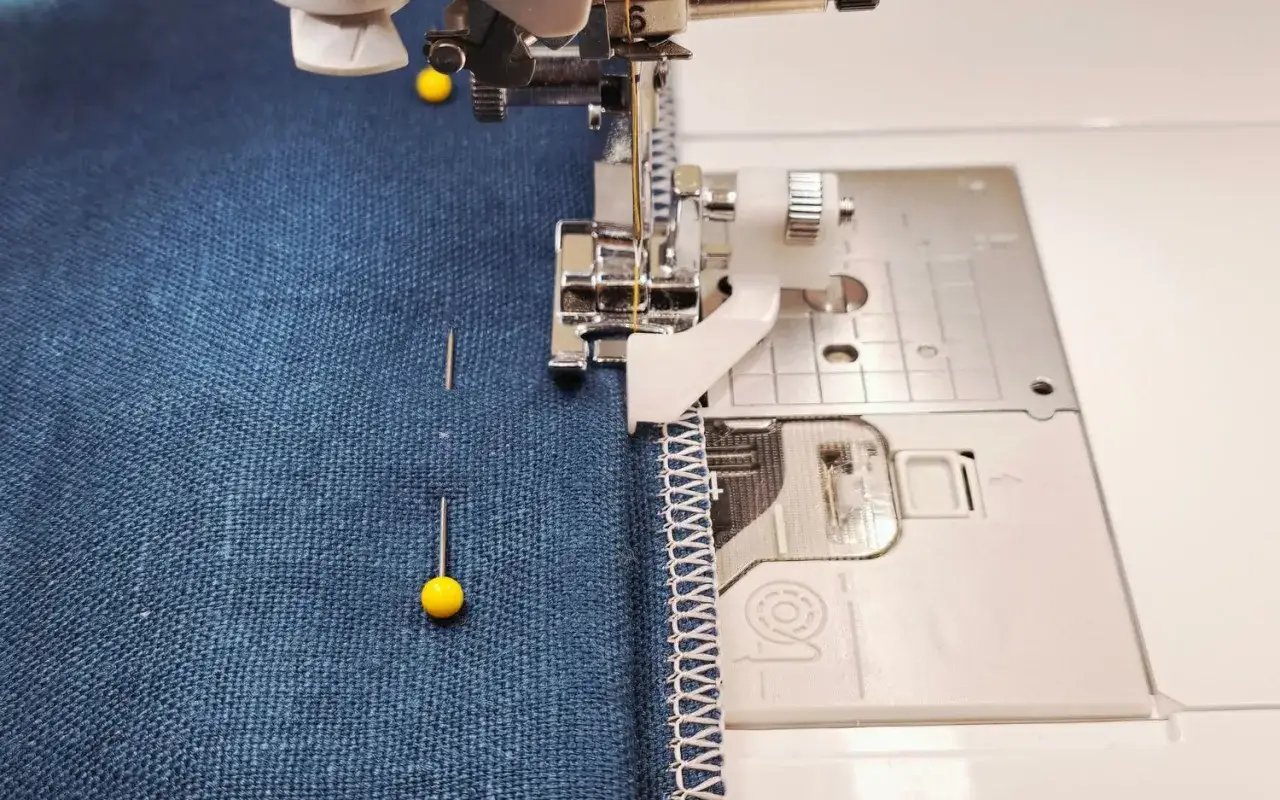
Before I sew, I check three things: the needle, the foot, and the way the hem has been pressed. The machine can compensate for only so much; if the fabric is unpressed or badly marked, the stitches simply record the mistake. Singer’s blind-hem guidance makes the same practical point I use in the workroom: the guide should just skim the fold, not ride over it.
| Fabric | Needle | Stitch length | Useful setup notes |
|---|---|---|---|
| Lightweight woven fabric | 70/10 or 80/12 universal or microtex | 2.0 to 2.5 mm | Use fine thread and keep the hem shallow |
| Medium cotton or linen | 80/12 or 90/14 universal | 2.5 to 3.0 mm | Press firmly and use a standard foot or blind hem foot |
| Denim or twill | 90/14 or 100/16 jeans needle | 3.0 to 3.5 mm | Reduce bulk at side seams before sewing |
| Jersey or other knit fabric | 75/11 or 80/12 ballpoint or stretch needle | 2.5 to 3.0 mm | Use a twin needle or stretch stitch and avoid stretching the fabric |
I also keep a hem gauge, chalk or washable marker, pins or clips, and a press cloth close by. If the fabric frays, I finish the raw edge first with an overlocker or a narrow zigzag. If the hem is on a curved line, I test the fold on a scrap before I commit to the garment, because the curve will tell me very quickly whether the settings are right.
How to sew the hem without distorting the fabric
Once the prep is done, I like to sew slowly and deliberately rather than trying to rush the whole edge in one pass. The hem usually looks best when the fabric is guided, not pulled. A good order of work keeps the line accurate and reduces the chance of rippling.
- Measure the finished length while the garment is worn or hanging in the way it will be worn.
- Mark the fold line, then turn up the hem allowance and press it all the way around.
- Finish the raw edge if the fabric frays, especially on cotton, linen, and viscose blends.
- Pin or clip every 5 to 7 cm so the fold stays even without stretching the cloth.
- Start near a side seam or back seam and stitch at a steady pace, keeping the fold aligned with the guide.
- On a blind hem, let the needle just catch the fold; on a turned hem, keep the topstitching close and even.
- Press the finished hem again, then let the garment cool flat before you wear or hang it.
The one habit I never skip is the second press. It settles the fibres, removes tiny ripples, and makes the hem look deliberate rather than merely sewn. From there, the real challenge is not the basic method but the garments and fabrics that make the machine work a little harder.
Where machine hemming gets tricky
The method changes once the hem has to travel around curves or through thickness. This is where many good seams go wrong, because the machine is fine but the fabric is fighting the feed. I handle those cases by reducing bulk, supporting the fabric, and choosing a finish that suits the material instead of insisting on one favourite technique.
Curved hems
On curved hems, I work in small stages and let the fabric rest after pressing. For inward curves, a few small clips into the allowance help the edge spread without puckering. For outward curves, I ease the edge gently rather than forcing it flat. If the curve is dramatic, basting first can save time later because it gives me a chance to check the shape before I stitch permanently.
Knits and stretch fabrics
For jersey, sweatshirt fleece, and other stretch fabrics, I usually choose a twin needle or a stretch stitch rather than a standard straight hem. The point is to let the seam move with the fabric instead of snapping the stitches when the garment is worn. I keep the stitch length slightly longer, avoid stretching the cloth as it feeds, and use a walking foot if the layers start to drift.
Denim, coatings, and thick seams
Denim and heavy coatings need less bulk at the hem junction and a needle that can push through without deflecting. I grade seam allowances, trim corners, and shorten the hand movement if I have to sew across a thick side seam. If the machine hesitates, I hand-wheel over the bulky section rather than forcing it. That one change often prevents skipped stitches and broken thread.
Read Also: Zigzag Stitch - Your Secret Weapon for Stretch Fabrics & More
Sheer and lightweight fabrics
For chiffon, organza, and very light viscose, the goal is not strength so much as control. I use a fine needle, a light thread, and a narrow hem, and I stabilise the edge if the fabric wants to wander. Tissue paper under the seam can help the feed dogs grip the fabric cleanly, then it tears away after stitching. That small trick makes a surprisingly big difference on slippery cloth.
These tricky cases are where the machine becomes a tool, not a solution on its own, and that leads straight into the mistakes that are easiest to fix once you know what to look for.
The mistakes that make hems look homemade
Most hemming problems come from haste, not from the machine itself. I see the same few issues repeatedly, and they are all fixable once you know the cause.
| Problem | Likely cause | Quick fix |
|---|---|---|
| Wavy hem | The fabric was stretched while sewing, or the stitch is too tight | Use a longer stitch, ease the fabric gently, and re-press |
| Visible stitches on the right side | The blind hem catches too much of the garment fabric | Adjust the guide so the needle only just bites the fold |
| Bulky hem at the side seams | Too much seam allowance left in one place | Grade the layers and trim the thickest parts before sewing |
| Skipped stitches | Wrong needle type, blunt needle, or too many layers | Change the needle and check the fabric weight before trying again |
| Uneven hem depth | The hem was measured only from the cut edge, not from the finished fold | Re-mark the finished line with a hem gauge or ruler |
I also watch for one easy-to-miss habit: pulling the fabric from behind the needle. That seems harmless, but it stretches the edge and changes the line. If a hem has already gone wrong, I unpick a short section, test again on a scrap, and then continue only when the stitch looks right. That is usually faster than pretending the first attempt will improve on its own.
The final checks that make the hem hold up
Before I call a hem finished, I look at it from the right side, then I hold the garment at arm’s length, and finally I let it hang. If the fabric has memory, especially on bias cuts or knits, the first press is not the last word. A quick second look after the garment has cooled tells me more than staring at it while it is still warm from the iron.
The cleanest hems usually come from restraint: choose the finish that suits the cloth, use the right foot and needle, press before and after stitching, and test before you commit to the real garment. When those pieces line up, machine hemming stops feeling fussy and starts behaving like a reliable finishing tool.
