
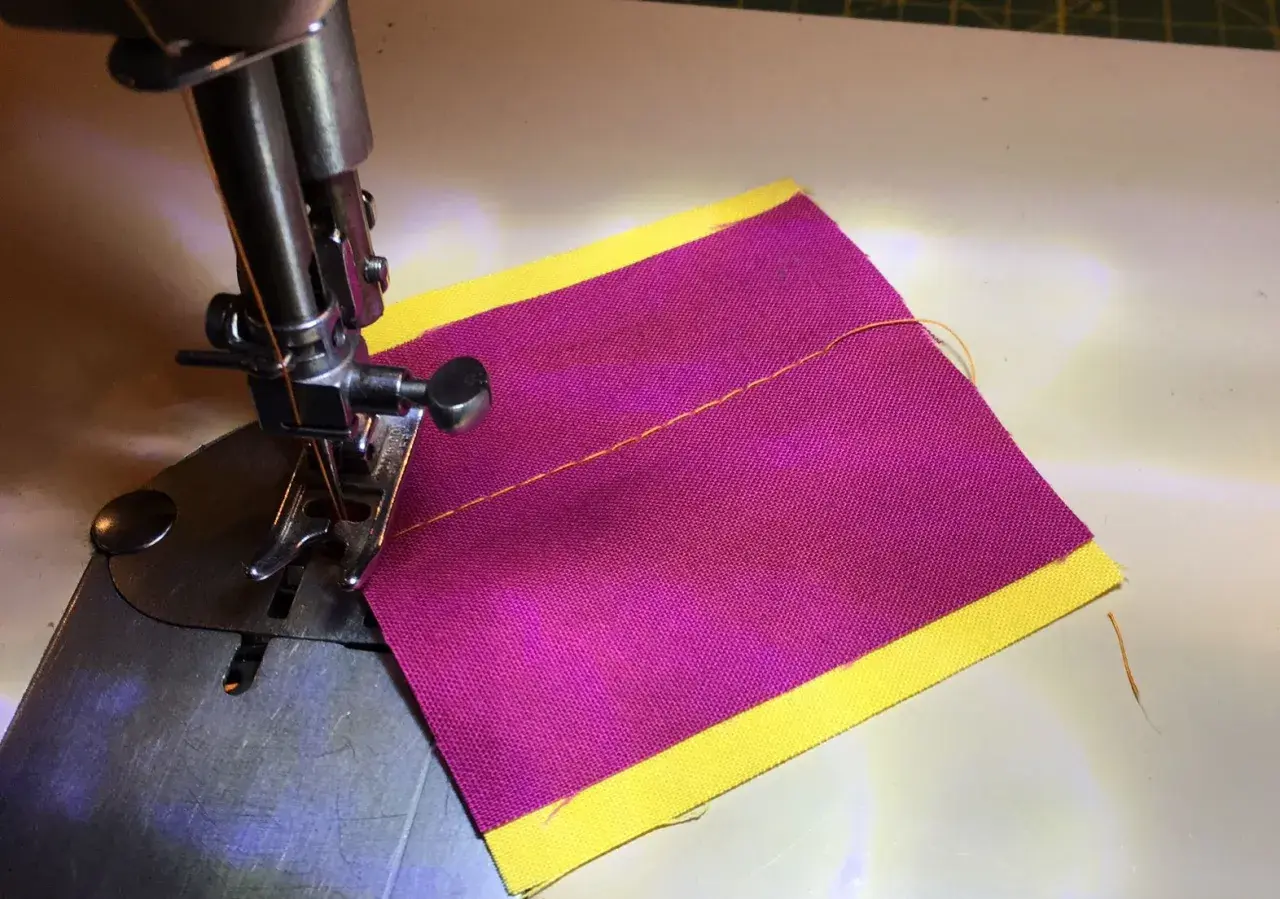
The essentials you need before the first stitch
- Raise the presser foot and the needle before you touch the thread path.
- Follow every guide from the spool to the needle; one missed guide is enough to cause trouble.
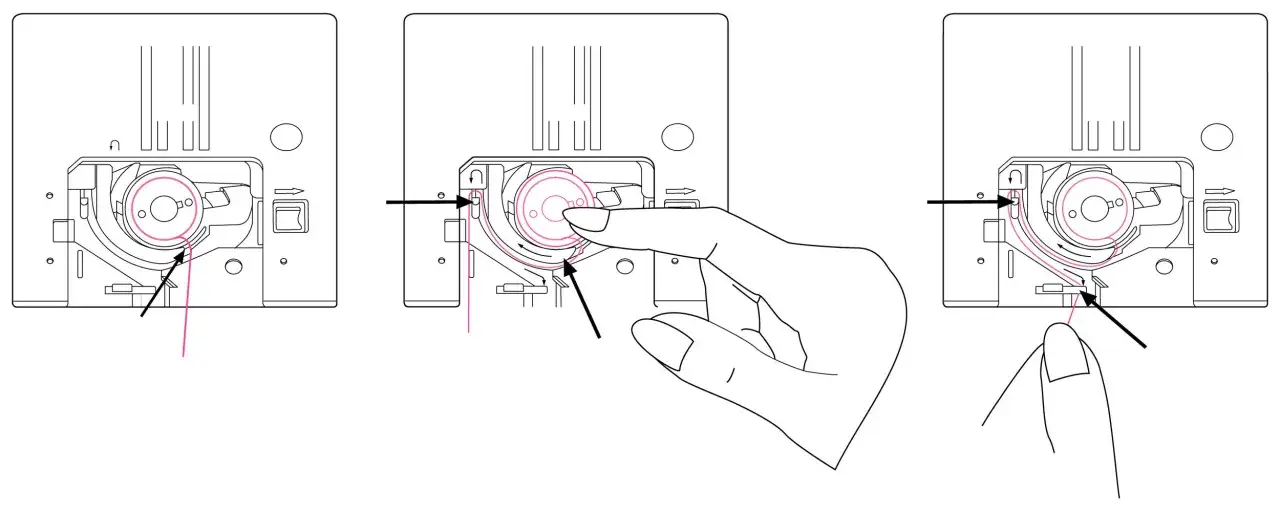
- Insert the bobbin in the direction shown on your machine, not by guesswork.
- Leave about 10-15 cm (4-6 in) of thread tails before sewing.
- Test on scrap fabric before starting the real project.
- If the stitch looks wrong, rethread completely before changing tension settings.
What the full threading path actually includes
The upper thread and the lower thread do different jobs, and I find it easier to think of them as two separate routes. The upper thread travels from the spool, through guides and tension discs, across the take-up lever, and down into the needle. The lower thread sits in the bobbin and locks with the top thread under the fabric. When one side is off, the stitch usually tells you straight away.
The tension discs are the small metal plates that control how freely the upper thread moves. They close when the presser foot is down and open when it is raised, which is why threading with the foot up matters so much. Once you understand that simple mechanism, the rest of the process stops feeling mysterious.
| Bobbin system | Where it sits | What to watch | Why it matters |
|---|---|---|---|
| Drop-in bobbin | Under a clear cover on the bed of the machine | Follow the arrow or marked path exactly | Very common on modern domestic machines and easy to load quickly |
| Front-loading bobbin | Inside a metal bobbin case behind a front hatch | The case must click in fully and the thread must sit in the spring | Common on older or more mechanical machines, and more sensitive to incorrect insertion |
Once you know which bobbin system you have, the rest of the setup becomes much more straightforward.
Getting the machine ready before you start
Before I thread anything, I switch the machine off, raise the presser foot, lift the needle to its highest point, and make sure the spool can unwind without snagging. Those four checks remove most of the friction from the process. I also look at the needle and the thread together, because the wrong pairing can create false problems that look like threading mistakes.
If your machine has an automatic needle threader, it still needs the needle in the highest position and the upper path set correctly first. I treat the threader as a convenience, not a shortcut. It is useful, but it cannot compensate for a badly routed thread.
Read Also: Twin Needle Topstitching - Master Perfect Hems & Seams
Match thread and needle to the fabric
I keep the combinations simple unless a project needs something special. A universal needle is usually fine for woven fabrics, while a ballpoint needle is a better fit for knits and a denim needle is the safer choice for dense layers. If I am changing from lightweight cotton to something heavier, I change the needle before I start sewing, not after the machine begins to complain.
| Fabric or task | Needle to start with | Thread note |
|---|---|---|
| Light woven cottons and lawn | 70/10 or 80/12 universal | Standard all-purpose polyester or cotton thread usually works well |
| Everyday dressmaking | 80/12 universal | A good general-purpose thread is usually enough |
| Knits and jersey | 75/11 or 80/12 ballpoint | Choose a smooth thread that feeds evenly |
| Denim, canvas, or thick layers | 90/14 or 100/16 denim | Use a stronger thread only if the machine and needle can handle it |
With the machine prepared properly, the upper path is much easier to follow and far less likely to snag.
Thread the upper path step by step
I thread the top of the machine in the same order every time, because skipping around is how people miss a guide. If your machine has printed numbers or arrows, follow them closely. The exact route can vary slightly by model, but the logic is the same.
- Place the spool on the spool pin and fit the cap so the thread unwinds smoothly.
- Pull the thread into the first top guide and let it travel into the main channel.
- Run the thread down through the tension path with the presser foot raised.
- Bring it up through the take-up lever, following the marked route on the machine.
- Guide the thread down again through the needle-bar guides above the needle.
- Thread the needle from front to back, then pull about 10-15 cm (4-6 in) through the presser foot towards the back of the machine.
The take-up lever is the small arm that moves up and down as you sew. If it is not in its highest position while you thread, the upper thread path is incomplete and the machine can behave as if something is wrong when the real issue is just the route. If your machine has an automatic threader, use it after the manual path is already in place and handle the loop gently rather than forcing it through.
When the upper path is correct, the bobbin is the next place I check.
Set the bobbin up the right way
The bobbin is where many beginners start guessing, and guessing is usually the mistake. On most domestic machines sold in the UK, the bobbin either drops into a top-loading chamber or sits inside a front-loading case. The important thing is not the style itself but matching the machine’s markings exactly.
| Step | Drop-in bobbin | Front-loading bobbin |
|---|---|---|
| Insert the bobbin | Place it under the cover in the direction shown on the machine | Seat it inside the metal case and follow the printed path |
| Thread the bobbin | Pull the thread into the slot and under the guide if your model has one | Run the thread through the case slot and under the tension spring |
| Check the fit | Close the cover fully | Make sure the case clicks into place with no wobble |
- Wind the bobbin evenly and stop before it looks overfilled or domed.
- Insert it in the direction shown on the bobbin cover or inside the case.
- Leave a short tail, usually about 10 cm (4 in), so the thread does not slip back into the case.
- Hold the upper thread, turn the handwheel towards you once, and bring the bobbin thread up through the needle plate.
- Pull both thread tails under the presser foot and towards the back before sewing.
If the lower thread will not come up, I check the bobbin orientation first and the upper threading second. Most of the time, the problem is not the machine at all but one missed step in the setup.
Check the stitch before you sew your project
I never trust a fresh threading job until I have sewn a short test seam on scrap fabric. A straight stitch around 2.5-3 mm is a sensible starting point for a general test. What I want to see is an even line, with the knot of the stitch sitting roughly in the middle of the fabric layers rather than pulled to one side.
- If the stitches loop underneath, the upper thread is usually not seated properly or the presser foot was down while threading.
- If the bobbin thread is pulled to the top, the bobbin may be inserted incorrectly or the tension path is not right.
- If the fabric is puckering, the stitch length may be too short for the cloth or the tension may need a small adjustment.
- If the machine sounds strained, stop and check for a snag before forcing more stitches through.
I like to inspect both sides of the test seam before touching the actual project. That one habit catches problems early and keeps the final fabric from becoming the experiment.
Fix the errors that usually trace back to threading
Most threading problems announce themselves in the same few ways, and the fix is usually simpler than people expect. When I see a bird's nest under the needle plate, I do not start turning dials at random. I remove both threads, clear the bobbin area, and thread the machine again from the spool onwards.
| Symptom | Most likely cause | What I do first |
|---|---|---|
| Loops or tangles on the underside | Upper thread missed a guide or the presser foot was down while threading | Rethread with the presser foot raised |
| Thread breaks again and again | Needle is blunt, bent, or the thread is snagging on the spool path | Replace the needle and check the spool cap and guides |
| Skipped stitches | Needle not fully inserted, wrong needle type, or damaged point | Fit a new needle and test on scrap fabric |
| Bobbin thread will not draw up | Bobbin inserted incorrectly or the upper thread is not seated | Reinsert the bobbin, hold the top thread, and turn the handwheel once |
| Machine hums but does not sew cleanly | Thread jammed around the bobbin area or under the needle plate | Switch off the machine, clear the area, and start again from the beginning |
If the machine still misbehaves after a full rethread, I replace the needle next. A dull or bent needle can imitate a threading problem so convincingly that it wastes time if you ignore it.
The habits that make threading faster next time
The fastest threading jobs are the ones I do the same way every time. I keep the manual or threading diagram close, wind a few spare bobbins before I begin, and leave a small scrap of the project fabric near the machine for test seams. That routine sounds small, but it turns threading from a chore into a quick reset.
- Keep spare needles, small scissors, and a seam ripper within reach of the machine.
- Rethread completely when you change thread type or move to a much heavier fabric.
- Check the spool cap, bobbin cover, and needle bar guide each time you change the spool.
- Leave 10-15 cm (4-6 in) tails behind the presser foot before the first stitches.
My rule is simple: if the stitch stops behaving, I do not chase the tension dial first. I rethread the machine from the spool to the bobbin, sew a short test seam, and only then make fine adjustments. That order solves most problems quickly and keeps the fabric safe from avoidable snags.
