
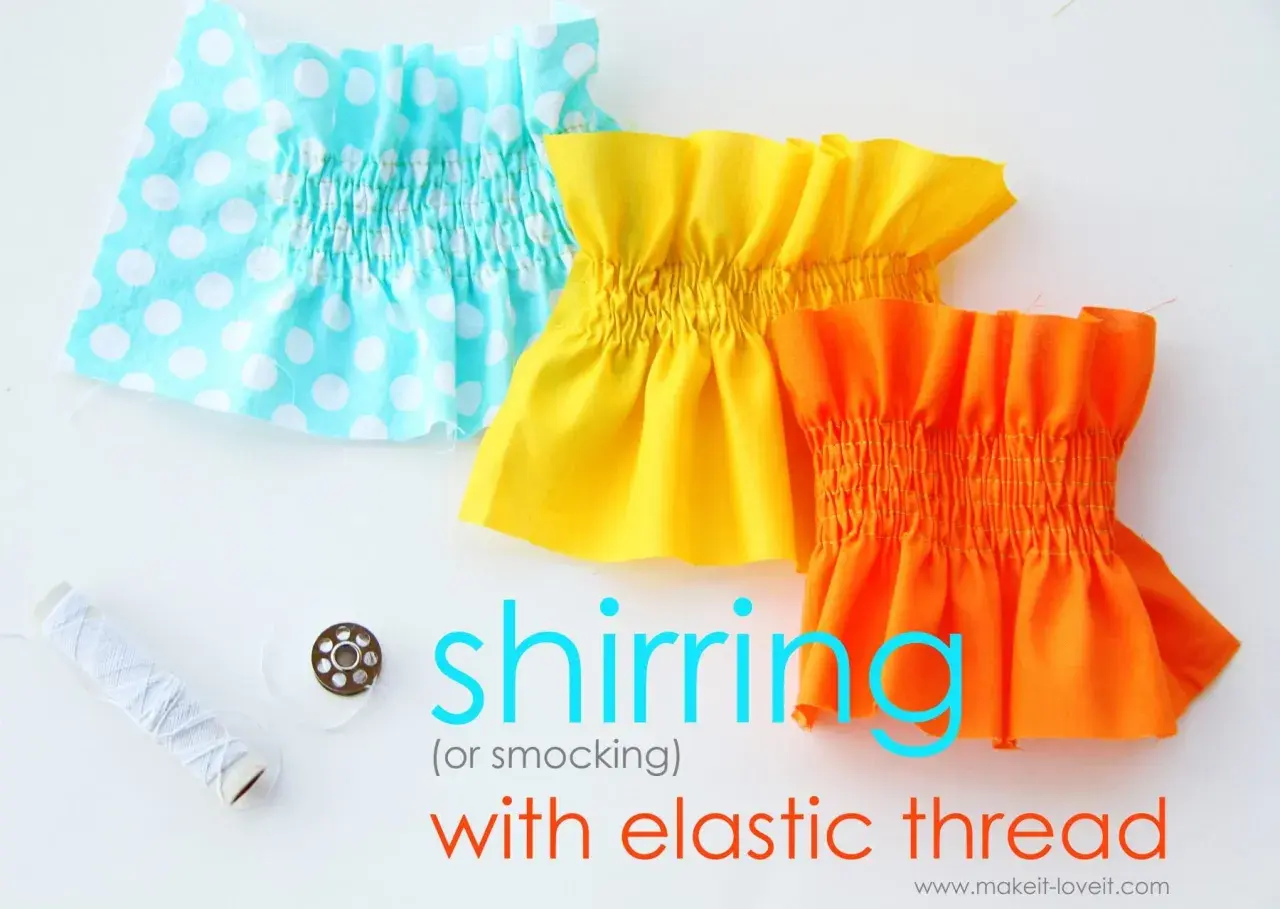
Elastic smocking gives fabric shape, stretch, and texture in one move: rows of elastic thread gather a flat panel into something soft, flexible, and visibly worked. I use it when a garment needs comfort without looking plain, especially on bodices, cuffs, sleeves, and lightweight summer pieces. The method is simple once the settings are right, but the finish depends on a few details that beginners often miss.
What matters most before you start
- This technique is usually done on a standard sewing machine with elastic thread in the bobbin and regular thread on top.
- Light to medium woven fabrics are the easiest to control; very thick or very slippery fabrics are less forgiving.
- A stitch length around 3.5 to 4 mm is a strong starting point for most machines.
- Rows usually tighten after steaming, so the final effect is not always visible the moment you finish stitching.
- Most problems come from bobbin winding, tension, or pulling the fabric instead of letting the machine feed it.
What it really is and what it is not
In everyday sewing talk, this is often called shirring, and that distinction matters. True hand smocking is a different decorative method built on pleats and embroidery stitches, while shirring uses elastic thread to create gathering and stretch directly in the fabric. I treat it as a fast, machine-made way to get a smocked look without the hours of hand stitching.
It is also different from sewing a simple elastic casing. A casing gives stretch, but it does not create the same textured surface or the same even, rippling effect across the cloth. If you want visible texture plus flexible fit, this is the technique to learn; if you only want functional stretch hidden inside a seam, a casing is usually the cleaner choice. That distinction helps you choose the right method before you cut a single piece.
Once you understand that, the rest becomes a question of materials and machine setup rather than special talent.
Tools, thread, and fabrics that behave well
For reliable results, I keep the kit plain and specific. You do not need a long list of specialist tools, but you do need the right thread, the right fabric, and a machine that is set up carefully.
| Item | What I look for | Why it matters |
|---|---|---|
| Elastic thread | Shirring elastic wound onto the bobbin by hand | This is what creates the gathered, stretchy rows. |
| Top thread | Standard all-purpose thread that matches the fabric | The top thread should sew cleanly without fighting the elastic underneath. |
| Needle | A fresh universal needle, usually 80/12 or 90/14 | A blunt or damaged needle is one of the fastest ways to get skipped stitches. |
| Fabric | Lightweight cotton, lawn, voile, viscose, or a light linen blend | These fabrics gather well without turning stiff or bulky. |
| Marking tool | Tailor’s chalk, a washable pen, or a ruler guide | Even rows make the finish look intentional rather than improvised. |
| Scrap piece | A test strip from the same fabric | This tells you the stitch length, tension, and row spacing before you commit. |
If I am choosing fabric for a first attempt, I start with a stable cotton lawn or a light poplin. Viscose can give a beautiful drape, but it also asks for a steadier hand because it shifts more under the presser foot. Heavy denim, thick canvas, and very stiff quilting cotton are poor first choices; they can still be used in some cases, but they take more adjustment and the gathered effect is usually less graceful.
Once the materials are right, the sewing itself becomes much more predictable.
How I sew the rows without fighting the fabric
- Mark the first stitching line on the right side of the fabric. I usually start a little in from the edge so the finished panel has room to gather evenly.
- Wind the elastic thread onto the bobbin by hand, keeping it relaxed rather than stretched tight. Over-tension at this stage often shows up later as weak gathers or thread breakage.
- Thread the top of the machine with regular thread and insert the elastic bobbin as usual.
- Set the stitch length to about 3.5 to 4 mm, then test on a scrap. If your machine behaves differently, adjust from there rather than assuming one setting works for everything.
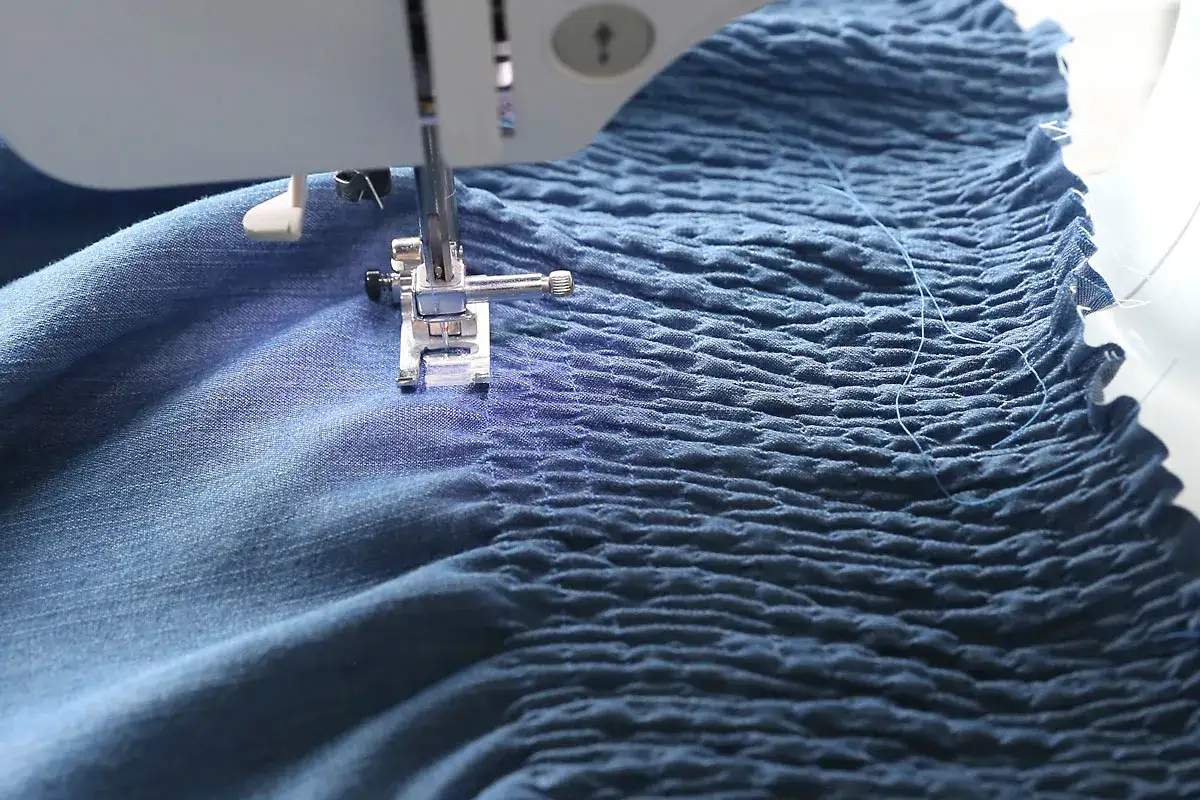
- Sew the first row slowly and let the feed dogs do the work. I never pull the fabric through; that only leads to uneven gathering.
- Sew parallel rows using a ruler, the presser foot edge, or a marked guide. Even spacing is what gives the surface its neat, rhythmic texture.
- Finish with steam from the wrong side or a light press, depending on the fabric. The gathers usually tighten and settle after heat, so do not judge the result too early.
Row spacing changes the final look more than many beginners expect. Closer rows give a denser, more structured finish; wider spacing creates a softer, airier surface. If I want a bodice to feel polished and close-fitting, I keep the rows tighter. If I want texture that looks relaxed and modern, I spread them out a little more. That choice becomes useful when you start applying the technique to actual garments.
Where the texture and stretch actually help
This method shines anywhere you want shape without stiffness. It is especially useful on areas that sit close to the body but still need movement. The best examples are the ones where both the visual effect and the practical stretch matter.
| Project area | Why it works | What to watch for |
|---|---|---|
| Necklines | It gives a soft, flexible edge that sits comfortably without zips or buttons. | Keep the rows even so the neckline does not twist. |
| Bodices | It creates close fit with a decorative surface, which is ideal for summer tops and dresses. | Use a fabric with enough drape or the bodice can feel boxy. |
| Cuffs and sleeves | It adds texture while letting the sleeve move naturally. | A very tight row spacing can feel bulky at the wrist or upper arm. |
| Children’s clothing | It stretches as the child moves and can accommodate a little growth. | Do not rely on it where durability and repeated heavy wear are the main concerns. |
| Waist panels | It gives a softer fit than a rigid waistband and works well on casual skirts. | For heavier garments, a casing or proper waistband may be more stable. |
I would not use it everywhere. On seams that must carry weight, stay sharply tailored, or support a heavy garment, this is more decorative than structural. That is not a flaw; it just means the technique has a clear range, and knowing that range saves time and frustration. From there, the real skill is recognising the mistakes before they waste a project.
The most common problems and the quickest fixes
Most shirring problems are boring in the best possible way: they come from a handful of repeatable causes. Once you know those causes, the fixes are usually quick.
| Problem | Likely cause | What I do |
|---|---|---|
| The rows stay flat | The elastic thread is too loose, badly wound, or the stitch length is too short. | Rewind the bobbin more carefully, lengthen the stitch, and test again on scrap. |
| The gathers are uneven | The fabric was pulled while sewing or the row spacing drifted. | Guide the fabric lightly, mark the rows, and slow down. |
| Thread keeps breaking | The needle is worn, the tension is too aggressive, or the thread is being overstretched. | Use a fresh needle and ease off the tension before changing anything else. |
| The back looks messy | The machine is not threaded correctly or the bobbin is not sitting properly. | Rethread the machine from the start and check the bobbin path carefully. |
| The fabric looks puckered | The cloth is too stiff, too thick, or the rows are too close together. | Switch to a lighter fabric or widen the spacing between rows. |
My blunt advice is to test before you trust the settings. A scrap that is at least the size of a postcard is enough to show whether the machine is gathering properly and whether steaming helps or hurts the finish. If the sample looks wrong, I fix it there rather than hoping the full garment will magically improve.
The small decisions that make the finish look polished
The cleanest results usually come from a few disciplined choices rather than from special equipment. I keep the fabric light enough to gather well, I keep the first row straight, and I do not rush the steaming stage. Those three habits do more for the final look than any dramatic machine setting.
If I want a softer, more modern finish, I use fewer rows and a little more space between them. If I want a firmer, more fitted effect, I pack the rows closer and let the elastic pull the panel in more strongly. That balance between texture and comfort is the real value of the technique, and it is why it keeps showing up in both beginner projects and more polished handmade garments.
Once you have one successful sample, the method becomes remarkably repeatable. That is when it stops feeling like a trick and starts feeling like a dependable sewing tool.
