
What matters most before you touch the tension dials
- Re-thread with the presser foot raised, because that opens the tension discs and seats the thread properly.
- Replace the needle early if the stitch suddenly changes, even if the old one still looks usable.
- Test on a scrap of the same fabric before you touch the garment.
- Clean lint from the looper area, feed dogs, and knife zone before chasing a tension problem.
- Check the fabric settings, especially differential feed, stitch length, and cutting width.
Read the stitch pattern before you change anything
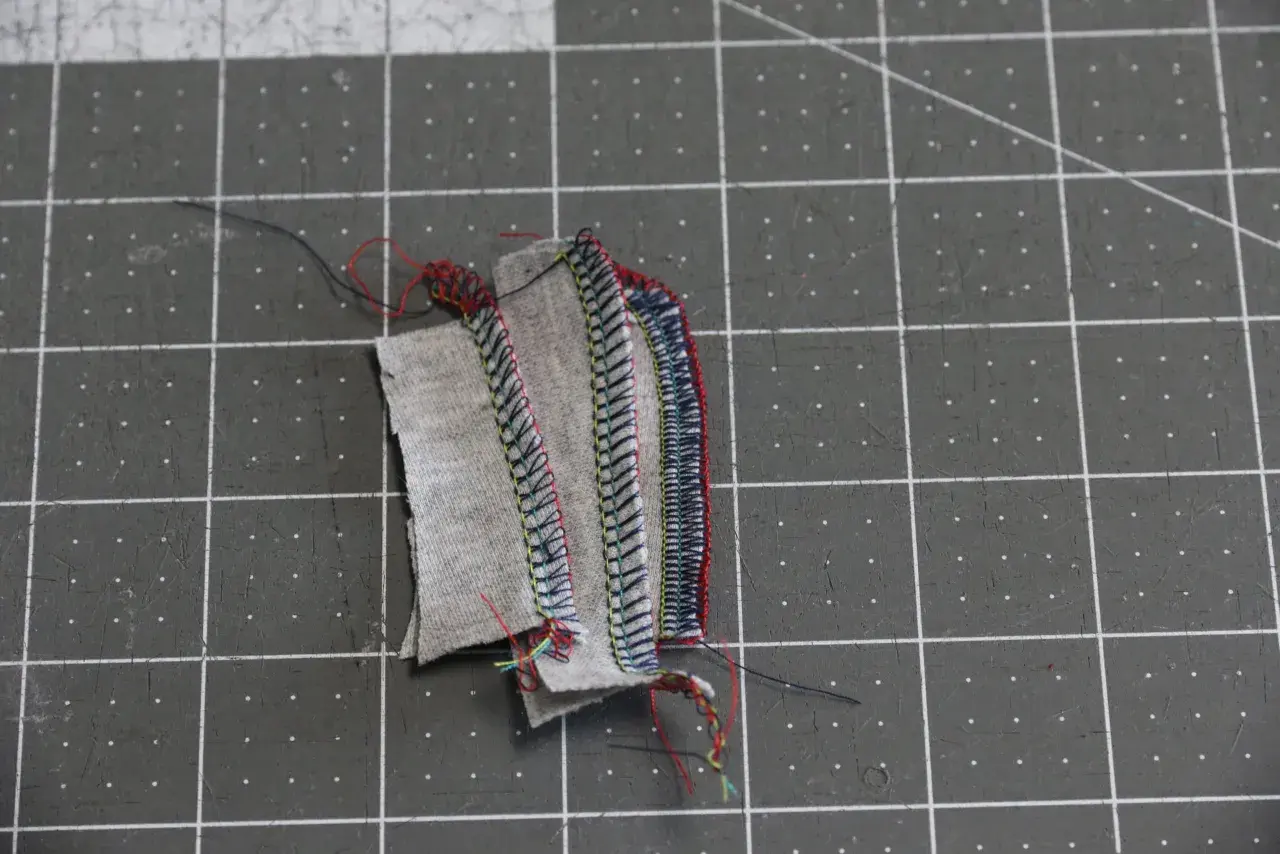
The fastest way to fix an overlocker is to treat the stitch as evidence. A loose loop on one side, a pulled seam, a frayed chain, or a ragged edge each points to a different part of the machine, and guessing usually wastes more time than the fault itself. I always start by asking one question: is this a threading problem, a needle problem, a tension problem, or a fabric-handling problem?
| What you see | What it usually points to | First thing I would try |
|---|---|---|
| Loose loops on the underside | Upper thread not seated properly, wrong threading order, or a tension path that is not fully engaged | Raise the presser foot, rethread, and confirm every guide is threaded |
| Skipped stitches | Bent, blunt, or wrong type of needle, or a needle not fully inserted | Replace the needle and check the orientation in the clamp |
| Puckering or tunnelling | Tension too tight, stitch length too short, or differential feed set poorly for the fabric | Loosen tension slightly and test a longer stitch |
| Fabric stretching or waviness | Differential feed too low for a knit or bias cut fabric | Increase differential feed and test again on a scrap |
| Frayed thread or sudden breakage | Poor-quality thread, rough thread path, burr on the needle or looper, or excessive tension | Swap the thread and inspect the path for snags |
| Edge looks chewed or unfinished | Cutting width, knife condition, or blade alignment | Check the knife and widen or narrow the cut before changing tension |
This order matters because it keeps you from fixing the wrong system. A stitch problem that looks dramatic can turn out to be one blunt needle, one missed guide, or one setting that is only a fraction off. Once you learn to read the seam, the machine becomes much less mysterious, and the next step is usually threading.
Threading and needles solve more than most people expect
Most overlocker faults begin with either incorrect threading or a needle that has reached the end of its useful life. The thread path on these machines is tighter and more sensitive than many people realise, so one missed guide or one spool that does not feed smoothly can throw the stitch off immediately. I treat threading as the foundation, not a box to tick.
When I rethread, I switch the machine off, raise the presser foot, and work slowly through the path. On many models the easiest order is lower looper first, then upper looper, then the needles, but I still follow the manual if my machine wants a different sequence. The presser foot being raised is not a small detail. It opens the tension discs so the thread can sit where it belongs instead of floating above them.
- Pull each thread through every guide, not just the obvious ones.
- Check that the thread sits cleanly in the tension discs and take-up path.
- Make sure the loopers are threaded all the way through, not just caught at the entrance.
- Insert the needle fully and tighten the clamp firmly.
- Change needles early, especially if the stitch suddenly becomes noisy or uneven.
If I had to give one practical rule, it would be this: if the stitch changed suddenly, replace the needle before doing anything else. That single move clears a surprising number of faults, and it is far cheaper than chasing a problem that started with a tiny bend you can barely see.
Balance tension with small, deliberate changes
Tension is where many sewists get stuck, because they change three things at once and then cannot tell which one helped. I prefer to work in tiny steps, usually one mark at a time, and test after each change on a 15 cm scrap of the actual fabric. That gives a real picture of what the seam is doing, not a guess based on memory.
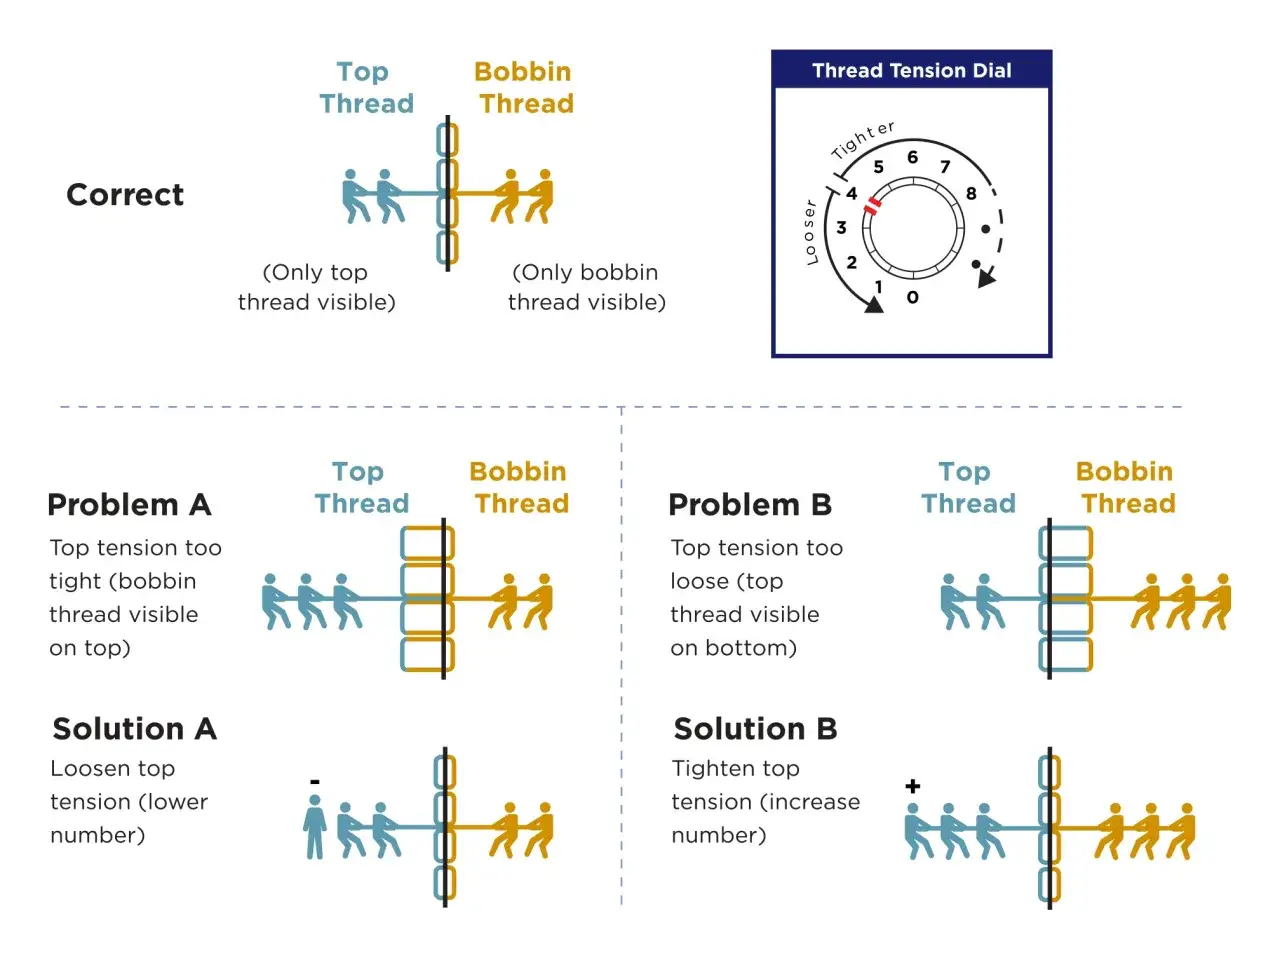
A balanced overlock seam should look even on both sides, with the loopers meeting neatly at the edge instead of wrapping around one face or pulling the seam into a ridge. If the loops are sitting on the underside, the upper thread is often too loose or not fully seated in the tension path. If the seam looks tight and drawn in, the needle tension may be too strong or the stitch length too short. When both sides look wrong, I usually rethread before I touch the tension dials any further.
Keep in mind that the numbers on the machine are relative, not universal. A setting of 3 on one overlocker may not behave like 3 on another, and even the same fabric can need a different balance depending on thread thickness. I treat the dials as fine adjustment tools, not rescue tools.- Make one change at a time.
- Test on the same fabric stack you will actually sew.
- Use the same thread type in all looper positions if you want a cleaner baseline.
- Do not chase perfection if the seam is already structurally sound and visually balanced.
In practice, small tension changes often solve a seam that looks much worse than it is. The next question is whether the fabric itself is the thing forcing the machine out of balance.
Let the fabric guide the settings, especially on knits and fine cloth
Some problems are not really machine faults at all. They are fabric behaviour showing up through the machine. Jersey stretches, chiffon shifts, and bulky seams create resistance that can make an overlocker appear badly adjusted when the real issue is that the fabric needs a different setup.
Differential feed is the setting I reach for first on stretch fabrics. It controls the front and rear feed dogs, which are the little toothed parts under the foot that move the fabric through the machine. If the fabric is stretching out of shape, increasing differential feed usually helps the machine feed the cloth more evenly. If fine fabric is puckering or forming a lettuce-like edge when you do not want one, reducing the differential feed can calm it down.
| Fabric behaviour | Good starting point | Why it helps |
|---|---|---|
| Wavy knit seam | Differential feed slightly above 1.0 | Stops the fabric from stretching as it goes through the machine |
| Fine woven fabric puckering | Differential feed closer to 1.0 or slightly below it | Reduces unwanted gathering at the seam line |
| Bulky seam or multiple layers | Longer stitch, slower speed, and enough pressure to keep the fabric moving | Helps the machine penetrate and carry the layers cleanly |
| Curled or rolled edge | Rolled hem setting, narrower cut, and lighter thread balance | Encourages a neat edge instead of a flat overlock seam |
I also pay attention to how hard the fabric is being pushed. A lot of distortion comes from the sewist, not the machine. Let the feed dogs do their job and guide the cloth lightly. If you are dragging the fabric, even a well-set machine can start to look wrong. For delicate or slippery material, a slightly slower speed and a test seam on scraps are often enough to make the result settle down.
Cutting width, stitch length, and knife condition matter too
It is easy to blame tension when the real problem is the cutter. On an overlocker, the knife trims the edge before the stitch wraps around it, so a dull blade, a wrong cutting width, or a disengaged knife can make the seam look messy even when the threading is perfect. If the edge is fuzzy, chewed, or not sitting under the stitch cleanly, I look at the cutting system before I change anything else.
A sensible starting point for general overlocking is usually a stitch length around 2.5 to 3 mm, then adjusted from there. Shorter stitches often suit rolled hems and finer fabrics, while longer stitches can help bulky seams travel more smoothly. Cutting width is equally important. If the blade trims too much, the seam can fall away from the edge. If it trims too little, the stitch may sit too close to the fabric edge and start to ravel.
- Check that the upper knife is engaged for normal seams.
- Inspect the blade for nicks if the cut looks ragged.
- Adjust cutting width before over-tightening the tension.
- Use a longer stitch when sewing thick layers.
- Lower or raise presser foot pressure if your machine allows it and the fabric is feeding too hard or too softly.
If your machine has a movable knife, remember that it is not only for special techniques. It also affects how the seam is formed at the edge. A cutter that is slightly out of position can mimic a threading fault so convincingly that it sends people down the wrong path for half an hour.
Build a five-minute routine that prevents repeat faults
The best repairs are the ones you do before the problem appears. When I want an overlocker to behave consistently, I keep the routine simple and repeatable. It is much easier to prevent a seam issue than to rescue one after the thread has bird-nested, shredded, or jammed into the looper area.
- Brush out lint from the loopers, feed dogs, and knife housing after a project or two.
- Check the needles before starting a new fabric, even if the last project finished cleanly.
- Keep thread cones feeding freely so the thread is not snagging or twisting on the stand.
- Run a test seam on the actual fabric, not just on spare cotton, whenever you change thread or fabric type.
- Write down the settings that work for your common fabrics so you are not starting from zero every time.
The moment I see repeated skipped stitches, a rough grinding sound, or tension that keeps drifting even after a rethread and needle change, I stop trying to tune the machine by feel. At that point the issue may be mechanical wear, lint deep in the looper area, or a blade that needs attention. That is the point where a service makes more sense than another round of guesswork, and it usually saves both time and fabric in the long run.
What I check before I trust the machine on good fabric
My final pass is always the same: rethread, fresh needle, test seam, then one careful adjustment at a time. If the stitch is balanced and the edge is clean, I stop there, because over-adjusting is how a good setup gets worse.
If you want the shortest possible route through overlocker problems, keep this order in mind: clean the machine, confirm the threading path, replace the needle, test on scrap, and only then touch tension or feed settings. That sequence solves most faults without turning the machine into a puzzle. When the same issue keeps returning after those checks, the machine is telling you it needs deeper attention, not more force from the dials.
