
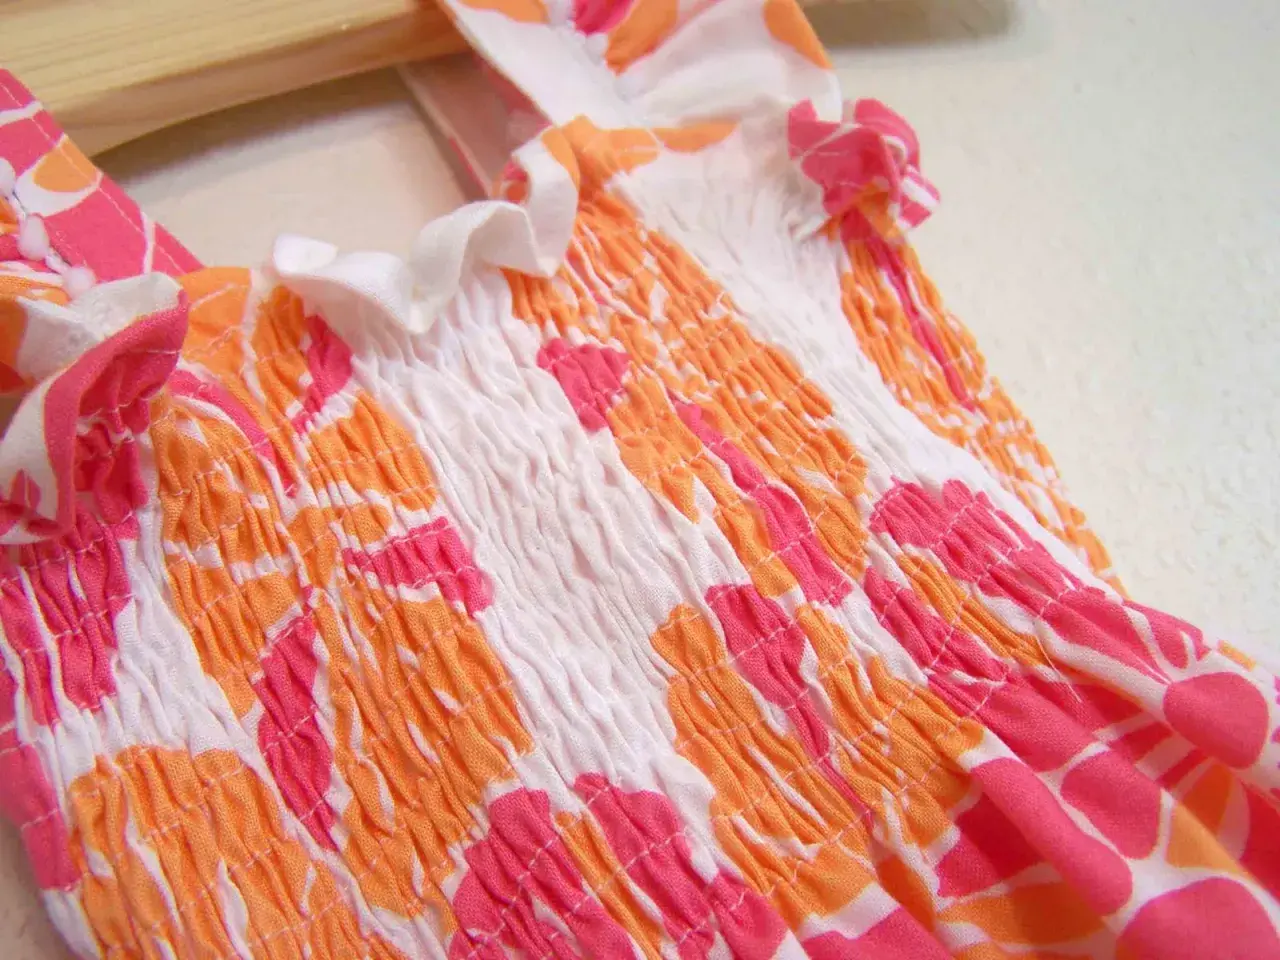
The cleanest results come from a lightly wound bobbin, a long straight stitch, and a proper test scrap
- Keep the elastic thread in the bobbin and use ordinary sewing thread on top.
- Wind the bobbin slowly and evenly, without stretching the elastic or filling it to the brim.
- Start with a straight stitch, a high upper tension, and the longest stitch length your machine allows.
- Use a fresh needle: universal for light wovens, stretch or blue-tip for knit or very fine fabrics.
- Test on the same fabric before you sew the real piece, then steam the rows lightly to let them contract.
What elastic thread is actually doing in the seam
Elastic thread belongs in the bobbin, where it can stretch and pull the fabric into shirring, the soft gathered effect used on bodices, sleeves, cuffs and waist panels. I keep the top thread ordinary, because the elastic does the work underneath while the needle thread simply locks the rows in place. That is why this technique looks decorative but still has real give.
It is best suited to lightweight woven fabrics, especially cotton lawn, voile, poplin and similar cloth that can gather neatly without becoming bulky. On very stretchy or very dense fabric, the effect can still work, but it needs more testing and a more careful needle choice. I would not treat it as a universal replacement for elastic casing in every project; it is a technique for controlled fullness, not brute-force stretch.
- Best for soft gathers and elasticated texture.
- Most reliable on flat, lightweight pieces before garment assembly.
- Less convincing on thick seams, heavy denim and very bulky layers.
Once that distinction is clear, the machine setup starts to make sense instead of feeling like guesswork.
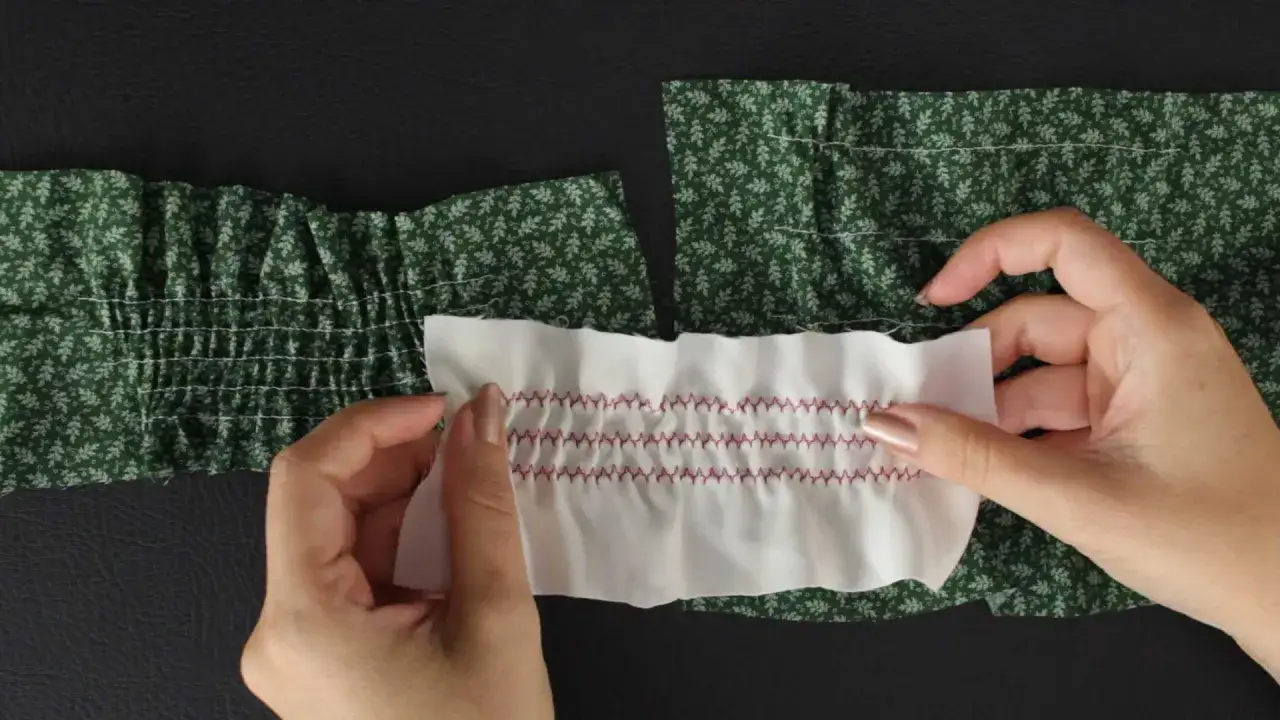
Set up the machine before you sew
Preparation is what saves time here. I start with an empty bobbin, a fresh needle, matching regular thread in the top, and a scrap cut from the same fabric as the project. If your machine has an automatic thread cutter, I would switch it off for this job, because elastic thread can spring back unexpectedly when you are still testing.
- Wind the elastic thread by hand slowly and evenly. Do not pull it tight as you wind, and do not fill the bobbin completely.
- Thread the top of the machine with regular sewing thread that matches the fabric as closely as possible.
- Set a plain straight stitch, then move to the longest stitch length you have or close to it. Many machines behave well with a very long straight stitch for shirring.
- Set the upper tension high enough to create pull, but not so high that the stitch becomes harsh or starts skipping.
- Leave tails of about 7.5 to 10 cm at the start and end so the elastic does not vanish into the machine when you begin or finish a row.
| Fabric situation | Needle to start with | Why it helps |
|---|---|---|
| Light woven cottons | Universal 80/12 | Clean holes and predictable stitching |
| Fine stretch fabrics or jersey | Stretch or blue-tip 75/11 | Helps reduce skipped stitches and fabric damage |
| Thicker or denser fabrics | Universal 90/14 after testing | Gives more clearance, but can leave larger holes |
I always test the stitch on a scrap before touching the actual garment. A stabiliser or light interfacing under delicate fabric can also stop puckering and make the rows look much cleaner. Once those settings are in place, the stitching itself becomes straightforward.
Sew the first rows evenly
When I start the first row, I keep the fabric flat and let the feed dogs move it. The elastic thread sits in the bobbin, so the machine is doing the gathering for you; if you pull the fabric, you will only confuse the result. The first row rarely looks dramatic, and that is normal. The effect builds after the third or fourth row, which is why I never judge the technique too early.
- Mark the first row and the spacing lines with chalk, a wash-away pen or a fine tailor's marker.
- Sew slowly and steadily in a straight line, keeping the fabric flat under the presser foot.
- Do not tug on the cloth as it feeds; let the machine establish the gather.
- Sew additional rows parallel to the first, keeping the spacing consistent.
- Leave the long tails alone until the panel is complete, then trim them carefully.
For row spacing, I usually start around 6 to 12 mm apart, which is roughly 1/4 to 1/2 inch. Closer rows create a denser shirred panel; wider spacing gives a looser, more breathable finish. If the gathering still looks shy, a little steam from the iron can help the elastic contract, but I hover or press very lightly rather than crushing the rows flat.
From there, the real variable is how much gather you want.
How to control the gather without fighting the fabric
Shirring responds to a few variables, and the trick is changing only one at a time. I find stitch length has the biggest visual impact, while bobbin winding and row spacing fine-tune the result. A shorter stitch gives a softer gather; a longer stitch gives a deeper, more obvious puff.
| If you want | Try this first | What it usually changes |
|---|---|---|
| More gather | Lengthen the stitch or add another row | Creates a fuller, more elasticated panel |
| A softer gather | Shorten the stitch slightly | Gives a gentler texture with less bulk |
| A lighter look | Increase the spacing between rows | Makes the shirring feel less dense |
| More recovery after sewing | Steam the rows lightly after stitching | Helps the elastic settle into its final shape |
I would not start by making large tension changes unless your machine manual clearly supports it. A small adjustment is useful; a big one often makes the stitch harder to read, not easier. In practice, the safest route is to test one setting, sew a short sample, then decide whether the fabric needs more pull or less.
When the effect looks wrong, the machine usually gives clues.
Fix the problems that usually show up first
Most shirring problems are not mysterious. They come from bobbin threading, stitch length, needle choice or over-enthusiastic winding. I check those four things first, because they account for most of the frustration before the fabric has even had a chance to gather properly.
| Problem | Likely cause | First fix |
|---|---|---|
| The fabric stays almost flat | The bobbin is not threaded through the tension path, or the stitch is too short | Reinsert the bobbin correctly and lengthen the stitch |
| The elastic thread breaks | The bobbin is wound too tightly, the thread is overfilled, or the thread is old | Rewind more loosely and replace the thread if it feels brittle |
| Loops show on the back | The bobbin is not seated in the tension guide correctly | Rethread the bobbin path carefully and test again |
| Skipped stitches appear | The needle is dull or not suited to the fabric | Change to a fresh needle and, on knits, try a stretch needle |
| The seam puckers badly | Tension is too aggressive or the fabric is too delicate for the current setup | Add a stabiliser and test the row on a scrap first |
One practical habit helps more than people expect: stop after the first test strip and read the result before sewing a full panel. If the rows look uneven, do not keep stacking mistakes on top of them. Rethread, recheck and sew the sample again. That small pause saves fabric and usually saves the project too.
After that, the project choice determines whether the technique looks refined or fussy.
Choose the right project and finish it cleanly
I reach for elastic-thread shirring on projects where I want soft stretch with visible texture: peasant tops, gathered bodices, sleeve hems, cuffs, baby garments and lightweight skirts. It is less convincing on bulky seams or very heavy fabrics, because the gathering gets lost in the thickness instead of looking neat. For many garments, I shirr the flat panel first and assemble the pieces afterwards, because that gives the rows room to settle properly.
- Good choices: cotton lawn, voile, poplin and light viscose blends.
- Good with testing: jersey and other stretch fabrics.
- Usually frustrating: denim, canvas, thick fleece and heavy layered seams.
- Needs extra care: very sheer fabrics and slippery synthetics.
Finishing matters too. I like to press from the wrong side with steam rather than pressing hard on the right side, because heavy pressure can flatten the texture you just created. If a row will later sit inside a seam allowance, I plan that join before I start shirring so the gather does not get distorted at the construction stage. That is one of those small sequencing decisions that makes the final garment look much more deliberate.
Before I cut into good fabric, I always do one final pass through the sample.
The checks I make before cutting the final fabric
The technique is forgiving once the machine and fabric are matched, but it punishes guessing. I always write down the stitch length, needle type and spacing that worked on the test piece, because once the row looks right it is easy to forget the exact setup. If I need several shirred sections, I wind more than one bobbin before I begin so I do not interrupt the rhythm halfway through a panel.
- Test on the same fabric, not a substitute.
- Measure how much the panel shrinks after steaming.
- Record the stitch length and needle that worked.
- Wind extra bobbins before starting the real garment.
- Keep row spacing consistent with chalk or a washable marker.
If I had to reduce the whole process to one habit, it would be this: test first, adjust one variable at a time, and stop as soon as the rows look even and recover well after steaming. That is the point where elastic thread stops feeling temperamental and starts behaving like one of the most useful tools in a sewing room.
