
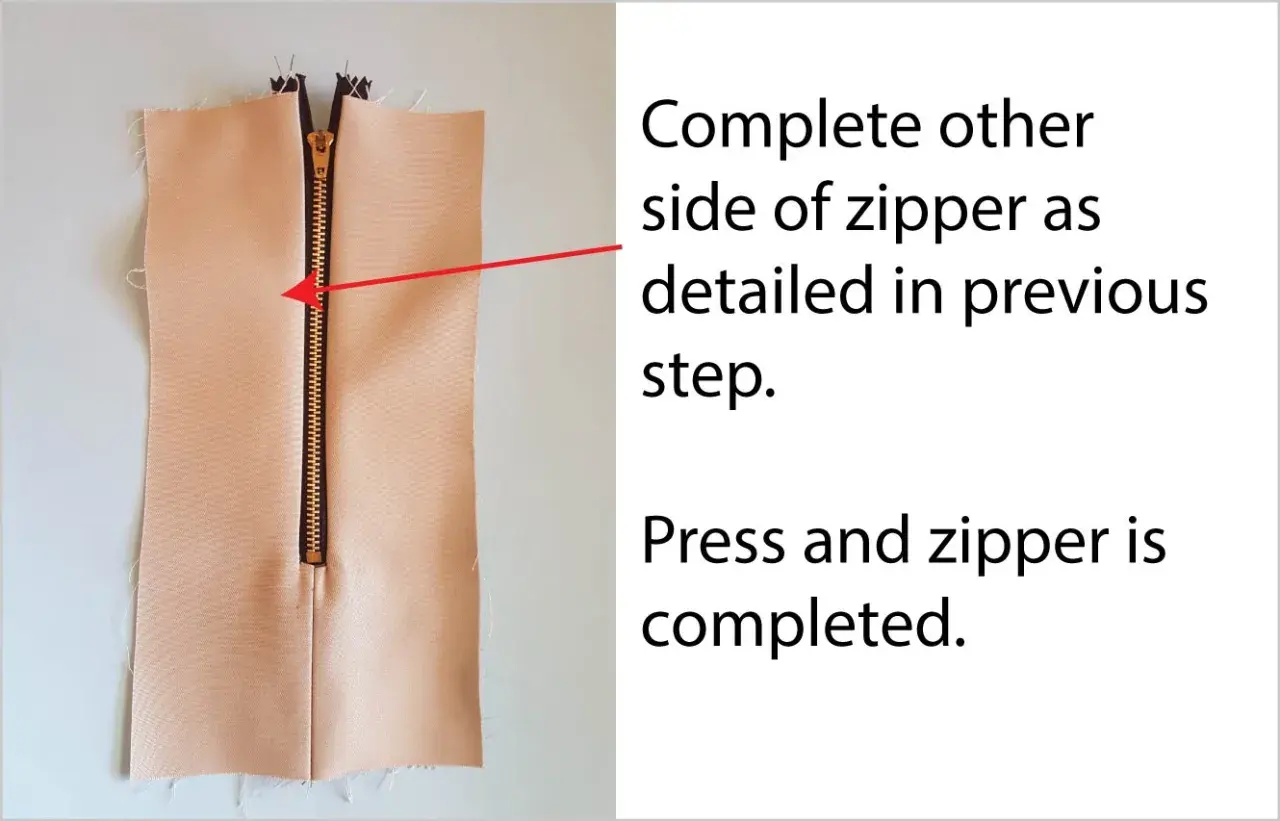
An exposed zip can do more than close a garment; it can define the line of a skirt, sharpen a jacket front, or give a plain project a deliberate, modern edge. The difference between polished and clumsy usually comes down to three things: the right zip type, enough support around the opening, and accurate stitching. In this article, I look at where the finish works best, how I sew it in, and the mistakes that make it look accidental instead of designed.
The practical points that matter before you start
- A visible zip works best when the opening is stabilised first, usually with fusible interfacing or stay tape.
- Metal and moulded plastic zips give a stronger statement; coil zips feel softer and less architectural.
- Accuracy matters more than speed, because both sides need to sit evenly and the teeth must line up cleanly.
- Topstitching can be a design feature on its own, but only if the rows stay parallel and consistent.
- Heavy, stretchy, or very drapey fabrics usually need extra support if you want the finish to lie flat.
What a visible zip is really doing in a garment
I think of a visible zip as a design line first and a fastening second. It gives the eye somewhere to travel, which is why it can look sharp on structured garments and a little awkward on fabrics that want to collapse or stretch. When the placement is right, the zip reads as part of the pattern, not a compromise added at the last minute.
It also behaves differently from other zip finishes. A standard centred zip disappears into the seam. An invisible zip is meant to vanish almost completely. A visible finish does the opposite: it invites attention, so the tape, stitching, and top stop all need to be neat enough to stand up to that attention.
| Finish | Visual effect | Best use | Main trade-off |
|---|---|---|---|
| Centred zip | Quiet and familiar | Everyday dresses, skirts, trousers | Less decorative impact |
| Invisible zip | Almost disappears | Formal garments, fitted seams | Fussy alignment and pressing |
| Visible zip | Intentional and graphic | Jackets, hoodies, utility skirts, bags | Needs stronger support and cleaner topstitching |
That difference matters because the finish only works when the garment can carry it, which is why I look at project choice before I touch the machine. The next step is deciding when the detail earns its place and when it simply adds noise.
When an exposed zipper is the better choice
There are garments where this finish feels natural, and others where it looks forced. I reach for it when I want the fastening to act as a feature rather than hide in the background. That usually means shapes with structure, clear seams, or a slightly sporty or utility feel.
- Denim skirts and dresses benefit from the extra texture. The zip reinforces the casual, workwear-inspired look instead of fighting it.
- Jackets and hoodies often need a front closure that feels sturdy. A visible zip suits that brief because it matches the practical shape of the garment.
- Utility trousers and dungarees can handle a statement fastening well, especially when the rest of the design already includes topstitching, patch pockets, or seam detail.
- Structured bags and pouches are a good place to practise the technique because the opening is smaller and the material usually needs less shaping.
- Close-fitting dresses can work too, but only if the fabric is stable enough and the zip line is treated as a strong design feature rather than an afterthought.
I avoid the look on fabrics that are very soft, slippery, or prone to stretching unless I am willing to reinforce them properly. A lightweight viscose, for example, can make the opening sag if it is not stabilised well; a heavily draped jersey may need more structure than the pattern originally suggests. As a rule, if the garment needs the closure to disappear, I would not force this finish onto it. Once the project choice is right, the sewing itself becomes much more straightforward.
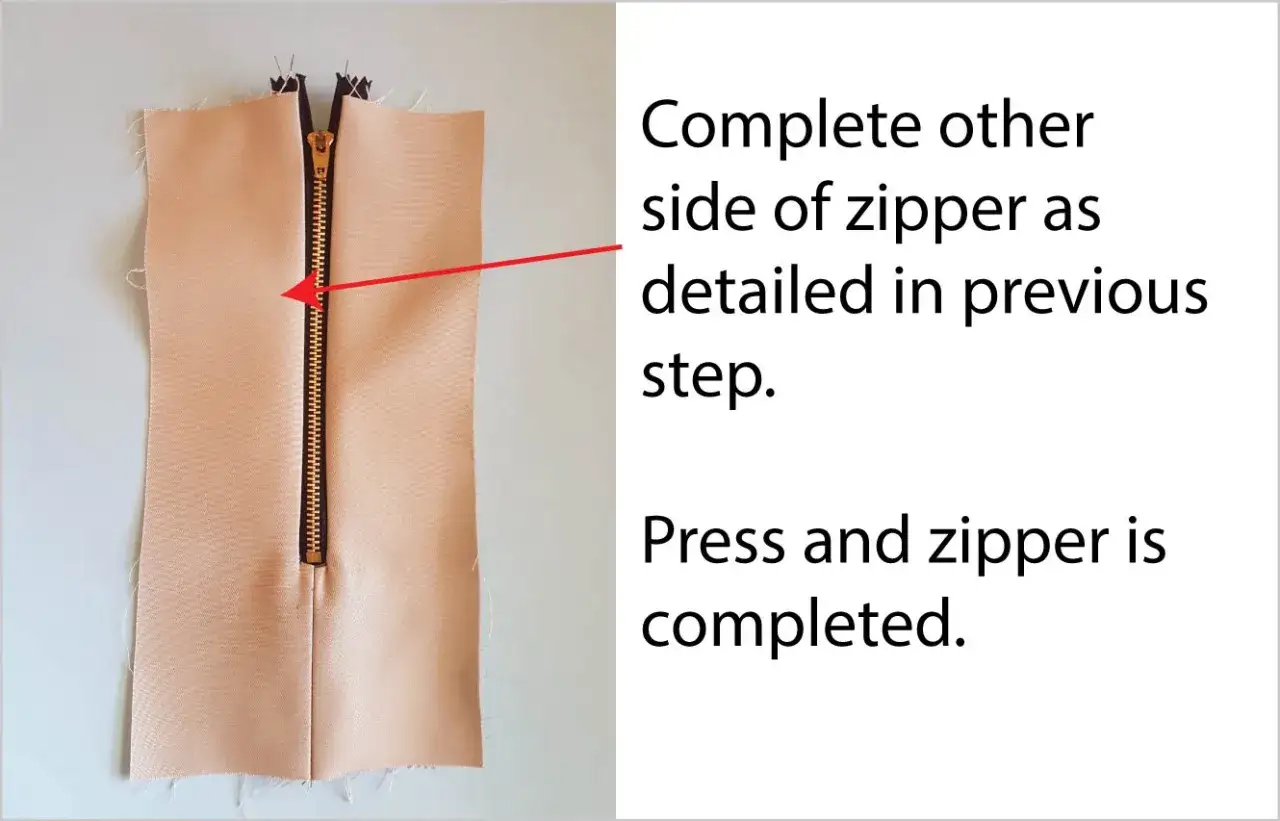
How I sew a clean visible zip
The cleanest results usually come from patient setup rather than clever machine work. I would rather spend an extra ten minutes marking and basting than spend the next hour unpicking a zip that drifted off line. The process is simple, but the order matters.
- Stabilise the opening first. I fuse a strip of interfacing to the wrong side of each zip area, usually about 25 mm wide and long enough to extend a little beyond the visible part of the opening. On knits or very soft wovens, I may use stay tape instead of ordinary interfacing so the edge does not distort.
- Mark the exact placement. Tailor’s chalk or a water-soluble pen gives me a clearer result than guessing by eye. I mark both sides, then lay the actual zip on top to check that the teeth, stop, and top edge all sit where I want them.
- Sew the seam below the opening and press it open. If the garment has a seam running into the zip, I keep the stitching smooth and consistent, then press carefully so the opening sits flat before the zip goes in.
- Baste before machine stitching. I baste close to the teeth by hand or with a long machine stitch. This is where a lot of good results are won, because the tape stays where I put it instead of shifting under the presser foot.
- Topstitch with control, not speed. A zip foot or edgestitching foot helps me keep an even distance from the teeth. If I want a bolder line, I use topstitching thread on the outside and a standard thread in the bobbin.
- Check symmetry before trimming anything. I close the zip, lay the garment flat, and compare both sides. If one side is pulling or sitting higher, I fix that before trimming the excess tape or finishing the top edge.
My own rule is simple: if the stitching looks calm, the whole zip looks intentional. If the rows wobble, the detail starts looking improvised, which is exactly what I try to avoid. The next question is what hardware and support make that calm finish possible in the first place.
Choosing the right zip, fabric and support
The hardware changes the character of the finish more than most people expect. A metal zip gives a crisp, more assertive line. A moulded plastic zip feels slightly sportier and lighter. Coil zips are softer and easier to persuade around gentle curves, which is useful when the garment needs more flexibility than structure.
| Zip type | Best for | Why I choose it | What to watch out for |
|---|---|---|---|
| Metal, separating | Jackets, denim, outerwear | Strong visual line and a very clear fashion look | Heavier and less forgiving on soft fabrics |
| Moulded plastic, separating | Hoodies, casualwear, kids’ garments | Light, durable, and easy to see as a design feature | The teeth can look bulky if the garment is delicate |
| Coil, closed-end | Skirts, dresses, bags, small openings | Flexible and smoother against the body | Less sculptural if you want a strong statement |
Support matters just as much as the zip itself. On medium-weight woven fabrics, a 15 mm seam allowance is usually enough room to build a neat opening, but I still reinforce the area if the fabric has any give. On knit fabrics, I would rather use a stabilising strip than trust the fabric to behave. On bulky cloth such as denim or heavy twill, grading the seam allowances down near the end of the zip prevents a lumpy finish.
Thread and needle choice help too. I use a needle that suits the cloth rather than forcing one setup across every project. That means a finer needle for lighter fabrics and something sturdier, such as a denim or topstitch needle, when I am working through thicker layers. Once those choices are right, the remaining problems are usually self-inflicted, which is where most mistakes live.
The mistakes that make the finish look accidental
The most common problems are not complicated. They are small slips that show up immediately once the garment is worn. I see the same ones often enough that I now check for them before I sew the final line.
| Problem | Likely cause | What I do instead |
|---|---|---|
| Rippling beside the zip | Opening was not stabilised enough | Fuse interfacing or add stay tape before stitching |
| One side sits higher than the other | Placement drifted during basting or topstitching | Mark both sides clearly and baste before machine stitching |
| Puckering at the top or bottom | Too little easing or too much bulk | Trim, grade, and press the end carefully before finishing |
| Flattened or distorted teeth | Pressing too hard, especially on synthetic zips | Use a press cloth and press from the fabric side whenever possible |
| Visible wobble in the topstitching | Stitching too fast or without a guide | Slow down and use the zip foot as a visual reference |
The fix for most of these issues is boring, but effective: test the fit, baste it, check it again, and only then sew it permanently. I also keep a habit of closing the zip and looking at the garment from a distance, because that is usually when asymmetry becomes obvious. The final section is the handful of details I keep when I want the zip to look designed, not improvised.
The details I keep when I want the zip to look designed
When I want this finish to feel intentional, I focus on the small decisions that are easy to overlook. I want the top edge to be clean, the tape to sit parallel, and the stitching to follow the same rhythm on both sides. That is what makes the closure look like part of the pattern rather than a hardware add-on.
- I finish the top edge with a facing or waistband so the zip has a neat starting point.
- I match the thread to the fabric when I want the stitching to blend, or I choose contrast thread when I want the line to show on purpose.
- I keep the tape straight and avoid letting it twist, because a small rotation is enough to make the whole closure look sloppy.
- I use a longer zip than the opening if the garment needs a little construction margin, then trim only after I am happy with the fit.
- I test movement in the finished garment before I trim away excess tape, especially on fitted pieces that need to sit smoothly when the body bends.
That is usually the difference between a zip that merely functions and one that becomes a feature. If the support is right, the placement is accurate, and the finishing is calm, the closure stops looking like a workaround and starts behaving like a deliberate design line.
