
Finishing an edge cleanly changes how a garment or quilt behaves, not just how it looks. In the bias tape vs binding decision, the real issue is flexibility, bulk, and how much control you need around curves, corners, and raw edges. This article breaks down the difference, shows when each option works best, and gives a practical method for choosing the right finish for everyday sewing projects.
The quickest way to choose the right edge finish
- Bias tape is the flexible strip; it excels on curves, small openings, and lighter finishes.
- Binding is the edge treatment; it is usually the better choice when you want a stronger, more visible frame.
- If the edge bends sharply, bias cut strips behave better than straight-grain strips.
- If the project will be handled, washed, or rubbed a lot, binding usually gives better protection.
- Pre-made tape saves time, while self-made strips give you more control over colour, width, and fabric weight.
- The term on the packet matters less than the job the finish has to do.
The quickest way to tell them apart
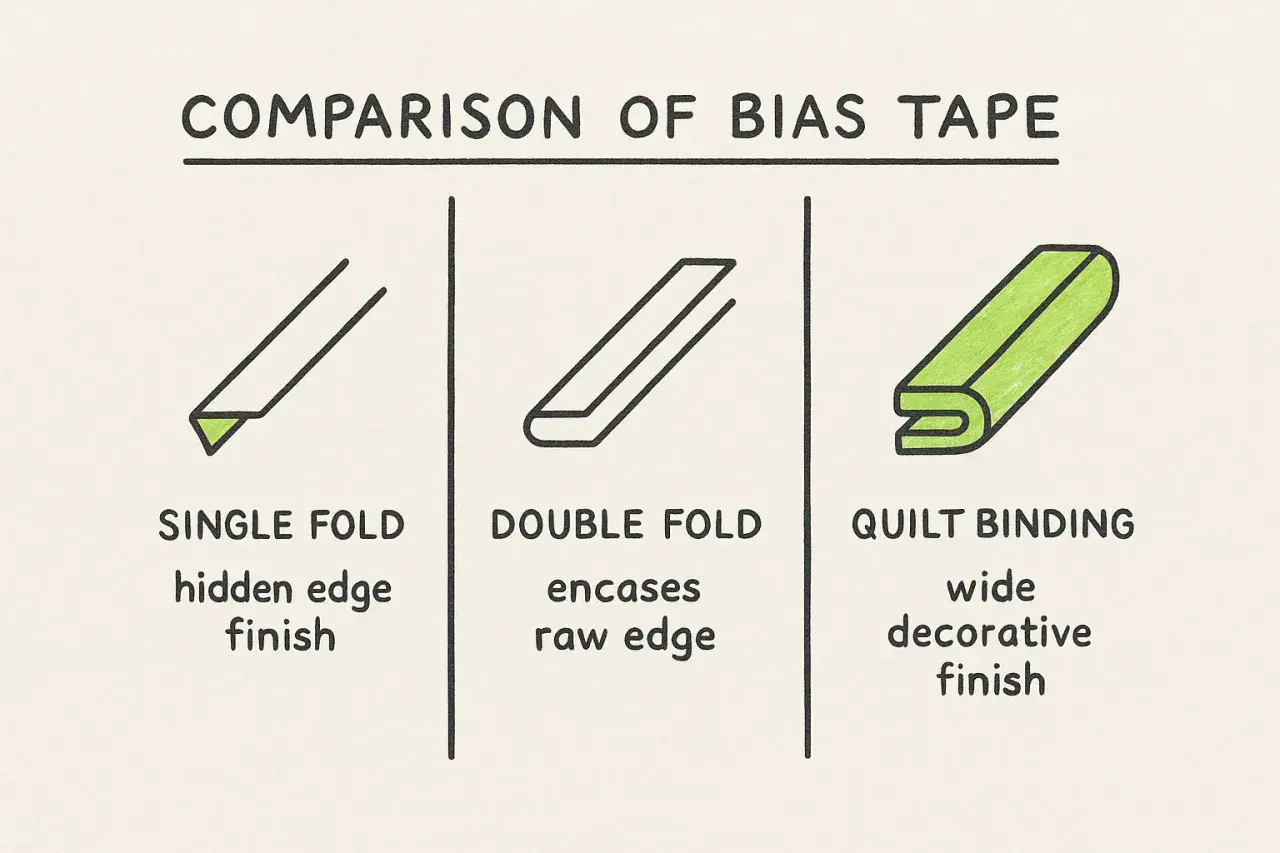
The cleanest way I explain it is this: bias tape is the strip, binding is the finish. Bias tape is fabric cut on the bias, usually at a 45-degree angle to the grain, which gives it a little stretch and lets it sit smoothly around curves. It may come as single-fold tape, double-fold tape, or a strip you make yourself and press at home.
Binding describes the edge treatment itself, especially when a strip is sewn around the raw edge of a quilt, blanket, placemat, bag, or garment and then turned to the other side. In practice, the two terms overlap a lot. A shop may label the same product as bias binding, bias tape, or double-fold tape, and the label is less important than how the strip behaves once stitched.
| Term | What it refers to | Typical use |
|---|---|---|
| Bias tape | A narrow strip cut on the bias, often folded once or twice | Necklines, armholes, curved edges, light decorative trims |
| Binding | The finished edge treatment that encloses or frames raw fabric | Quilts, blankets, placemats, pot holders, bag edges |
| Bias binding | Binding made from bias-cut strips | Curved or shaped edges that need flexibility |
| Straight-grain binding | Binding cut along the straight grain instead of the bias | Long straight edges where stability matters more than stretch |
That distinction matters because the strip and the finish do different jobs. Once you separate those two ideas, the choice becomes much easier, especially when the edge is curved rather than flat.
When bias tape is the smarter choice
I reach for bias tape when the edge needs to bend without puckering. Necklines, armholes, armhole facings, curved yokes, baby bibs, and scalloped edges all benefit from the extra give in a bias-cut strip. A straight-grain strip can look tidy on a ruler, but once you try to persuade it around a curve, the fabric starts fighting back.
Bias tape also suits finishes that should stay light and unobtrusive. On a blouse, a dress facing, or a small accessory, I usually want the edge to look neat without adding a lot of bulk. A narrow pre-folded tape in the 12 mm to 19 mm range is often enough for those jobs. If I need more coverage, I will go wider, but I still keep the finish slim enough that it does not dominate the design.
There is one caveat worth respecting: bias tape is flexible, not magical. On thick fabrics, stiff coatings, or heavily layered seams, very narrow tape can disappear into the bulk or look strained. In those cases, I either widen the strip or switch to a sturdier binding method. That leads naturally to the opposite side of the comparison.
When binding does the better job
Binding is the better tool when the edge is part of the structure, not just a tidy finish. Quilts, throws, placemats, pot holders, tote bags, and other projects that are handled often usually look better with a binding that fully encloses the raw edge. It gives the project a clearer outline and more protection against wear.
For quilts, I usually think in terms of binding first and decoration second. A classic binding strip is often cut at 57 mm, or 2¼ in, which is a dependable starting point for many quilts. If the quilt is thick or heavily layered, 64 mm, or 2½ in, gives a little more room for wrapping the edge cleanly. That extra width matters because a cramped binding tends to expose raw edges or feel tight at the corners.
Binding also handles mitered corners better than a narrow tape finish. A mitered corner is the folded, angled join that keeps the corner neat instead of bulky. On a square quilt or placemat, that detail can make the whole piece look intentional rather than improvised. If the project has mostly straight sides, straight-grain binding can be a sensible option too, because it uses less fabric and stays stable.
In short, I use binding when I want the edge to read as a frame. That frame can be subtle or bold, but it should feel durable. From there, the next question is how to choose the right width and grain for the job.
How I choose the width and grain
When I am deciding between a narrow tape and a wider binding, I look at three things first: the shape of the edge, the thickness of the layers, and how visible I want the finish to be. The table below is the version I keep in my head when I am standing at the cutting table.
| Project situation | Better choice | Why it works |
|---|---|---|
| Neckline or armhole | Bias tape, usually narrow | It bends smoothly and keeps bulk to a minimum |
| Curved edge or shaped opening | Bias binding | It follows the curve without rippling |
| Quilt, blanket, or placemat edge | Binding, often 57 mm to 64 mm strips | It encloses the raw edge and frames the project neatly |
| Light decorative trim | Bias tape | It adds a clean line without much weight |
| Straight edge where stretch is not needed | Straight-grain binding | It is more stable and wastes less fabric |
For self-made strips, the grain matters as much as the width. Cutting on the bias gives you flexibility, but it also uses fabric less efficiently than cutting on the straight grain. That trade-off is worth it when the edge curves. On a long straight edge, I would usually rather save fabric and use a stable strip than waste bias-cut material that adds no benefit.
I also prefer to make one sample corner or curve before I cut the full project. That small test tells me whether the tape is too narrow, whether the fabric is too stiff, and whether the finish will sit flat once pressed. It is a small step, but it saves a lot of frustration later.
How I apply a clean finish
The technique is not complicated, but it does reward patience. I work in two passes: first I secure the strip, then I wrap or finish it so the raw edge disappears. The exact method depends on whether I am using tape on a garment edge or binding on a quilt or accessory.
- Prepare the edge first. If the fabric frays easily or stretches, I staystitch or lightly neaten the edge before attaching anything.
- Attach the first side. With bias tape, I open one fold and stitch along the crease line, usually keeping the seam allowance around 6 mm. With binding, I sew the strip to the first side of the project, leaving enough width for the wrap.
- Wrap and press. I fold the strip over the raw edge and press it firmly before stitching the second side. This is where the finish starts to look crisp instead of lumpy.
- Choose the final stitch wisely. Edgestitching gives a visible, tidy line. Stitching in the ditch means sewing exactly in the seam line so the topstitch disappears from the front. I use whichever one suits the look of the project.
- Handle corners and curves separately. On curves, I ease the strip into place and avoid pulling it. On corners, I stop short, fold the miter, and press the point before stitching it down.
The biggest mistake I see is over-stretching the tape while sewing. That turns a flexible strip into a wavy edge, which is the opposite of what you want. Gentle handling and accurate pressing matter more than speed here. Once you know the mechanics, the main risks become much easier to spot.
The mistakes that make the edge look clumsy
The first problem is using the wrong grain. Straight-grain strip on a curve almost always creates tension, little ripples, or a finish that refuses to lie flat. The second is cutting the strip too narrow for the thickness of the project. A neat narrow finish can look sharp on cotton lawn, but on batting, fleece, or several layers of seams, it can expose raw edges or feel compressed.
The third mistake is skipping pressing between steps. I would rather spend an extra minute pressing than spend ten minutes unpicking a finish that twisted on the way around the edge. The same goes for joins: if you are making your own strip, join lengths with diagonal seams rather than blunt end-to-end joins. The diagonal seam spreads the bulk and makes the join less obvious.
I also think it is worth being honest about fabric choice. A stiff coated cotton, a very slippery satin, or a bulky quilt sandwich will not behave like plain quilting cotton. The method can still work, but the strip width, stitch length, and pressure of the presser foot may need adjustment. When a finish misbehaves, it is usually because the fabric and the technique do not match, not because the idea itself is wrong.
That is why I keep a small set of reliable materials close at hand. It makes the next project easier before I have even cut the first strip.
What I keep ready for the next project
If I were building a practical sewing drawer for edge finishes, I would keep a few things on hand rather than a huge range of options. Narrow pre-folded bias tape in a neutral shade is useful for garments and small repairs. Wider binding strips are better for quilts and thicker projects. A simple bias tape maker, a good iron, and a clear ruler take a lot of guesswork out of self-made strips.
- Keep at least one narrow tape for necklines, armholes, and light trims.
- Keep a wider binding option for quilts, bags, and anything with corners or heavy layers.
- Store one neutral colour and one contrast colour so you can choose between invisible and decorative finishes.
- Make a quick scrap test when the fabric is unusually thick, slippery, or curved.
- Use the project shape, not the label on the packet, as the final decision point.
That is the practical answer I come back to every time: bias tape is the better tool for curves and light finishes, while binding is the better tool for durable framed edges. If you choose by shape, thickness, and desired look instead of by habit, the finish will usually behave the way you want it to.
