
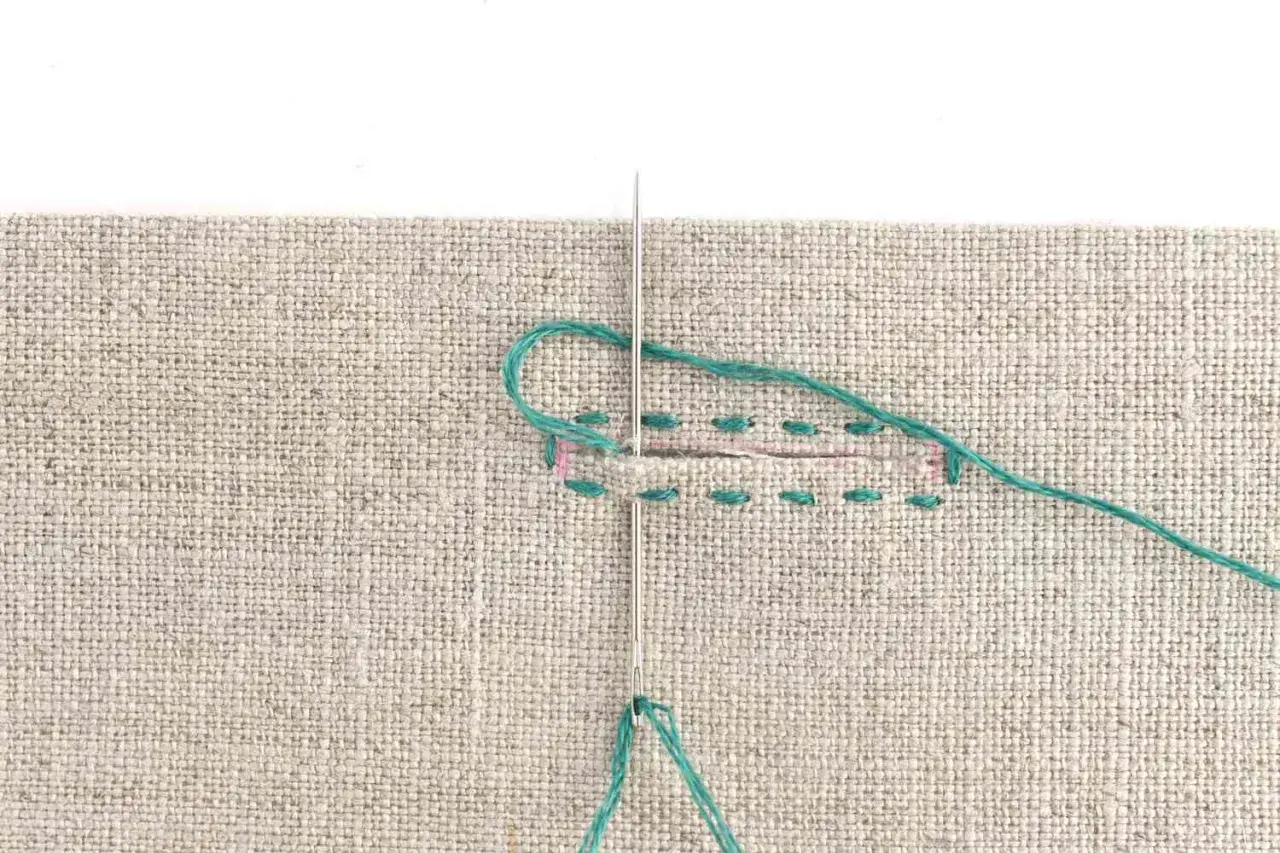
I treat a buttonhole as a small structural decision, not a finishing afterthought. If you get the size, placement, fabric support, and stitch method right, the closure looks neat and opens smoothly instead of pulling, puckering, or fraying. This guide shows how to sew a button hole cleanly on a sewing machine or by hand, and it covers the practical details that usually decide whether the result feels polished or frustrating.
What matters most before you stitch
- Measure the button first, then add a little ease so it passes through without forcing.
- Reinforce the area with interfacing on medium to light fabrics, especially at stress points.
- A one-step machine buttonhole is the fastest option, while a hand-sewn hole gives more control on delicate cloth.
- Always test on a scrap with the same fabric layers before sewing the garment.
- Cut the slit open only after you have checked the stitching and the button fit.
Start with the garment and the button, not the machine
The best buttonholes begin with fit, not stitch settings. I always check how the garment closes under real tension, because a shirt cuff, jacket front, and waistband do not need the same kind of opening. A buttonhole on a stress point should support the pull of the fabric, while a lighter closure can be smaller and less aggressive.
As a rule of thumb, I measure the button diameter and add 2 to 3 mm for a flat button, a little more if the button is thick or domed. That extra room matters more than beginners expect. If the opening is too tight, the button strains the fabric; if it is too long, the closure looks sloppy and may gape.
I also think about direction at this stage. Horizontal buttonholes are usually the safer choice on fronts and waistbands because they resist pull more effectively, while vertical ones can work well where the button is mainly guiding the overlap rather than holding a lot of stress. Once that decision is clear, the rest of the setup becomes much easier.
Set up the fabric and tools for a clean opening
A tidy buttonhole depends on a fabric that has enough support to hold the stitching. On medium and lightweight fabrics, I nearly always add interfacing behind the buttonhole area. Fusible interfacing is the easiest option for most dressmaking, but a small patch of sew-in interfacing can be better on fabrics that dislike heat or need a softer hand.
| Tool or material | Why I use it |
|---|---|
| Buttonhole foot | Keeps the stitch formation consistent and helps the machine feed the opening evenly. |
| Tailor’s chalk or a fine fabric marker | Lets me mark the centre line and exact end points before I sew. |
| Interfacing | Stops the fabric from stretching and gives the stitch something solid to grip. |
| Sharp needle | Reduces snags and skipped stitches, especially on woven fabrics. |
| Seam ripper or embroidery scissors | Used to open the slit after stitching without tearing past the ends. |
| Scrap fabric | Lets me test stitch length, width, and button fit before I touch the garment. |
Once the fabric is stabilised and the tools are ready, the next decision is which method gives the cleanest result for that particular cloth.
Choose the buttonhole method that matches the fabric
There is no single right answer here. I choose the method based on fabric weight, the look of the garment, and how much control I need over the finish. A machine-made buttonhole is fast and repeatable, but a hand-sewn one can look softer and more refined on special pieces.
| Method | Best for | Strength | Limitation |
|---|---|---|---|
| One-step machine buttonhole | Most everyday garments and beginners | Fast, consistent, and easy to repeat | Depends on the machine’s settings and foot |
| Four-step machine buttonhole | Older machines and more manual control | Flexible and widely available | Takes more attention to keep each side even |
| Hand-sewn buttonhole | Delicate fabrics, tailoring, and decorative finishes | Very controlled and elegant on the right fabric | Slower and less forgiving if the marking is off |
For a shirt, blouse, or simple dress, I usually reach for the machine. For wool tailoring, silk, or anything historical-looking, hand work often looks more appropriate. That choice shapes the steps you take next, so I keep it clear before I start stitching.
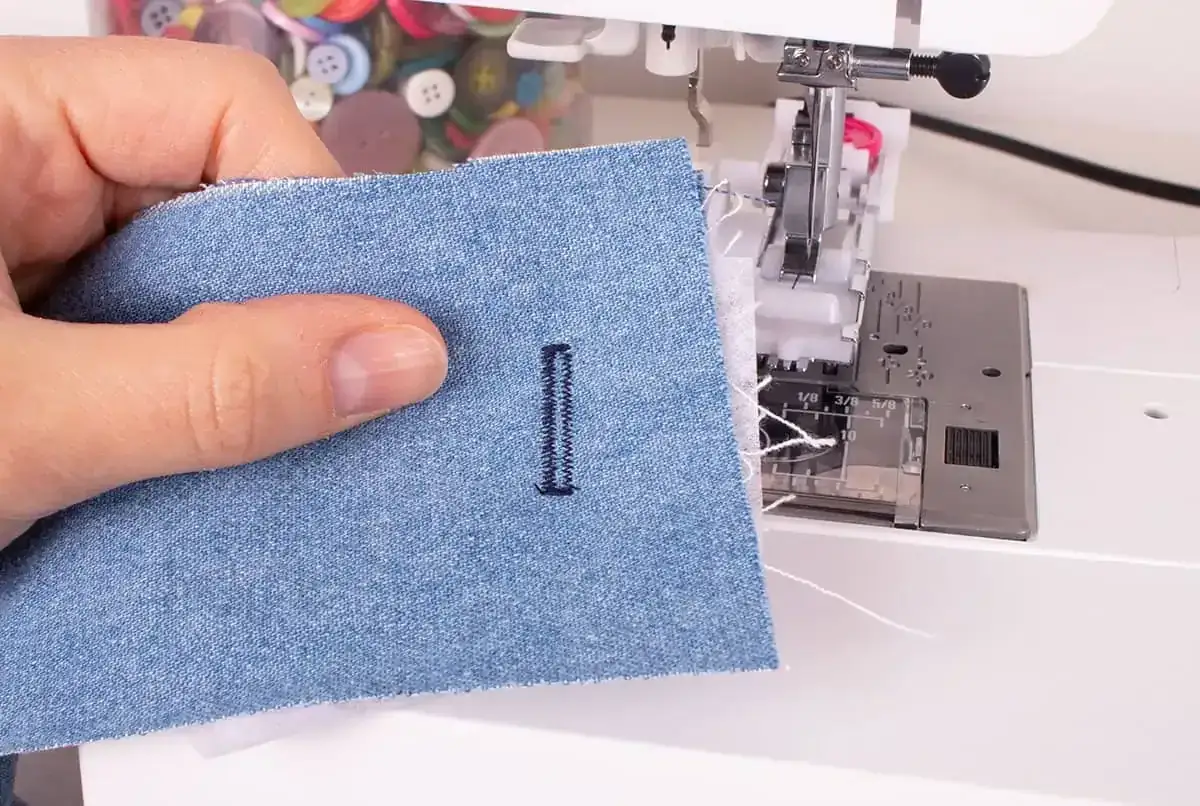
Sew a buttonhole on a machine step by step
When the machine is set up properly, the process is straightforward. I still recommend testing on a scrap from the same fabric layers, because the stitch can look perfect on the machine and still misbehave once it meets the real garment.
- Mark the centre line and the finished length of the buttonhole on the fabric.
- Reinforce the area with interfacing if the fabric is soft, stretchy, or loosely woven.
- Fit the buttonhole foot and select the buttonhole programme or stitch sequence on the machine.
- Place the fabric under the foot so the markings line up exactly with the machine guide.
- Sew at a steady pace without pushing or pulling the fabric. Let the feed dogs do the work.
- Stop at the end of the cycle, then check that the bar tacks and sides look balanced.
- Open the slit with a seam ripper or small scissors, placing a pin across each end so you do not cut too far.
If your machine uses a four-step buttonhole, the sequence is manual rather than automatic, but the principle is the same: establish one side, form the end, return on the other side, and secure the second end. I find that slow, even handling matters more than speed. A rushed buttonhole almost always shows it.
One rule I follow every time is simple: sew all the buttonholes first, then cut them open after I have checked each one. That keeps me from opening a mistake too early and locking myself into a bad placement.
Use hand stitching when the fabric needs more control
Hand-sewn buttonholes are slower, but they reward patience. I reach for them when the fabric is too delicate for a machine foot, when the garment needs a softer tailored finish, or when the buttonhole is part of a more traditional construction. They also let you shape the opening more deliberately if the machine struggles with the fabric thickness.
The basic hand method is simple in concept: cut a neat slit, then overcast the edges with dense stitches, usually using buttonhole twist or strong sewing thread. The stitches should sit close together so the raw edge is fully enclosed. On tailored pieces, a thin cord called gimp can be worked into the edge to create a slight raised ridge that improves durability and makes the hole look crisp.
I usually think of hand buttonholes as a finishing skill rather than a rescue technique. They work best when the marking is accurate, the slit is the right length, and the stitches are even. If the layout is messy, hand sewing will not magically fix it, so preparation still matters just as much as it does with a machine.
Because hand work can be time-consuming, I budget roughly 20 to 40 minutes for one careful buttonhole if I want a neat result. That is slower than machine stitching, but on a coat, blazer, or special blouse, the extra time is often worth it.
Fix the common problems before you cut the slit
Most buttonhole problems can be corrected if you catch them early. The key is to diagnose the cause instead of just re-stitching the same mistake and hoping for a different result. I look first at support, then at stitch tension, then at button size.
| Problem | Likely cause | What I do |
|---|---|---|
| Puckering around the hole | Fabric is too soft, needle is dull, or tension is too tight | Add interfacing, replace the needle, and test again on a scrap |
| Button will not pass through | Hole is too short or the button is thicker than expected | Unpick and lengthen the buttonhole before opening the slit |
| Fraying at the cut edge | Fabric is loose woven or the slit was cut too aggressively | Use a sharper cutting tool, add interfacing, and seal the area if suitable |
| Uneven sides | Fabric shifted during stitching or the machine setup was inconsistent | Practice on scraps, hold the fabric flat, and sew at a steadier pace |
| Looped, messy stitches | Tension or stitch settings do not suit the fabric | Adjust stitch width and length, then repeat the test sample |
If a finished buttonhole is only slightly too short, I would rather unpick and redo it than force the button through. Forcing the closure stretches the fibres around the opening, and that damage only gets worse with wear. A clean rework takes longer at the bench, but it saves the garment.
The final details that make the finish look tailored
The difference between a decent buttonhole and a really good one often comes down to habits. I keep the garment flat while sewing, avoid cutting before I have checked the final stitch, and press the area gently from the wrong side with a pressing cloth. Those small steps reduce shine, distortion, and accidental snips.
I also pay attention to placement on the garment as a whole. A row of buttonholes looks more professional when the spacing is even, the direction matches the stress of the opening, and the top and bottom holes are positioned with the garment’s shape in mind. A slightly awkward buttonhole in the wrong place is more noticeable than a very simple one in the right place.
If I want the cleanest possible result, I work through a short final checklist: mark carefully, reinforce the fabric, test on a scrap, sew all the holes before cutting, and check every button for actual fit before I call the job done. That routine is plain, but it works. Once you build it into your sewing, buttonholes stop feeling like a gamble and start feeling like a reliable finishing skill.
