
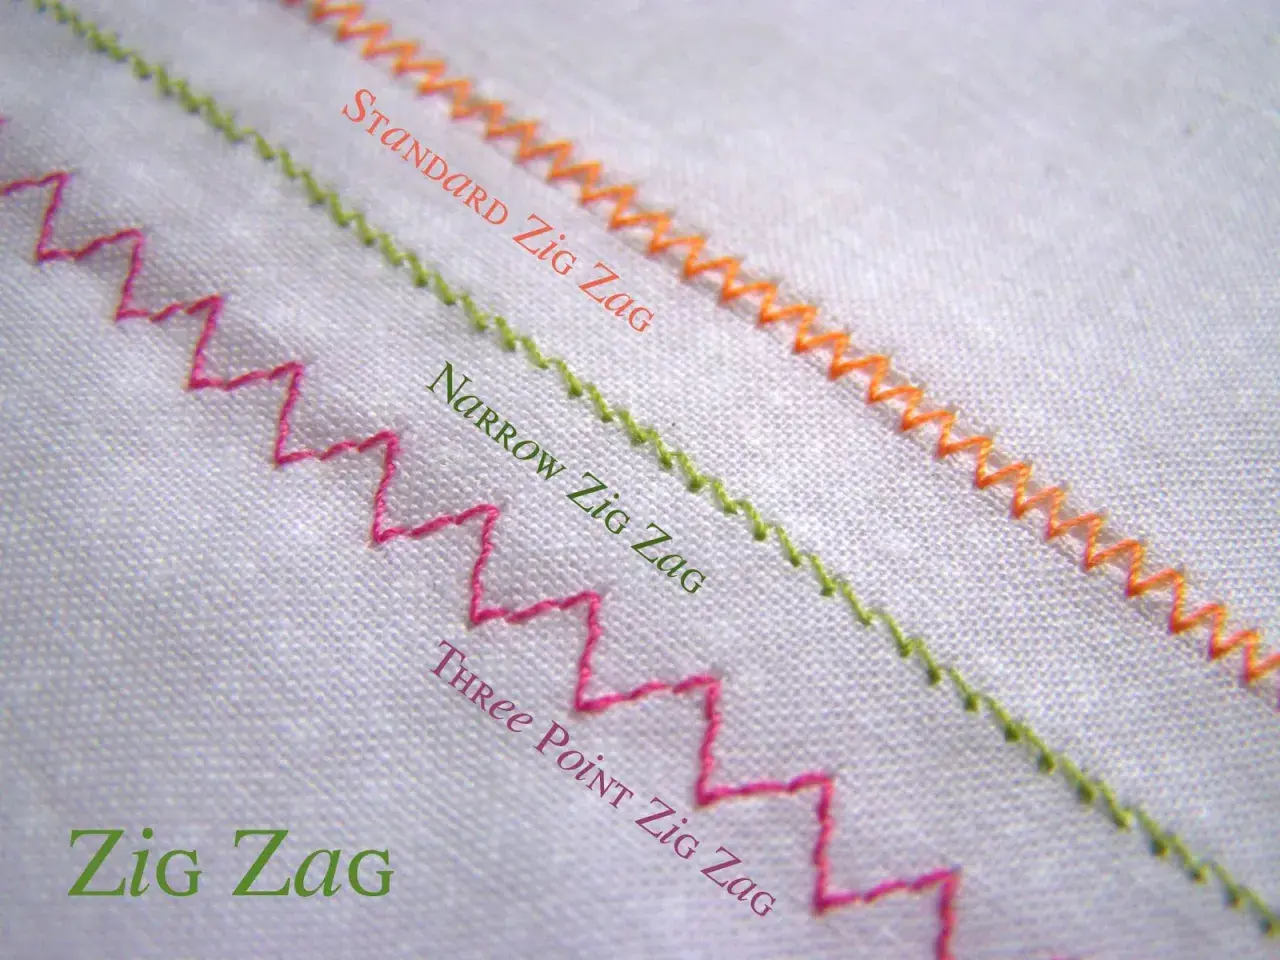
The essentials at a glance
- It is a side-to-side stitch, so it has more give than a straight stitch.
- I reach for it on knits, elastic, button repairs, edge finishing, and quick fixes.
- A ballpoint or jersey needle matters more than most beginners expect.
- Test scraps first: width, length, and tension all change the result.
- It is practical, but it does not replace every other stitch on the machine.
- For many home sewers in the UK, it is the simplest way to sew stretch fabric without extra equipment.
What makes a zigzag stitch so useful
The reason this stitch earns its place is simple: it builds flexibility into the seam. Because the needle swings left and right, the thread can stretch a little with the fabric instead of snapping under stress. That matters on anything that needs recovery, from T-shirt seams to elasticated waistbands.
I also like it because it does several jobs at once. A narrow version can sew seams in knit fabric. A wider version can finish raw edges. A dense version can anchor appliqué or hold a button. In other words, this is not just a decorative option tucked away on a machine dial; it is a practical tool that solves everyday sewing problems.
That flexibility is exactly why it shows up in so many projects, and it leads naturally to the bigger question: when should you choose it instead of another stitch?
When I would reach for it on a sewing machine
I do not use this stitch for everything. On stable woven fabric, a straight stitch still gives the cleanest and strongest-looking seam. But the moment a project needs movement, the zigzag comes into play.
Here are the situations where I would choose it first:
- Knit garments such as T-shirts, leggings, and loungewear, where the seam has to stretch with the fabric.
- Elastic application on waistbands, cuffs, swimwear, and children’s clothes.
- Seam finishing when I do not have an overlocker and want to reduce fraying.
- Mending tears, worn patches, or split seams, especially when I need a repair that can move.
- Appliqué and edge work where a controlled line around the motif matters more than a perfectly hidden seam.
- Button sewing on a domestic machine, provided the feed dogs are lowered and the width is set to match the button holes.
I would not use it as a default answer for every garment. But for stretch, repair, and edge control, it is one of the most forgiving stitches a home sewist can have. Once you see where it fits, the next step is getting the machine settings right.
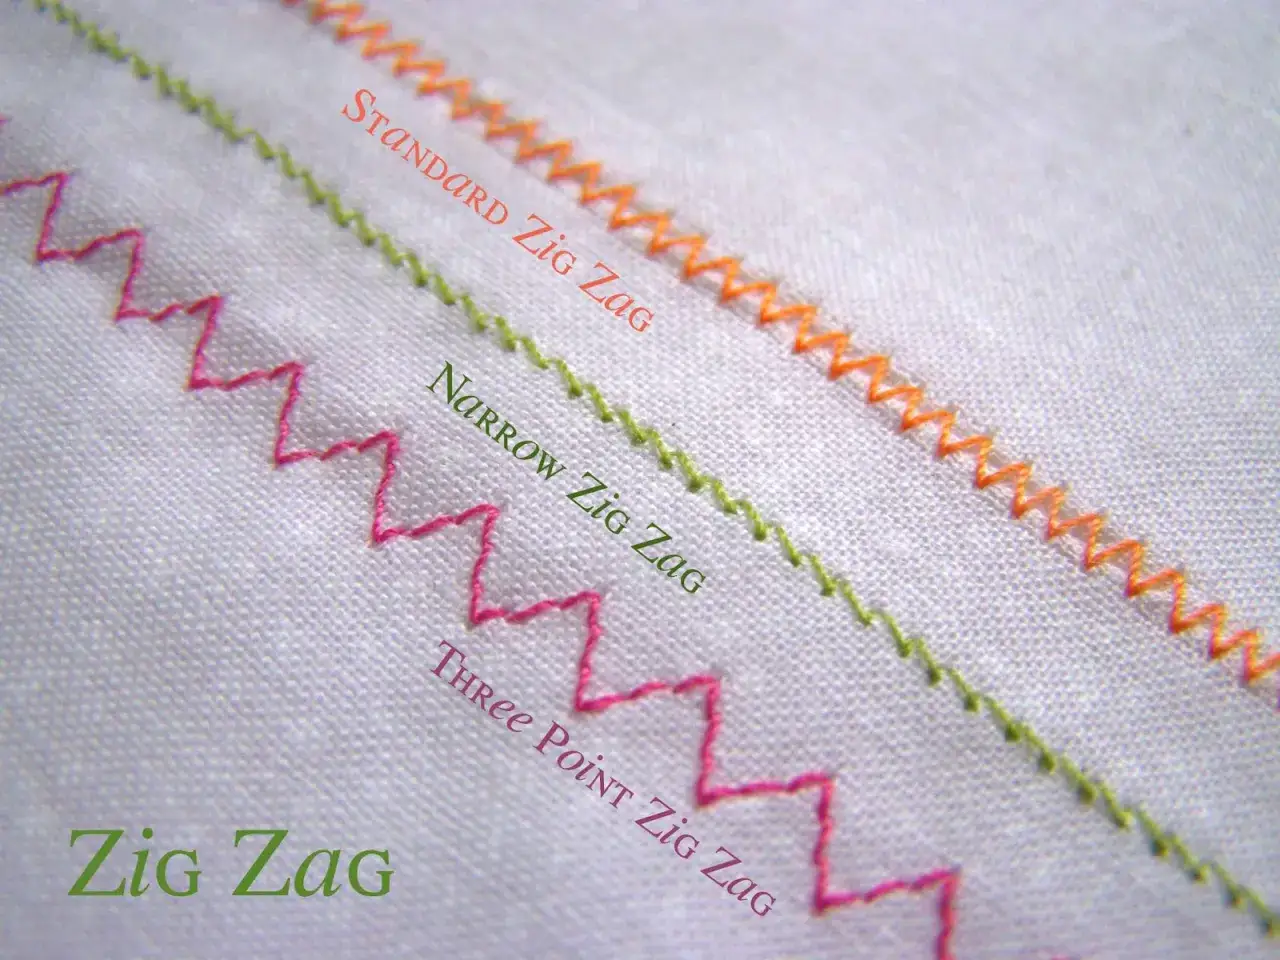
How to set your machine for cleaner results
The stitch itself is only part of the story. A neat result depends on needle choice, thread tension, stitch width, and how you feed the fabric through the machine. On many domestic machines, the default length for utility stitches sits around 2.5 mm, but I treat that as a starting point rather than a rule.
- Choose the right needle. For jersey and other stretch fabrics, I use a ballpoint or jersey needle. Its rounded tip slips between fibres more gently and reduces skipped stitches.
- Match the foot to the job. A standard zigzag or all-purpose foot usually works well. If the fabric is sticky, slippery, or bulky, an even-feed or walking foot can help.
- Test the width and length on scraps. A narrow setting is usually better for seams that need to recover. A wider setting suits edge finishing or elastic.
- Do not pull the fabric. Let the feed dogs move it. If you stretch the fabric while sewing, the seam can wave or end up permanently distorted.
- Adjust in small steps. If the seam tunnels, puckers, or feels too stiff, change one thing at a time: width, length, or tension.
My own starting point for a knit seam is usually a narrow zigzag with moderate length, then I fine-tune from there. For lighter fabrics, I keep the stitch less aggressive; for elastic, I test how much stretch the seam needs to recover without popping. That hands-on testing is what separates a tidy result from a frustrating one, which is why the next comparison matters so much.
How it compares with stretch stitches and overlocking
People often treat this stitch as if it were interchangeable with every other stretch solution. It is not. A zigzag, a dedicated stretch stitch, and an overlocker all solve related problems, but they do not solve them in the same way.
| Option | Best for | Strengths | Limitations |
|---|---|---|---|
| Narrow zigzag | General knit seams, repairs, quick everyday sewing | Available on almost every machine, easy to test, flexible enough for many projects | Less polished than an overlocked seam, can look bulky if set too wide |
| Dedicated stretch stitch | Garments that need extra recovery, especially activewear or very elastic knits | Usually stronger on stretch, often neater than a basic zigzag | Not every machine has one, and it can be slower to sew and harder to unpick |
| Overlocker | Fast construction and clean finishing on knits and woven edges | Trims, sews, and finishes in one pass; very professional result | Extra cost, more learning, and it is not essential for occasional sewing |
My honest view is that a good basic machine and a well-tuned zigzag cover a surprising amount of ground. If you sew knitwear often, an overlocker becomes worth considering. If you sew occasionally, I would not treat it as mandatory. The point is to choose the simplest tool that still gives the result you need.
The mistakes that ruin an otherwise good seam
Most bad results come from a few predictable problems, and the fix is usually easier than people think. I see the same mistakes again and again when a seam ripples, stretches out, or refuses to behave.
- Using the wrong needle. A universal needle can work on some knits, but a ballpoint or jersey needle usually gives cleaner results.
- Pulling the fabric. This is the fastest way to create wavy seams, especially on lightweight jersey.
- Setting the stitch too wide. A very wide zigzag can look clumsy on fine fabric and weaken the line of stitching.
- Setting the stitch too dense. If the stitch is too short or too tight, the seam can lose its stretch and feel stiff.
- Skipping the scrap test. Fabric weight, fibre content, and machine tension all change the outcome.
- Ignoring the finish. If raw edges are not managed, fraying can make even a well-sewn seam look untidy.
When a seam starts misbehaving, I diagnose it in this order: needle, fabric handling, stitch width, stitch length, then tension. That sequence usually finds the problem quickly. And once those basics are under control, the stitch becomes much more dependable on real projects.
Where it saves time in real projects
The best way to understand this stitch is to see where it pays off in practice. I use it most often on jobs that are too small to justify a more complex setup, or too stretchy to trust to a straight line.
- T-shirts and tops because the seam needs to stretch when the garment is put on and taken off.
- Leggings and sportswear because repeated movement can split a rigid seam very quickly.
- Swimwear where stretch and recovery both matter, especially around elasticated edges.
- Hems on knits when I want a secure finish without a coverstitch machine.
- Elastic casings when I need an edge that can hold its shape without twisting.
- Small repairs where matching the original construction is less important than making the item usable again.
- Appliqué and patchwork accents when a visible stitch line becomes part of the design rather than a problem to hide.
What I find useful here is not just the stitch itself, but the speed of decision-making it gives you. If you know one reliable method for stretch seams, one for finishing, and one for repairs, you stop wasting time overthinking every small task. That is the real advantage of learning this technique properly, and it is the idea I would keep in mind as a final check.
The habits that make it reliable every time
If I had to reduce the whole topic to a short rule, it would be this: let the stitch support the fabric instead of forcing the fabric to suit the stitch. That means testing on scraps, choosing the right needle, and being honest about what the machine can do well.
For most home sewing, this stitch is not glamorous, but it is quietly essential. It helps you sew garments that need give, repairs that need staying power, and finishes that look clean enough to keep using rather than remaking. If you sew stretch fabric regularly, it is worth learning how your own machine behaves with different widths and lengths. A few minutes of testing usually save a lot more time later.
When I want a seam to move without falling apart, I do not reach for the fanciest option first. I reach for the stitch that behaves properly under pressure, and that is usually enough.
