
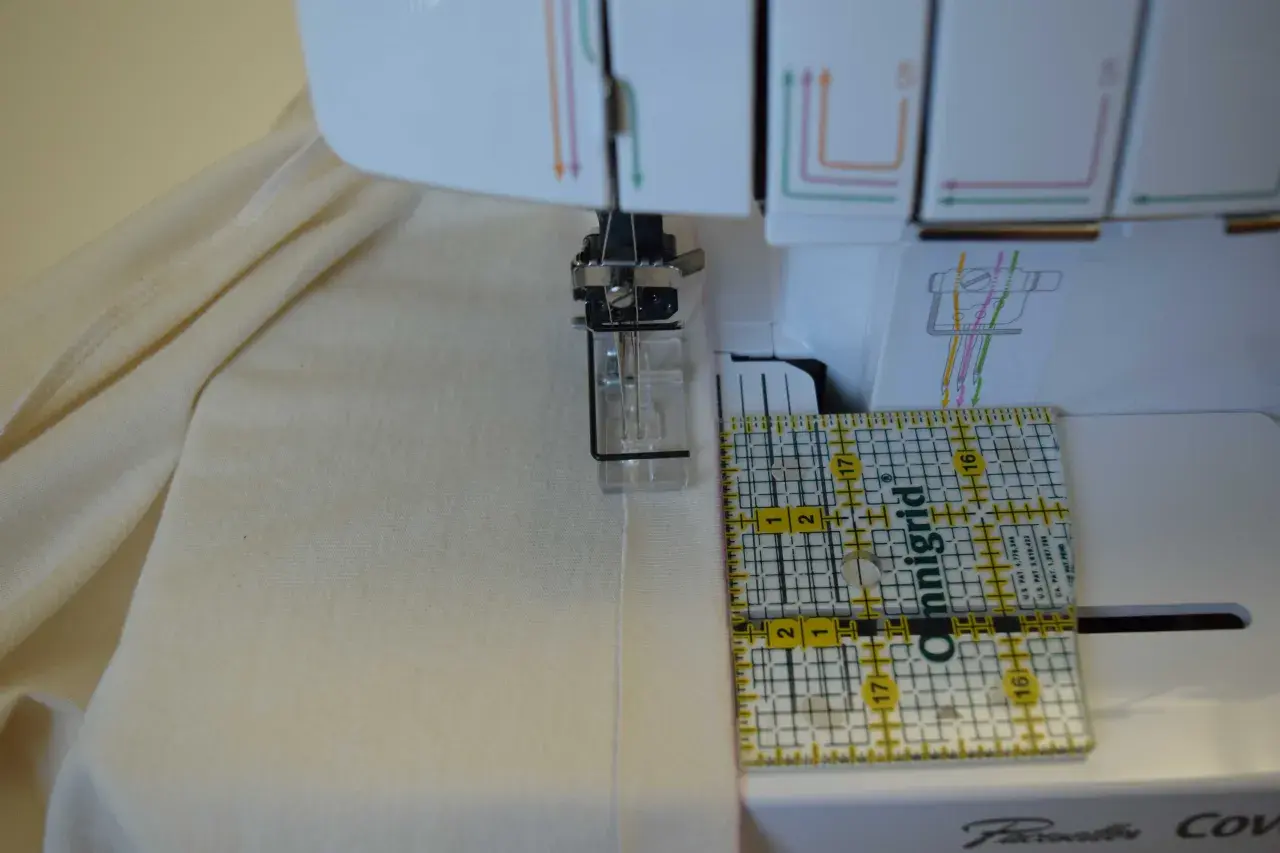
I use a coverstitch machine when I want a hem that looks clean on the outside and still stretches with the garment. Learning how to use a coverstitch machine is mostly about setup, thread order, fabric control, and making small adjustments before you sew the real piece. This guide covers the practical sequence: preparing the machine, threading it, stitching hems neatly, and fixing the problems that usually show up first.
The practical starting points that save the most time
- Start on scrap fabric before you touch the garment, so you can check tension and stitch balance first.
- Use the correct needle system for your machine and replace any bent or blunt needles immediately.
- Set differential feed at 1.0 as a neutral baseline, then adjust for waviness or puckering.
- Do not pull the fabric; guide it lightly and let the feed dogs move it through.
- Leave a short thread chain at the end of the seam if your machine is designed for it, then trim or secure the tail neatly.
- Clean lint regularly around the feed dogs and looper area, because fluffy build-up is a real cause of poor feeding.
What a coverstitch machine actually does
A coverstitch machine is the finishing tool I reach for on knits, jersey, ribbing, cuffs, waistbands, and athletic wear. It creates parallel rows of stitching on the top side and a looped chain underneath, which gives a professional hem without locking the fabric rigid. That matters because stretchy garments need a finish that moves with them instead of fighting the fabric.
It is also easy to confuse this machine with an overlocker. I treat them as different jobs: an overlocker trims and finishes seams, while a coverstitch machine hems and topstitches without cutting the edge. If your garment already has its side seams joined, the coverstitch is usually the machine that makes the hem look ready-to-wear.
| Task | Coverstitch machine | Overlocker |
|---|---|---|
| Hemming stretch fabric | Excellent | Possible, but not the same finish |
| Joining and edge-finishing seams | Not its main job | Excellent |
| Topstitching with stretch | Excellent | Not ideal |
| Cutting fabric while sewing | No | Usually yes |
Most home machines use one, two, or three needles, so you can get a narrower or wider stitch depending on the look and support you need. Once that distinction is clear, the rest of the process becomes much less mysterious.
Set up the machine before you sew
Before I thread anything, I make the machine ready for a clean test sample. A good coverstitch result is built on boring details: the right needle, correct thread, sensible starting tension, and a fabric setting that matches the cloth.
| Setting | Good starting point | Why it matters |
|---|---|---|
| Needles | Use the needle type your manual specifies | The wrong needle is one of the fastest ways to get skipped stitches |
| Thread | Good-quality polyester or spun thread | Helps the stitch stay even and flexible |
| Stitch length | About 3 mm for ordinary hems | Long enough to look clean without crowding the fabric |
| Differential feed | 1.0 | Neutral starting point before you correct stretch or puckering |
| Tension | Mid-range, often around 4 on many home machines | Gives you a balanced sample before fine-tuning |
| Presser foot pressure | Leave it at the default unless the fabric is heavy or very light | Too much or too little pressure can affect feeding |
My own rule is simple: if the sample is wrong, I stop there. I do not “hope” the garment will sew better than the test strip.
- Power off before threading. That is not optional.
- Raise the presser foot while threading so the thread seats properly in the tension disks.
- Bring the needles to the highest position before you start.
- Use the fine or standard fabric setting on your machine, if it has one, before chasing tension numbers.
Once the machine is ready, the thread path matters more than any fancy adjustment, so I move on to threading and the first test chain.
Thread it in the right order
Threading is where many people lose patience, usually because they try to improvise. I do the opposite: I follow the machine’s order exactly, because the sequence really does matter. On many home coverstitch machines, the looper is threaded before the needles, and any top cover stitch attachment is threaded according to the model instructions.
- Switch the machine off and raise the presser foot.
- Turn the handwheel until the needles are at their highest point.
- Place the thread cones or spools securely and make sure they feed smoothly.
- Thread the looper path first, passing through the guides and tension disks in the correct order.
- Thread the selected needle or needles, keeping the thread path clean and untangled.
- If your machine has a top cover stitch function, thread that path only when you actually need it.
- Pull the thread tails to the back and sew 3 to 5 stitches on scrap fabric before moving to the garment.
A good test chain should form smoothly without the threads jumping out of the guides. If the thread slips out of a notch or looks loose, I stop and rethread rather than forcing the machine to cooperate.
If your model has a tension release clip, a built-in needle threader, or a fine-mode switch, use those features exactly as intended. They are there to reduce friction and improve stitch quality, not to be skipped when the setup feels awkward.
Stitch the hem cleanly on the garment
For a first proper hem, I like to work on a folded T-shirt, cuff, or jersey skirt rather than a flat sample. Fold the hem to the wrong side and press it well, because the machine will follow a pressed edge more reliably than a vague fold. Mark the finished edge on the right side with tailor’s chalk, then position the fabric so the left needle drops just to the left of that line.
That placement matters more than beginners expect. If the needle lands too far in, the hem looks too wide; too far out, and the raw edge may not be fully secured. A neat coverstitch is really a positioning exercise.
- Start with a scrap leader under the foot so the stitch forms before the garment arrives.
- Sew slowly for the first few stitches, then settle into a steady pace.
- Keep the fabric flat in front of and behind the foot, but do not tug it.
- Guide curves gently instead of forcing them through the needle area.
- Use the free arm, if your machine has one, for sleeves, cuffs, and trouser legs.
At the end of the seam, I usually produce a short thread chain, then trim it to a manageable tail. A chain of about 12 cm is enough to work with, and leaving roughly 5 cm at the fabric edge makes finishing easier. If your machine or project does not suit a visible chain, pull the threads to the wrong side and secure them there instead.
The real habit to build here is restraint. The machine should feed the fabric, not your hands.
Adjust the stitch for different fabrics
Different fabrics ask for different treatment, and this is where a coverstitch machine earns its keep. I do not change everything at once; I adjust one variable, test again, and keep notes. That approach is slower for five minutes and much faster over the life of a project.As a baseline, 1.0 is the neutral differential feed setting on many machines. Lower numbers can help fine fabrics that tend to pucker, while higher numbers can help stretchy knits stay flatter. If your cloth starts to ripple, the answer is usually not “more pressure” from your hands.
- Wavy hem on jersey - raise differential feed a little and retest.
- Puckering on lightweight fabric - lower differential feed slightly and check tension.
- Stitches feel too tight - back off the needle or looper tension in small steps.
- Heavy knit or sweatshirt fleece - use the correct needle size, slow down, and support the fabric rather than forcing it.
- Decorative topstitching - test the thread choice first, because thicker decorative thread behaves very differently from standard polyester.
If your machine has a fine and standard setting, use the fine setting for delicate knits and the standard setting for heavier fabrics before you start micro-adjusting tension. I have found that this saves a lot of false troubleshooting.
When the fabric behaves, the stitch looks intentional instead of accidental, which is exactly the point of this machine.
Fix the mistakes that matter most
Most coverstitch problems are annoyingly ordinary. The good news is that they usually point to setup, not a broken machine. When I troubleshoot, I start with the simplest causes first: threading, needle condition, tension, and fabric support.
| Symptom | Likely cause | First fix I would try |
|---|---|---|
| Needle thread breaks | Machine threaded incorrectly, tension too tight, needle bent or blunt, wrong needle, fabric too heavy | Rethread with the presser foot up and replace the needle |
| Skipped stitches | Needle inserted incorrectly, blunt needle, tension off, wrong thread path, fabric too heavy | Check the needle, then rethread and lengthen the stitch slightly |
| Seam puckering | Tension imbalance, wrong fabric setting, thread that stretches too much | Adjust tension in small steps and confirm the fine or standard mode |
| Fabric does not feed smoothly | Presser foot raised, pressure too weak, lint packed around the feed dogs | Lower the foot, increase pressure slightly if needed, and clean the machine |
One practical detail that saves time: if stitches show up on the right side where you do not want them, use tweezers to pull the threads to the wrong side and knot them before you decide to unpick the whole seam. That is often cleaner than ripping out a nearly good hem.
If a problem keeps returning after you change one thing, I stop and inspect the needle again. On this machine type, a slightly bent or poorly inserted needle can create more drama than the tension dials ever will.
Keep the finish neat after sewing
The last part of using a coverstitch machine is not glamorous, but it protects every future hem. I clean lint from the feed dogs and looper area regularly, especially after sewing fleece, ribbing, or brushed knits. Dust build-up changes how the machine feeds, and a machine that does not feed cleanly will never stitch cleanly for long.
- Change a damaged needle straight away.
- Keep a few scrap strips beside the machine for starting and stopping.
- Write down the settings that worked for each fabric.
- Retest whenever you switch from a light jersey to a heavier knit or sweatshirt fabric.
- Store the machine with the thread path tidy so the next setup starts easier.
I also keep a simple note of what worked: fabric type, needle, thread, stitch length, differential feed, and tension. That sounds minor until you are hemming the same fabric three weeks later and want the same result without guessing. Once the sequence becomes familiar, the machine stops feeling temperamental and starts behaving like the precise finishing tool it is meant to be.
