
Most sewing machine problems come down to a short list of culprits: threading, the needle, the bobbin, lint build-up, or the fabric itself. I start with those first because they solve far more issues than random tension changes ever do. In this guide, I walk through the symptoms, the likely cause behind each one, and the order I use when I troubleshoot a machine at home.
The fastest fix is usually to rethread, change the needle, and clear the bobbin area
- A tangled mess under the fabric usually points to upper threading or bobbin placement, not a mysterious machine failure.
- Skipped stitches often come from a dull, bent, or wrong needle for the fabric.
- Puckering is usually caused by tension, stitch length, or a poor match between needle and fabric.
- If the handwheel locks or the machine grinds, stop and clear the jam rather than forcing it.
- Changing the needle after about 8-10 hours of sewing is a simple habit that prevents a lot of damage.
The quickest way to narrow down the fault
When a machine misbehaves, I do not start by turning every dial. I look at the symptom first, because the symptom usually points to the real cause. A machine that loops underneath is telling you something different from one that skips stitches or jams on thick seams.
| What you see | What it usually means | What I check first | When I stop troubleshooting |
|---|---|---|---|
| Thread nests under the fabric | Upper threading is not seated correctly or the bobbin is not wound or inserted properly | Rethread with the presser foot raised and reload the bobbin | If the same nest returns after a full rethread |
| Thread breaks repeatedly | Needle, thread quality, or thread path friction | Replace the needle and check for snags in the guides | If new thread and needle make no difference |
| Skipped stitches | Wrong, dull, or bent needle, or sometimes timing | Fit the correct needle for the fabric | If it still skips across several fabrics |
| Puckered seams | Tension, stitch length, or fabric handling | Lengthen the stitch and reduce tension slightly | If the fabric still distorts after adjustment |
| Grinding or lock-up | Thread jam or debris in the hook area | Power off and clear the bobbin area | If the handwheel will not turn freely by hand |
The rule I trust most is simple: if the machine behaves badly on different fabrics, the setup is the likely issue; if the fault appears only on one tricky fabric, the material is part of the answer. That distinction saves a lot of wasted time, and it leads neatly into the most common threading faults.
When thread loops, breaks, or turns into a nest
Loose loops, shredded thread, and the classic bird’s nest under the fabric usually come from the upper thread path. I first check whether the thread is actually sitting in every guide, especially the take-up lever, because one missed guide can create a messy stitch that looks like a tension fault but is really a threading fault.The presser foot matters here too. When the foot is down, the tension discs are engaged; when it is up, the thread can slip into position more easily. I rethread with the foot raised, then lower it and test on scrap fabric before changing any tension setting. That small habit prevents a lot of unnecessary tinkering.
- Check that the spool is feeding smoothly and is not catching on a notch or a badly sized spool cap.
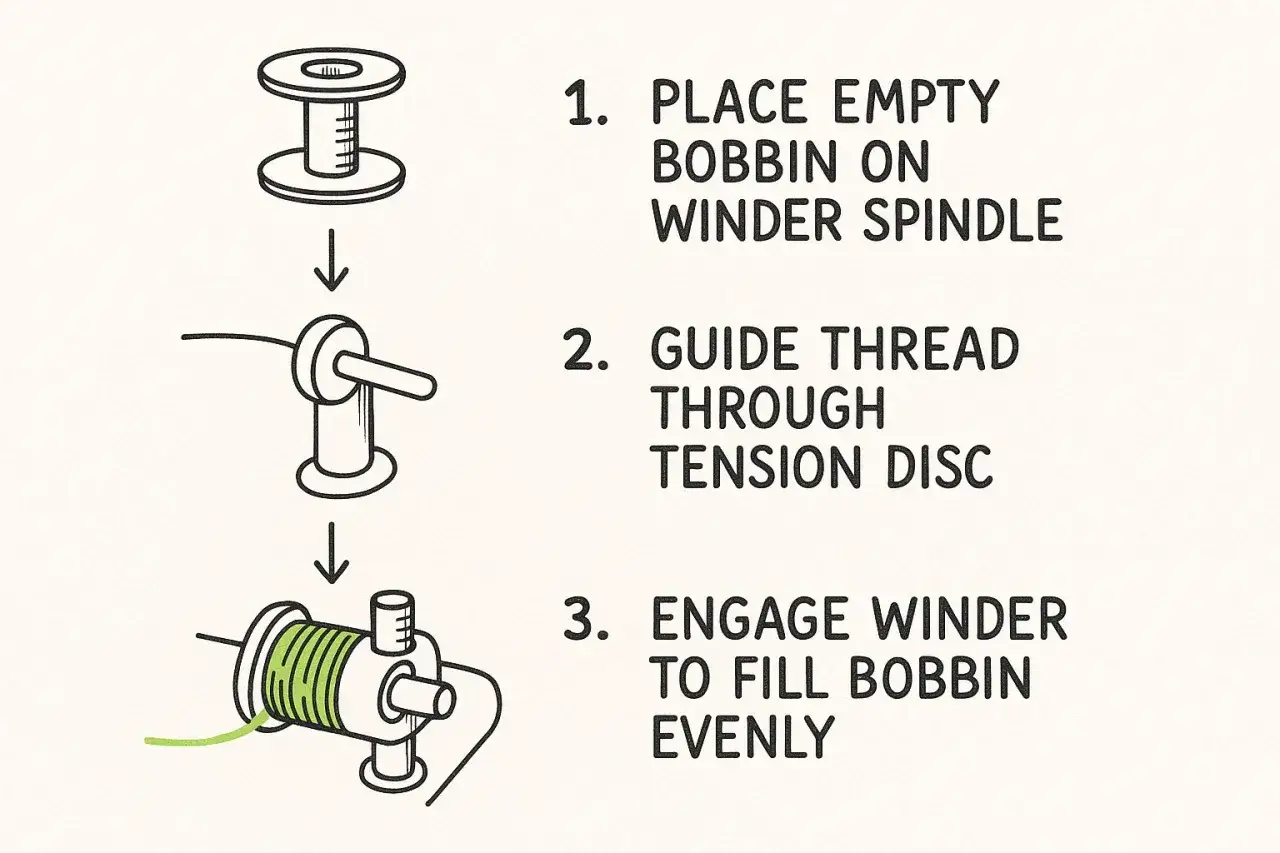
- Rewind or replace bobbins that look uneven, loose, or overfilled.
- Inspect the bobbin case for lint, burrs, or tiny thread fragments.
- Use the bobbin direction specified in the manual, not the direction that looks convenient.
- Swap out old thread that has gone fuzzy, brittle, or inconsistent.
A bird’s nest is the tangled wad of thread beneath the fabric, and in practice it usually means the top thread is not being controlled properly. If the fault still returns after a full rethread and a clean bobbin area, I stop blaming tension and start looking for a damaged bobbin case or a deeper mechanical issue. Once the thread path is reliable, the next weak point is usually the needle itself.
Skipped stitches and broken needles usually start with the needle
If a stitch disappears every few inches, or the needle snaps as soon as the fabric thickens, I reach for a fresh needle before I touch anything else. A dull or bent needle may still look acceptable to the eye, but it will stop the machine from forming a clean stitch. That is especially true on knits, denim, leatherette, and layered seams.
I match the needle to the fabric instead of assuming one universal needle will do the job. A ballpoint or stretch needle is better for jersey and other knits, while a denim or sharp needle is the safer choice for dense woven fabric. For thicker topstitching thread, a needle with a larger eye helps reduce friction. The point is not to memorise every type, but to stop using a needle that fights the material.- Insert the needle fully into the clamp so it sits at the correct height.
- Install it in the orientation shown in the manual; on many domestic machines the flat side faces the back.
- Do not pull the fabric through the machine, because that can deflect the needle and bend it.
- Slow down at bulky seams, zip tape, and topstitched edges.
- Replace the needle after roughly 8-10 hours of sewing, or sooner if it hits a pin or feels rough.
If the needle and fabric are both correct and the machine still skips stitches on multiple projects, I think about timing. Timing is the point where the needle and bobbin thread meet to form a stitch, and once that relationship is off, the machine needs proper adjustment rather than guesswork. That is the moment when a repair becomes more sensible than another round of trial and error.
Puckering and poor feeding are usually fabric issues, not bad luck
When a seam pulls in, ripples, or refuses to feed smoothly, I look at the relationship between stitch length, thread tension, and fabric thickness. Very short stitches can crowd the fabric and make it pucker. Excessive tension can do the same thing, especially on lightweight cottons and delicate dress fabrics.
Feed dogs, the toothed bars under the presser foot, are responsible for moving the fabric forward. If they have been lowered for free-motion work, the machine will not feed normally. I also check whether the presser foot pressure is appropriate for the material. If the machine allows adjustment, lighter pressure usually helps thicker layers move more freely, while firmer pressure can improve grip on very fine or slippery fabric.
- Lengthen the stitch before increasing tension.
- Use a finer needle on delicate fabric and a stronger needle on dense fabric.
- Add stabiliser to stretch, sheer, or very soft fabrics that need support.
- Use a walking foot when multiple layers, quilting, or slippery textiles are involved.
- Guide the fabric gently; do not tug from behind the machine.
In my experience, seam distortion is often a fabric-and-settings mismatch rather than a sign that the machine is failing. When I sort out feeding first, the machine usually stitches much more cleanly, which makes the next issue easier to identify if the seam still refuses to behave.
Jams, grinding noises, and a machine that has seized
When a machine suddenly locks up, makes a grinding sound, or the handwheel becomes hard to move, I stop immediately. Forcing the wheel or pressing the pedal harder is how a simple thread jam becomes a bent needle, a damaged hook, or worse. The first move is always to switch the machine off and clear the fabric path safely.
I remove the presser foot, take out the needle if it is bent, and open the bobbin area. On many machines, the problem is a tangle around the rotary hook, which is the part that catches the upper thread around the bobbin to form a stitch. A small brush works better than shoving lint deeper into the mechanism. If thread has wrapped tightly around the hook, I cut it free carefully rather than dragging it out.
- Unplug the machine before reaching into the bobbin area.
- Turn the handwheel towards you by hand only if it moves smoothly.
- Check the bobbin for the correct size and shape for your machine.
- Look for bent needles, trapped thread, or broken needle fragments around the plate.
- Stop if you smell burning, hear metal-on-metal scraping, or feel resistance that does not clear.
If the handwheel still will not turn freely after the jam is cleared, I treat that as a service issue. At that stage the problem is no longer ordinary user maintenance, and continued forcing is more likely to create damage than a solution. That is why my final step is always prevention, not just repair.
What I check before I book a repair
A machine does not need to be broken to deserve a service, and I would rather prevent a major fault than pay for it later. For a machine that gets regular use, I like a yearly service, and I shorten that interval if the machine handles heavy fabrics, quilts, or long sewing sessions. The same goes for a machine that has just suffered a jam or a needle strike.
- Change the needle regularly, not only when it snaps.
- Clean the bobbin area and feed dogs after lint-heavy projects.
- Use the bobbins and needles specified in the manual, not just whatever fits loosely.
- Oil the machine only if the manual explicitly says to do so.
- Keep the machine covered and dry when it is not in use.
When I narrow a fault down this way, the process becomes predictable instead of frustrating. Most machines are not mysterious at all; they are simply sensitive to a few repeat mistakes, and once those are out of the way, sewing becomes far more reliable.
