
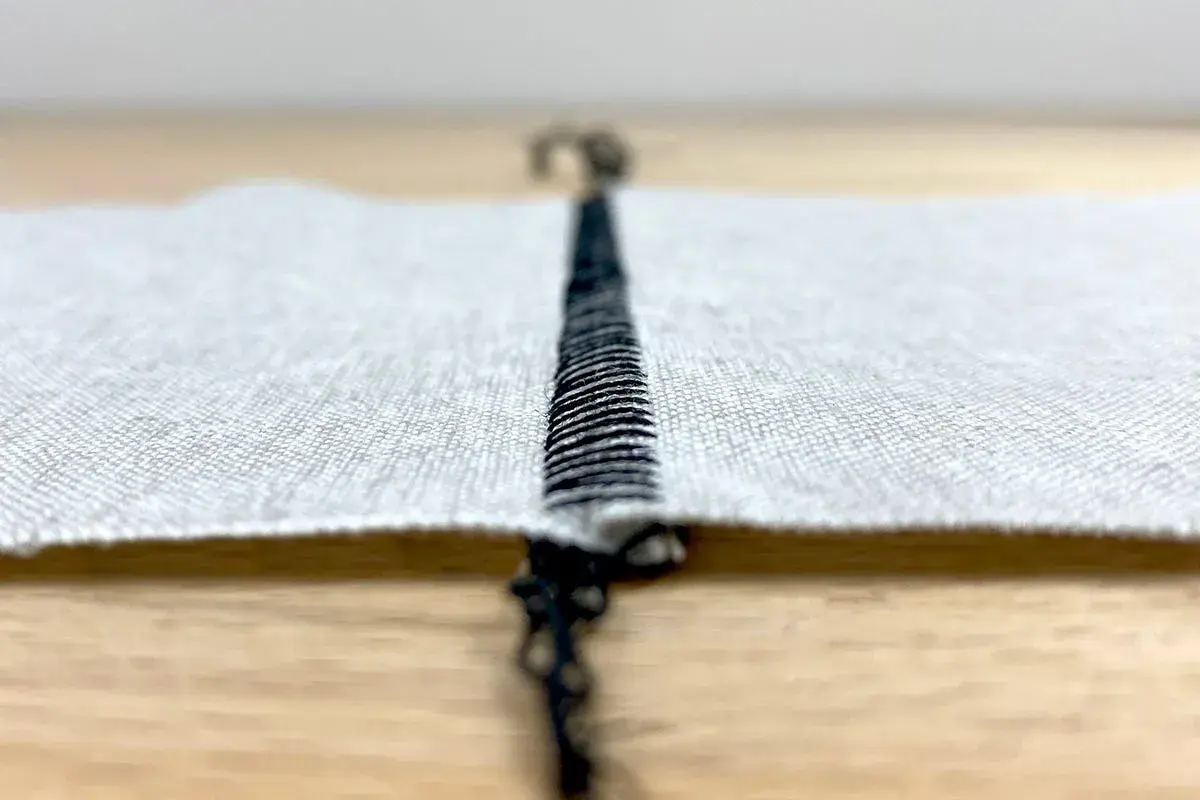
The short version is that flatlock joins layers with little bulk, while coverstitch finishes hems with stretch.
- Flatlock is best when you want a seam to open flat on fleece, sportswear, lingerie, or decorative joins.
- Coverstitch is the better choice for T-shirt hems, cuffs, leggings, and any edge that must keep its stretch.
- Flatlock is usually made on an overlocker with tension adjustments; coverstitch needs a coverstitch machine or combo unit.
- A good test seam matters more than the exact settings on the first try, because fabric weight changes everything.
- For UK buyers, the bigger decision is often whether to buy a dedicated machine or a combination model.
What flatlock is really doing inside the seam
Flatlock is not just a decorative trick. It is a seam that is deliberately set up to open out so the joined fabric sits almost level with the surface, which makes it useful wherever bulk is a problem. I use it most often on knitwear, fleece, and activewear because it removes that ridged seam feel you get from standard construction.
The key detail is that the machine is not trying to hide the join; it is trying to flatten it. On the right fabric, that gives you a clean ladder-like effect on one side and a neat looped edge on the other, so the seam can be functional and decorative at the same time. Most flatlock settings are created on an overlocker, the machine many sewists outside the UK call a serger, and they usually involve removing a needle and loosening the thread balance so the seam can spread open. Once that distinction is clear, the stitch structure itself starts to make sense.How coverstitch is built and why hems behave differently
Coverstitch works differently. It places parallel rows of stitches on the right side of the garment and a looper chain underneath, which locks the hem while still letting the fabric stretch. That is why it looks so much like ready-to-wear hemming on T-shirts, leggings, and dancewear.
Most home coverstitch machines use two or three needles, and some premium models add a top cover stitch for a more decorative finish on the face of the fabric. I think of it as a specialist hemming system rather than a general seam maker: it is brilliant at one job, and very specific about how that job should look. That difference explains why the comparison is less about looks and more about the job the seam has to do.
How the two stitches compare on fabric, stretch, and bulk
When I compare them properly, I look at what the seam has to survive, not just how it photographs. A seam on a sweatshirt side panel, a hem on a jersey dress, and a finish on swimwear all demand different things.
| Feature | Flatlock | Coverstitch | Why it matters |
|---|---|---|---|
| Main job | Join pieces with very low bulk | Finish hems and topstitch stretchy edges | One is a construction seam, the other is a finishing seam |
| Look | Can be reversible, with a ladder-like side and a looped side | Parallel rows on top, looper thread underneath | The visible effect helps you choose the right side of the garment |
| Best fabrics | Knitwear, fleece, lingerie, sportswear | Jersey, rib knit, stretch hems, cuffs, bindings | Both handle stretch, but they use it differently |
| Bulk | Very low | Low at the hem, but not meant for joining thick layers | Bulk control is where flatlock usually wins |
| Machine | Overlocker with flatlock capability | Dedicated coverstitch machine or combo unit | Machine choice affects cost and setup time |
| Common starting point | Often 2 or 3 threads with tension adjusted from the middle outward | Usually 2 or 3 needles depending on the hem width | Testing matters because exact settings change with fabric |
As a rule, flatlock is more forgiving of bulky layers and more interesting visually; coverstitch is more reliable where the edge must recover after stretching. The practical choice comes down to whether the seam lives inside the garment or sits at the edge.
When flatlock earns its place in garment construction
I reach for flatlock when bulk is the enemy. That means fleece seams, sportswear panels, soft layer seams in loungewear, and any place where I want the join to feel almost invisible against the skin. It is also a strong choice for decorative seam detailing, especially if I switch to a heavier or more contrasting thread so the stitch becomes part of the design.
It can work beautifully on lighter stretch fabrics too, but I would not use it blindly. On very rigid fabric, the seam may not open cleanly; on very thick fabric, the result can become clumsy rather than flat. I have also seen it used for delicate joins where low bulk matters more than raw seam strength, such as lace layered with silk. The common thread is simple: if the seam needs to sit flat and stay comfortable, flatlock is doing real work, not just ornamental work. That makes the next question obvious: when should the edge itself be handled by a different stitch?
When coverstitch is the better finish
Coverstitch is the cleaner answer when the garment edge has to stretch and still look deliberate. I would choose it for T-shirt hems, leggings, cuffs, necklines, bindings, and sportswear hems that need to survive movement and repeated washing. The stitch is especially good when the right side of the garment matters visually, because the parallel rows give a polished ready-to-wear look.
It also earns its place when I want reinforcement without stiffness. A triple coverstitch gives more security for activewear and heavier knits, while a narrower version can look less heavy on fine jersey. On many machines, stitch speeds sit around 1,000 to 1,300 stitches per minute, which matters if you hem a lot and want production-style efficiency at home. If the seam is meant to finish the edge rather than join two bulky pieces, coverstitch usually wins without much argument. The real problems begin when the wrong settings are used for the wrong fabric.
Mistakes that create puckering, tunnelling, and weak seams
The problems I see most often are not machine failures; they are setup and expectation failures.
- Using flatlock on fabric that is too thick or too rigid, then wondering why the seam will not open flat.
- Pulling the seam apart aggressively before the stitches have settled, which can distort the balance.
- Setting coverstitch tension too tight, which creates tunnelling between the needle rows.
- Ignoring differential feed, the mechanism that changes how fast the front and back feed dogs move; on knits, it helps prevent stretching or waving at the edge.
- Skipping test strips and going straight to the garment, even though a 10 cm sample usually tells you everything you need.
My own habit is to change one variable at a time and retest in small steps, usually no more than one tension point or half a millimetre of stitch-length adjustment at once. That is slower at the start, but it saves fabric and frustration. If you are choosing a machine next, the buying decision matters almost as much as the stitch choice itself.
What machine setup makes sense in a UK sewing room
In UK retail, dedicated coverstitch machines I checked sit roughly from about £489 to £999 for the mainstream range, while combination overlocker-and-coverstitch machines often start around £645 and can climb well above £1,395. That spread matters because flatlock capability usually comes bundled into an overlocker you may already own, while coverstitch is often a separate purchase.
- Choose a flatlock-capable overlocker if you already sew seams and want low-bulk joins without adding another machine to the room.
- Choose a dedicated coverstitch machine if you hem knits often and want the fastest path to a polished finish.
- Choose a combo machine if space is tight and you are happy to convert between modes, but expect a slower workflow.
- If you mostly make T-shirts, leggings, and childrenswear, a coverstitch machine will probably earn its keep faster.
- If you make fleece, sports layers, lingerie, or decorative activewear, flatlock will probably get used more than you think.
For most sewists, the real question is not which stitch is better in the abstract, but which one will be used on Tuesday night when you are trying to finish a garment cleanly. That is the standard I use when I narrow the choice down.
The decision rule I use for everyday knits and activewear
If the seam must disappear into the fabric and stay as flat as possible, I choose flatlock. If the edge is a hem, cuff, or visible finish that has to stretch and look neat, I choose coverstitch.
When I am working on garments for real wear rather than display, I also ask one blunt question: will this stitch be seen more as a seam or more as a finish? That question usually settles the debate immediately. A twin needle can imitate coverstitch on a regular machine, but it does not replace the way a real coverstitch handles stretch, and a standard zigzag does not give you the same low-bulk flat join as a proper flatlock.
So I would treat flatlock as the seam for joining and relief, and coverstitch as the seam for hems and edge discipline. That is the simplest way to avoid buying the wrong machine, using the wrong finish, or overcomplicating a garment that only needed the right stitch in the first place.
