
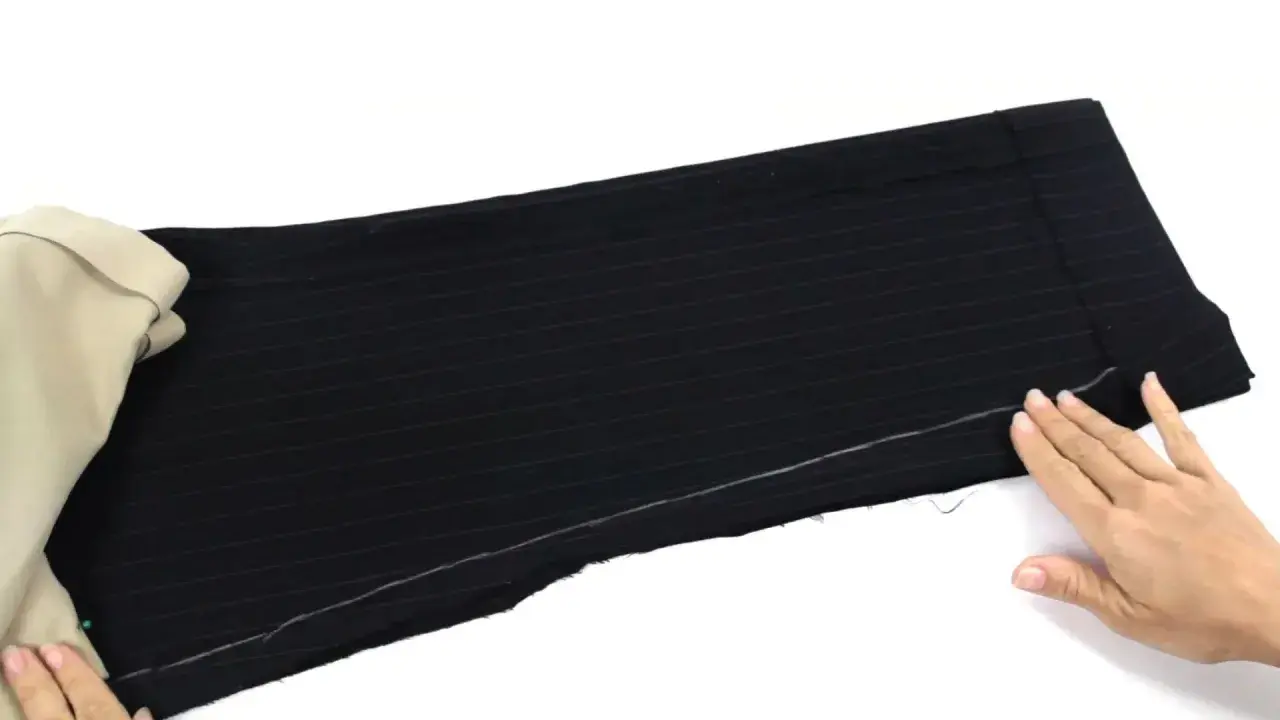
Changing the shape of a trouser leg can make a pair feel sharper without replacing the whole garment. Knowing how to taper pants properly can save a pair that fits well everywhere except the lower leg, but the trick is to remove width in a way that still lets the garment hang cleanly. In this guide, I cover the measuring, marking, stitching, and finishing steps, plus the denim-specific details that matter if you want a neat result rather than a pinched, twisted hem.
Key things to know before you start
- Measure the new leg shape on the body first, then mark the line with chalk before cutting anything.
- Most clean tapers begin around the knee and blend down to the hem.
- For a small change, the inseam is often enough; for a bigger change, split the adjustment across both seams if the construction allows it.
- Always baste and try the trousers on before trimming seam allowance away.
- Jeans need heavier needles, slower stitching, and extra care around flat-felled seams and original hems.
Measure the new leg shape before you touch a seam
I start by asking one simple question: how much narrower should the leg actually be? That sounds obvious, but it is where most alterations go wrong. If you guess too aggressively, the trousers can end up pulling across the calf or twisting at the side seam. If you are only taking in a little, a reduction of about 1.5 to 3 cm per leg is often enough to slim the line without changing the character of the garment.
The best way to check is to turn the trousers inside out, put them on, and mark the new line with tailor’s chalk while standing naturally. I usually begin at the knee or just above it, then blend the line down to the hem with a ruler or French curve. That gives the leg a smooth taper instead of a sharp angle. If you are unsure, mark two versions, one conservative and one more fitted, then baste the safer option first. Once you know the amount, the next decision is where that width should come out.
Choose the seam that should do the work
There is no single correct seam to alter. The right choice depends on the garment construction, the size of the change, and how visible you want the alteration to be. I usually think of it as a balance problem: the more the reduction is spread out, the more natural the leg tends to look.
| Where to taper | Best for | Why I would choose it | Watch out for |
|---|---|---|---|
| Inseam only | Simple trousers, subtle slimming, many jeans | It is usually less visible from the front and easy to blend into the existing shape. | If the reduction is large, the leg can shift slightly and look unbalanced. |
| Outseam only | Trousers with a plain outer seam and enough room to work | Useful when the inseam contains bulk, pockets, or a more complicated construction. | The change can be more noticeable, especially on tailored trousers. |
| Both seams | More dramatic tapering or wide legs that need a cleaner overall line | Spreads the reduction so the leg keeps its centre and hangs more evenly. | You must keep both sides symmetrical or the leg can twist. |
For dress trousers, I often prefer the inseam for a modest change because it is discreet. For jeans or wider legs, I will split the reduction between both seams if the construction allows it, because that keeps the silhouette more balanced. The actual sewing is straightforward once this decision is made, provided you test the fit before you commit.
Sew the taper and test it before trimming
The cleanest alterations follow the same order every time: mark, baste, fit, sew, then finish. If you rush straight to the final seam, you lose the chance to correct the line while it is still adjustable. I prefer to work slowly here, because even a small mistake is easier to see once the hem is on and the leg is moving.
- Turn the trousers inside out and mark the new taper line from the knee to the hem.
- Blend that line into the original seam above the knee so the change looks intentional.
- Pin along the marked line, keeping the fabric flat and avoiding puckers.
- Baste by machine or hand with a long stitch so you can remove it easily.
- Try the trousers on, walk a few steps, and check how the leg falls over your shoe.
- If the line looks right, sew the permanent seam with a standard stitch length of about 2.5 to 3 mm.
- Trim and finish the seam allowance only after you are certain the fit works.
- Press the seam carefully, because pressing does more to make the alteration look professional than most people expect.
I keep at least 1.5 cm of seam allowance until I am satisfied with the result. That gives you room to correct a line that turns out too tight. If the trousers have a strong shape through the thigh, do not force the taper too high up the leg. The next question, especially with denim, is how to handle the original construction without making the alteration bulky.
Handle jeans differently from tailored trousers
Jeans are their own category. The fabric is heavier, the seams are often thicker, and the factory finish can be very visible. If you treat denim like a light pair of dress trousers, the result usually looks bulky or uneven. For a cleaner outcome, I use a denim needle in size 90/14 or 100/16, polyester thread, and a slightly longer stitch length if I am matching topstitching on the outside.
When the seam is flat-felled
Many jeans use flat-felled seams, which means the raw edge is enclosed and stitched down. That is durable, but it also makes alteration work slower. You may need to unpick the topstitching, open the seam, sew the new line, and then rework the felled edge so the bulk does not show through. If the denim is thick, I would rather reduce the taper a little than force an over-bulky seam through the machine.
Read Also: Sew a Button on Pants - Easy Fix for Jeans & Trousers
When you want to keep the original hem
If the hem has a faded wear line or a distinctive factory finish, preserve it if you can. The neatest method is often to taper first, then reattach the original hem so the bottom edge still looks authentic. That matters more on jeans than on almost any other trouser, because the hem is part of the garment’s character. On stretch denim, I also leave a touch more room at the calf than I would on rigid denim, because extra tightness there tends to create diagonal drag lines.
Once the construction details are under control, the remaining problems are usually down to fit errors rather than sewing technique.
Avoid the fit mistakes that make the leg twist
Most bad tapers are not caused by poor stitching. They come from a shape that was altered in the wrong place, or altered too much. When the line is off, the leg can twist around the calf, the hem can kick out, or the side seam can start travelling towards the front of the leg.
- Starting too high makes the whole leg feel trapped, especially if the thigh already fits closely.
- Taking too much from one seam can shift the balance and make the leg look as if it was twisted during sewing.
- Skipping the basting stage removes your chance to test the shape before it becomes permanent.
- Cutting away excess too early leaves you with no room to correct the line.
- Ignoring the knee is a classic mistake, because that is where the leg needs room to bend.
- Forgetting to press makes even a well-sewn alteration look homemade.
My rule is simple: if the fit looks wrong while the trousers are still basted, it will not magically improve after trimming. A flat, balanced line through the knee and calf is the real goal. If that balance is impossible to achieve, the issue may not be the leg width at all.
Know when narrowing the leg is not the right fix
Sometimes the trousers do not need a taper, they need a different alteration altogether. If the seat is pulling, the crotch is too tight, or the thigh is already strained, narrowing the lower leg can make the garment feel even worse. I would also be cautious if the pockets begin to gape, the crotch seam rides up, or the trousers pull diagonally from the hip to the knee. Those are signs that the upper fit is carrying the problem.
In those cases, the better fix may be to adjust the waist, the rise, or the thigh before touching the lower leg. If the garment is simply the wrong cut for your body, no amount of tapering will make it hang naturally. That is why I prefer to check the whole silhouette before I sew the final line, not just the hem width.
The final fitting check that keeps the result clean
Before I press the alteration as finished, I always do three things: I walk, I sit, and I look at the leg from the side. That last view is the most revealing, because it shows whether the taper runs smoothly from knee to hem or suddenly pinches in too hard.
- Check that both legs match in width and length.
- Make sure the hem still hangs evenly over the shoe.
- Look for diagonal lines pulling across the calf or shin.
- Press the seam in the same direction as the original construction wherever possible.
A careful taper is less about making the leg skinny and more about preserving the line of the garment. If you keep the change modest, test it with a basting stitch, and respect the original construction, the result usually looks as if it was made that way from the start.
