
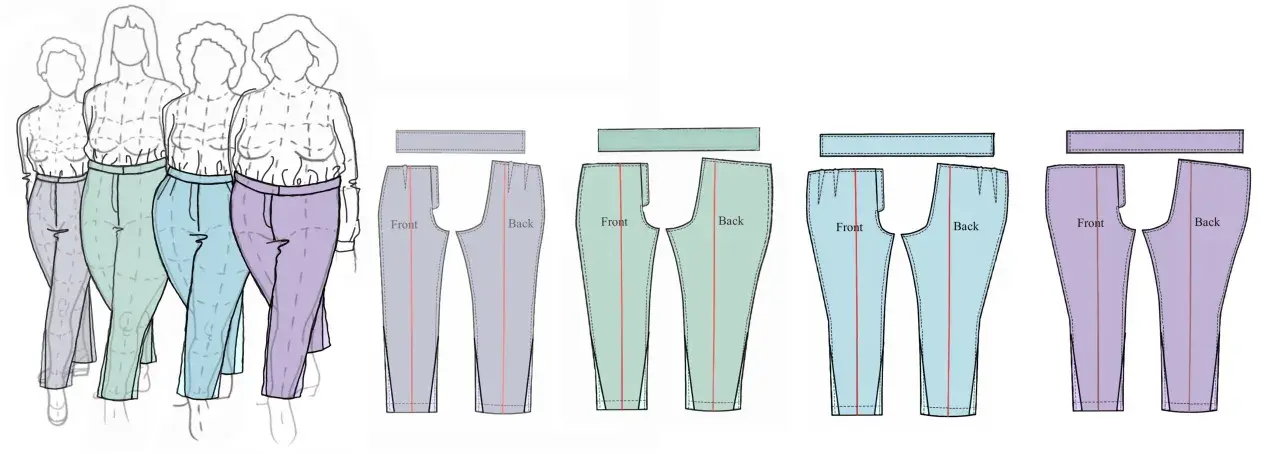
The lower half of trousers does more work than most people notice: it shapes the silhouette, controls movement, and decides how the hem sits over a shoe. In this article I focus on trouser legs as a design and sewing detail, so you can read the construction, choose a shape with confidence, and finish it neatly. I’ll cover the parts that matter, the fit signals I watch for, and the alterations that make the biggest difference.
The key points at a glance
- The leg section runs from the crotch area to the hem, and its shape affects both comfort and style.
- Inseam, outseam, knee line, hem allowance, and break are the measurements I check first.
- Straight, tapered, wide, flared, and cropped legs all behave differently on the body and over footwear.
- A blind hem usually suits tailored trousers, while jeans and casual styles often need a deeper topstitched finish.
- Most leg alterations work best when the garment is still balanced on grain and the crotch fit is left alone.
What the lower leg section actually includes
When I talk about the leg, I mean the section that starts where the body opens into two separate tubes and ends at the hem. The most useful landmarks are the inseam, which runs along the inside of the leg, the outseam, which sits on the outside, the knee line, and the hem opening. I also pay attention to the break, which is the small fold the hem makes as it rests on the shoe.
This matters because a leg can look “right” on the hanger and still behave badly once someone walks, sits, or bends. If the fabric twists, pulls, or collapses, the issue is often not the waistband at all; it is usually the way the leg was drafted, cut, or sewn. Once those parts are clear, the shape becomes much easier to judge.
How leg shape changes the look and the fit
I treat leg shape as the fastest way to change the character of a pair of trousers without rebuilding the whole garment. A small change at the knee or hem can make the same pattern read as sharp, relaxed, classic, or very fashion-led.
| Shape | What it does | Best for | Watch out for |
|---|---|---|---|
| Straight | Keeps a consistent width from thigh to hem, which gives a clean vertical line. | Everyday wear, work trousers, and jeans that need to stay versatile. | Can look boxy if the leg is too wide or the hem is too long. |
| Tapered | Narrows gradually toward the ankle, making the leg look neater and more directional. | Modern tailoring, cropped trousers, and denim that needs less bulk at the ankle. | Too much taper can trap the calf or make the hem ride up. |
| Wide | Falls away from the body and creates more movement and drape. | Fluid fabrics, relaxed tailoring, and styles that should feel airy. | Needs enough weight and length to hang well; otherwise it can flap rather than flow. |
| Flared | Stays narrow through the thigh and opens below the knee. | Balancing the upper body, highlighting a shoe, or creating a stronger fashion line. | Looks awkward if the flare starts too high or the hem sits at an unhelpful length. |
| Cropped or turned-up | Shortens the leg visually and draws attention to the ankle and footwear. | Spring looks, casual denim, and styles where the shoe is part of the outfit. | Can shorten the line if the crop lands at the widest part of the calf. |
My own rule of thumb is simple: straight legs are the safest starting point, taper sharpens the silhouette, wide legs ask for better drape, and flare only works when the proportion above it is under control. From there, fitting is mostly about measurement rather than guesswork.
How I measure a leg before I cut or alter it
I always measure both legs separately, even on a pair that looks symmetrical. Bodies are not perfectly even, and neither are many trousers after wear. The goal is not a mathematically perfect garment; the goal is a leg that hangs cleanly and feels balanced in motion.
- First, I check the inseam from the crotch point to the hem on both legs.
- Then I compare the side seams so I can see whether one leg has twisted or stretched more than the other.
- After that, I mark the knee line, because that is where tapering and widening usually need to be blended smoothly.
- I pin the hem while the trousers are being worn with the shoes they are actually meant to meet.
- Before I cut anything, I fold the garment flat and check that the side seams match and the hemline reads level from left to right.
That last check saves a lot of mistakes. I have seen more than one pair shortened beautifully on one leg and left awkwardly uneven on the other because the maker measured from the waistband instead of the inseam. Once the measurements are stable, hemming becomes the final precision step.
Hemming details that make the difference
The hem is not just a finishing edge; it is part of how the entire leg hangs. A hem that is too shallow can fray or flip, while one that is too deep can make the fabric feel heavy and clumsy at the ankle. I choose the finish based on the fabric, the weight of the garment, and how visible I want the stitching to be.
| Hem method | Best for | Typical allowance | Why I use it |
|---|---|---|---|
| Blind hem | Tailored trousers, wool blends, smarter workwear | About 4-5 cm | It keeps stitches discreet on the outside and gives a polished finish. |
| Double-fold topstitched hem | Jeans, twill, casual cotton trousers | About 2.5-3.8 cm | It is durable, familiar, and matches the sturdiness of denim well. |
| Turn-up or cuff | Heritage styles, heavier denim, relaxed tailoring | Usually deeper than a standard hem | It adds weight and visual interest, but it needs enough fabric to sit properly. |
| Rolled hem | Lightweight viscose, linen blends, summer trousers | About 0.6-1.2 cm | It reduces bulk on delicate fabric, though it is not the right choice for heavy cloth. |
For denim, I prefer a jeans needle around 90/14 or 100/16 and strong polyester thread, because the fabric and original topstitching usually demand it. For smarter trousers, pressing matters even more than stitch speed: a careful press and a clean fold make the hem look finished before the machine needle even goes near it. After the hem is right, the next question is whether the leg itself needs reshaping.
When to taper, widen, or leave the leg alone
This is where I see the most overcorrection. If the seat and thigh fit well, I am cautious about changing the upper leg just to make the hem look slimmer. A good alteration should improve the line without creating a new problem higher up.
- If the trouser pulls at the calf but fits well above it, I taper gradually from around the knee rather than chopping the hem in sharply.
- If the hem feels too narrow or the fabric catches when walking, I add room back in small stages instead of forcing a tight shape.
- If the leg twists after washing or wearing, I check grain alignment before I blame the width.
- If the knee bags out, I look at wear ease and fabric recovery before I decide the whole leg is too wide.
- If seam allowances are already narrow, I stop and reconsider the alteration rather than sacrificing durability for a slimmer line.
Jeans usually tolerate a stronger taper than tailored trousers because the fabric is sturdier and the style is more casual. With suiting, I keep the change softer, because a hard taper can break the drape and make the leg look over-edited. Once the cut is right, fabric and footwear decide whether the result feels intentional or simply off.
What works best for denim, tailoring, and everyday wear
The same leg shape will read differently in denim, wool, linen, or stretch cloth. That is why I never choose a silhouette in isolation; I look at the fabric weight, the shoe, and how often the garment will be worn. In the UK, where the same pair may need to work with trainers one day and boots the next, that balance matters more than a trend chart.
For jeans, I usually want a shape that survives movement and washing without losing its line. Straight and gently tapered legs are the easiest to live with because they work with most trainers, loafers, and ankle boots. For tailored trousers, I lean toward straighter or softly tapered legs, because the cloth needs room to drape and the hem should sit with a calm break rather than bunching aggressively.
Wide legs can be excellent in linen or fluid viscose, but only if the hem has enough depth to hang properly. Flared legs are still useful when the goal is to balance the body or showcase footwear, yet they need proportion more than novelty. If I am unsure, I choose the version that lets the fabric move naturally and still looks deliberate from the side.
When I step back and judge the whole garment, I am really asking three things: does the leg hang straight, does it move without strain, and does the hem land where the eye expects it to land? If the answer is yes, the shape is doing its job, and the rest is just refinement.
