
A good free jeans pattern can save money, but the real value is that it gives you a clean starting point for a pair you will actually wear. In practice, the best downloads make fit, construction order, seam allowances, and fabric choice clear before you cut a single piece. This article walks through exactly what I look for, which cuts are easiest to start with, and how I would sew the jeans so the process stays manageable rather than chaotic.
What matters before the first cut
- Check the PDF details first. A good download should show seam allowance, a size chart, a test square, and clear assembly steps.
- Choose an easy silhouette. Straight-leg, relaxed, or softly flared jeans are far more forgiving than a close-fitting skinny cut.
- Use denim that matches the pattern. For a first pair, midweight denim around 280-380 gsm is usually easier to control than very heavy cloth.
- Expect to spend on materials even if the pattern is free. In the UK, a realistic first-pair budget is often about £25-£60 depending on fabric, zip, thread, and hardware.
- Fit and pressing matter more than speed. Accurate printing, a toile, and careful pressing usually make the biggest difference to the final result.
The details I check before I trust a download
I never treat a free jeans pattern as automatically usable just because it is free. The first thing I check is whether the PDF feels complete: seam allowance stated clearly, size range shown, print scale included, and construction steps written in a sane order. If any of those are missing, the pattern may still be usable, but it usually means I will have to do more guessing than I want on a denim project.
For jeans, those small details are not cosmetic. Seam allowance is especially important because some free patterns use 1 cm, some use 1/2 inch, and some vary by section. A missing test square is another red flag, because a jeans leg that prints 2-3 percent off can throw the whole fit out. I also like to see whether the pattern is tiled for A4 as well as available in a large-format file, since that makes life easier for UK sewists using local printers or copy shops.
| Pattern detail | Why it matters | What I prefer |
|---|---|---|
| Test square | Confirms the pattern printed at the correct scale | A clear 5 cm or 2 in square on the first page |
| Seam allowance | Prevents sizing drift and confusion during assembly | Stated on the instruction pages and pattern pieces |
| Finished measurements | Helps you choose a size by garment shape, not just body size | Waist, hip, thigh, rise, and inseam listed together |
| Instructions | Jeans involve pockets, fly, waistband, and heavy seams | Step-by-step photos or illustrations for each major stage |
| Size range | Determines whether the pattern is workable without grading | Multi-size grading with clear measurement charts |
If a free download checks those boxes, I treat it as a serious starting point rather than a gamble. That matters because the next decision, the cut you choose, has a much bigger effect on your odds of success than most people expect.
Which jeans shape is easiest to start with
For a first pair, I would usually choose a silhouette that gives me room to breathe around the thigh and calf. A narrow leg can look sleek, but it is less forgiving when the rise is slightly off or the fabric is stiffer than expected. In 2026, the cuts that feel both current and practical are still the simplest ones: straight-leg, relaxed, and softly flared jeans.
| Style | Best for | Difficulty | Why I would or would not start here |
|---|---|---|---|
| Straight-leg | A first wearable pair | Moderate | Easy to fit and timeless, with fewer shape-sensitive areas than a skinny leg |
| Relaxed or boyfriend fit | Learning denim construction | Moderate | Forgives small fit issues and still looks intentional in heavier denim |
| Soft flare | Anyone who wants a vintage edge | Moderate to challenging | Good balance if the knee placement and hem are accurate |
| Skinny or close fit | Experienced fitters | Challenging | Demands tighter fit control, more stretch awareness, and more tweaking |
I would also avoid low-rise jeans for a first attempt unless the pattern is exceptionally well drafted. A higher rise is easier to measure, easier to wear, and usually more comfortable while you are learning how the crotch curve behaves. If you already know that your waist and hip are far apart in size, pick a pattern that lets you blend sizes at the waist, hip, and thigh rather than forcing one size across the whole garment.
The other thing I watch is the leg opening. A slightly wider opening is not just a style choice, it also makes hemming simpler and lets you check balance more easily before the final press. Once the silhouette is right, the fabric and notion choices become much more straightforward.
The fabric and notions I would not compromise on
Denim behaves very differently depending on weight, weave, and stretch content, so I choose the fabric before I choose the final size. For a first pair, I usually want midweight denim around 280-380 gsm, or roughly 9-12 oz. That range is sturdy enough to feel like proper jeans, but not so heavy that every seam turns into a wrestling match on the machine.
If the pattern is designed for stretch denim, keep the stretch modest. Around 1-3 percent elastane is usually enough for comfort without turning the garment into something that grows out of shape. For rigid denim, I prefer patterns with a little ease in the hip and thigh, because the cloth will not give you any mercy once the seams are sewn.| Item | What I look for | Why it matters |
|---|---|---|
| Denim | Midweight woven cloth, prewashed if possible | Controls shrinkage and gives a more stable result |
| Needle | Jeans needle, usually 90/14 or 100/16 | Punches through dense layers without shredding the fabric |
| Thread | Topstitch thread for visible lines, all-purpose thread in the bobbin | Reduces bulk while keeping the topstitching crisp |
| Zip | Strong metal zip in the length specified by the pattern | Lets the fly sit flat and survive repeated wear |
| Interfacing | Medium-weight fusible for waistband and fly area | Stops the waistband from collapsing after washing |
| Hardware | Rivets, button, optional bartack reinforcement | Gives stress points the durability jeans need |
In the UK, I would budget roughly £25-£60 for a first pair even when the pattern itself costs nothing. Fabric is usually the biggest variable, but thread, interfacing, zip, and hardware add up quickly once you move beyond a simple trouser. That is not a drawback, just a reminder that “free pattern” does not mean “free garment”.
Once the materials are right, the sewing order matters more than any single trick, because jeans are built from several small steps that all depend on each other.
How I would sew the jeans from cut pieces to final topstitching
I always read a jeans pattern once from start to finish before I cut anything. That sounds basic, but it saves me from the classic mistake of discovering the fly extension, pocket bag, or waistband interface only after the fabric is on the table. For a pattern with a zip fly, I want the sequence in my head before I start, because the fly is where a lot of home sewists lose confidence.
- Cut carefully and label everything. Mark left and right pieces, notches, pocket bags, and the wrong side of each panel. Denim is unforgiving when pieces get swapped.
- Prep the pockets first. Topstitch pocket edges, reinforce pocket openings, and stitch the pocket bags before the major seams go together. This keeps the bulky parts manageable.
- Assemble the front and back units. Join darts, yokes, or shaped panels before closing the legs. If the pattern includes shaping, do not rush this stage.
- Construct the fly or closure carefully. Use the pattern order exactly unless you already know the technique well. I would rather sew the fly slowly than unpick dense denim later.
- Join the inseams and outer seams. Keep notches matched and press as you go. A long stitch length, around 3-3.5 mm for visible topstitching, usually looks cleaner on denim.
- Finish seams with a durable method. Flat-felled seams are my first choice for jeans because they enclose raw edges and add strength. If the pattern calls for another finish, use it consistently.
- Add the waistband, belt loops, hardware, and hem. This is where the jeans start to look finished, so I slow down again and check symmetry before I commit.
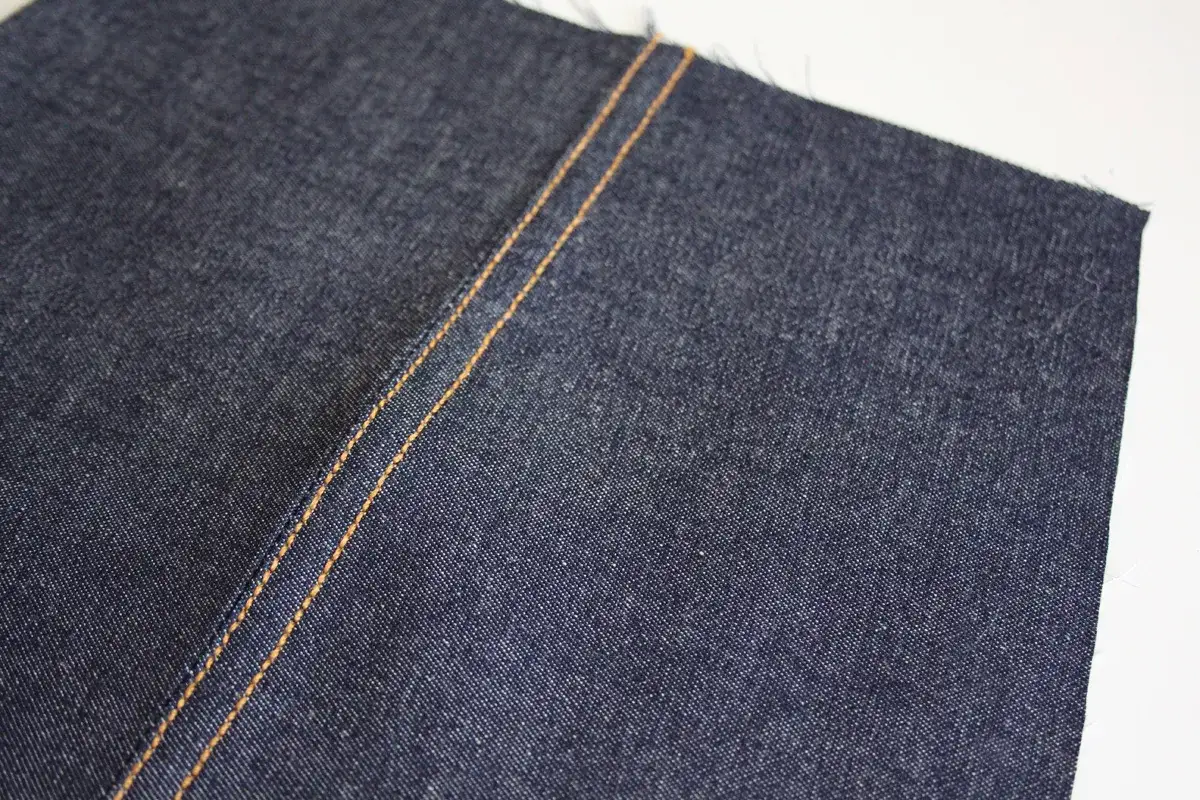
A flat-felled seam is a folded seam finish that hides the raw edge and creates two visible lines of stitching. It is one of the reasons jeans last so well, and it is worth learning if you plan to sew denim more than once. When layers get thick, I switch to the handwheel and press every section hard, because topstitching looks much better on a flat, controlled seam than on a bulky ridge.
The mistakes that cost the most time on a first pair
Most jeans problems are boring, predictable, and completely avoidable. That is actually good news, because it means a lot of frustration can be removed before the first stitch is sewn. The patterns I trust most are the ones that make these risks obvious rather than hiding them behind polished photos.
- Skipping the print test square. If the scaling is wrong by even a little, the rise and leg shape can shift enough to wreck the fit.
- Choosing size by waist alone. Jeans need waist, hip, thigh, and rise to work together. I trust finished measurements more than the label number on the packet.
- Using heavy denim on a tightly fitted pattern. Thick cloth can make a neat pattern feel stiff, bulky, or restrictive very quickly.
- Ignoring stretch percentage. A pattern drafted for rigid denim will not behave the same way in a stretch twill, and the reverse is just as true.
- Skipping a toile. A quick test pair in spare denim or sturdy cotton can show whether the crotch curve, rise, and thigh width need adjustment.
- Pressing too casually. Denim needs pressing at every stage. If I do not press as I go, the topstitching tends to wander and the seams stay lumpy.
- Adding hardware too early. I wait until fit is confirmed before I install rivets or permanently close anything that is hard to open again.
The easiest way to protect a project is to make the first version slightly less ambitious than the final pair you want. A relaxed or straight fit in midweight denim gives you room to understand the pattern before you start chasing a more exact silhouette. Once the basic shape works, the next choice is whether a free download is enough for your goals or whether a more detailed draft would save time.
When a free pattern is enough and when I’d pay for a better draft
I think free patterns are excellent when you want to learn, test a shape, or make a pair of jeans without adding the cost of the pattern itself. They are often enough if the instructions are clear, the size range fits you, and the design does not demand unusually precise fitting. Where they start to fall short is in the details: more limited support, fewer fitting notes, and less guidance when your body sits between sizes or needs a deeper crotch adjustment.
| Free pattern | Paid pattern |
|---|---|
| Good for trying a style with minimal upfront cost | Better if you want more technical support and refinement |
| Often simpler to access and quick to download | Often includes more sizes, sewalongs, or fitting help |
| May have fewer views, narrower grading, or lighter testing | Usually offers a more polished instruction set and pattern range |
| Ideal for a first practice pair or a low-risk project | Worth it if you know jeans fit issues are likely to take time |
The finishing touches that make homemade jeans wear well
When a pair of jeans looks handmade in a good way, it is usually because the finishing decisions were consistent. I would always prewash denim before cutting, especially indigo cloth that might bleed onto lighter seams or linings. I also like to press the final hem, check the inseam length with the intended shoes, and sit down in the jeans before I permanently lock in the waistband and hardware.
- Prewash the fabric. This reduces shrinkage and lets the dye behave before the garment is assembled.
- Strengthen the stress points. Pocket corners, the fly base, and the crotch seam take the most strain, so I reinforce them before the jeans are finished.
- Keep the topstitching line steady. Even a slightly imperfect pair looks far more intentional when the visible stitching is clean and even.
- Check pocket placement on the body. A pocket set too low or too far apart changes the whole balance of the jeans.
- Hem after wearing the jeans once. It is the simplest way to confirm the length still works after the fabric settles.
If I were making a first pair today, I would choose a straight or softly relaxed leg, a midweight denim with little or no stretch, and a free pattern that gives me clear seam allowance and honest construction notes. That combination gives the best chance of ending up with jeans that feel deliberate, durable, and worth wearing again and again.
