
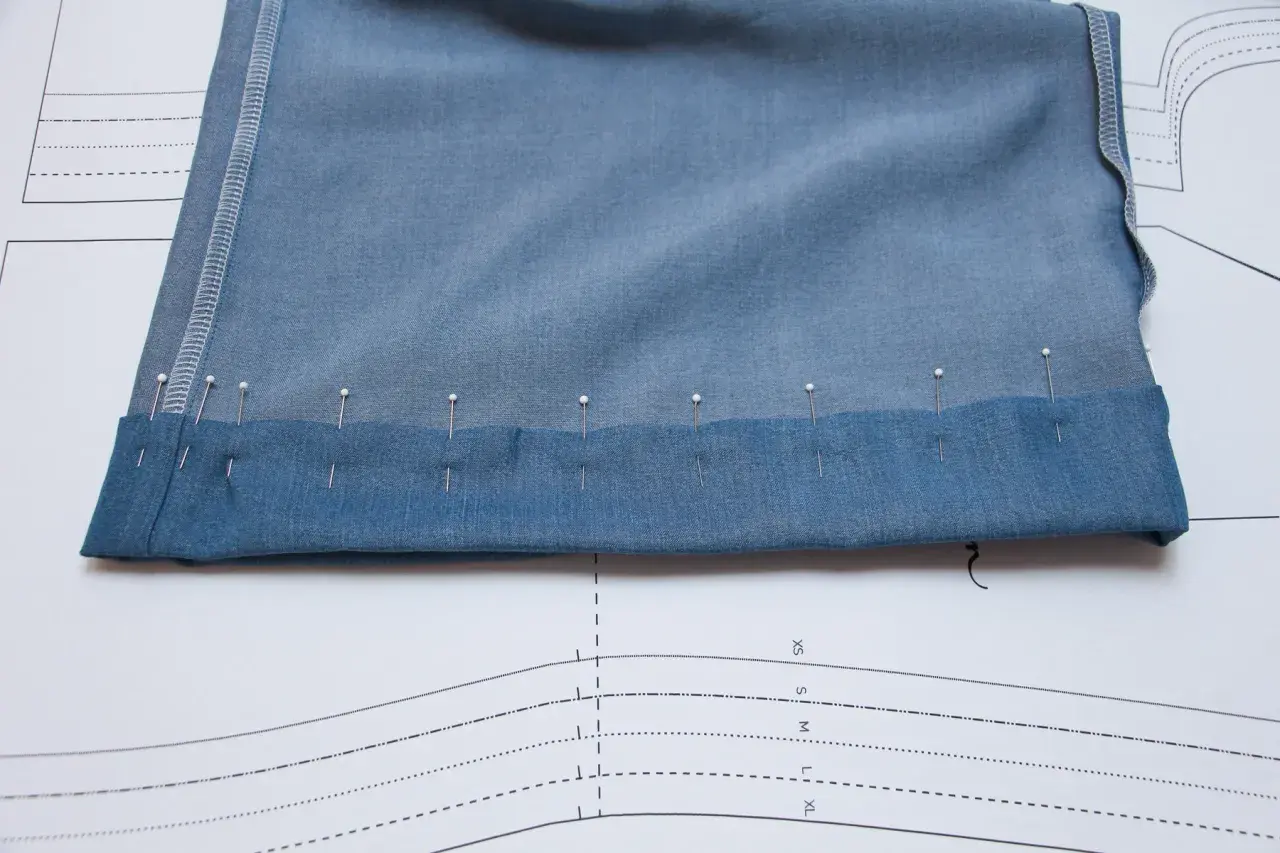
Getting a clean hem on knit trousers is less about fancy equipment and more about control. The fabric wants to stretch, the leg can twist, and a small mistake at the fold shows up immediately at the ankle. This guide shows how to hem knit pants without turning the legs wavy or losing the stretch that makes the garment comfortable.
The safest way to finish knit trouser hems without stretching them out
- Pick the finish first: twin needle, zigzag, blind hem, coverstitch, or an overlocker-assisted turn-up.
- Let drapey knits settle before you mark the final length, especially viscose jersey and similar fabrics.
- Use a ballpoint or stretch needle, and test the stitch on scraps before sewing the real hem.
- Soft stretch hem tape, fusible stretch interfacing, or lightweight stabiliser can stop waviness and tunnelling.
- Press before and after stitching; heat and pressure are part of the finish, not an extra step.
Choose the finish that suits the fabric and the final look
I start by deciding what the trousers need to look like from the outside and how much stretch the fabric still has to offer. A ponte leg does not behave like a soft jersey lounge pant, and a narrow ankle opening needs a different finish from a wide palazzo leg. The right method is usually the one that respects both the fabric weight and the amount of movement at the hem.
| Method | Best for | Why it works | Watch out for |
|---|---|---|---|
| Twin needle | Most jersey, French terry, ponte, and everyday knit trousers | Looks clean and professional while still stretching | Can tunnel on very soft or very light fabrics |
| Zigzag stitch | Beginners, backup method, and fabrics with moderate stretch | Forgiving and easy to adjust on the machine | More visible than a twin-needle or coverstitch finish |
| Blind hem | Smarter knit trousers and heavier stable knits | Discreet from the right side | Less reliable on very soft or unstable jersey |
| Coverstitch | Activewear, lounge trousers, and a polished ready-to-wear look | Purpose-built for stretch hems | Needs a coverstitch machine and a bit of practice |
| Overlocker-assisted turn-up | Heavy knits and hems that need a clean raw edge first | Fast and tidy on the inside | Usually still needs topstitching or a second finish |
Measure and mark the new hem before you touch the scissors
This is the stage that saves most hems from looking slightly off. Knit fabrics can behave differently after they have been worn, so I let the garment settle before I measure anything serious. Viscose jersey, modal blends, and other drapey knits often benefit from a few hours hanging up, and sometimes overnight, before you mark the final length.
- Put the trousers on with the shoes or trainers they will actually be worn with.
- Mark the finished length on both legs, checking the inseam and side seam so the hem sits level.
- Add a hem allowance that suits the fabric: 2.5-3 cm for lighter knits, 3-4 cm for heavier or fuller legs.
- Lay the trousers flat and confirm both legs match before you cut.
- Cut with sharp shears or a rotary cutter, then press the raw edge so it stops curling while you work.
For trousers with a lot of drape, I also measure twice from the floor, not just from the waistband. That extra check matters because a leg can look even on the table and still sit uneven once it is hanging. When the marking is accurate, the hem method itself becomes much easier to control, which brings us to the actual stitching.
Hem knit trousers on a regular sewing machine
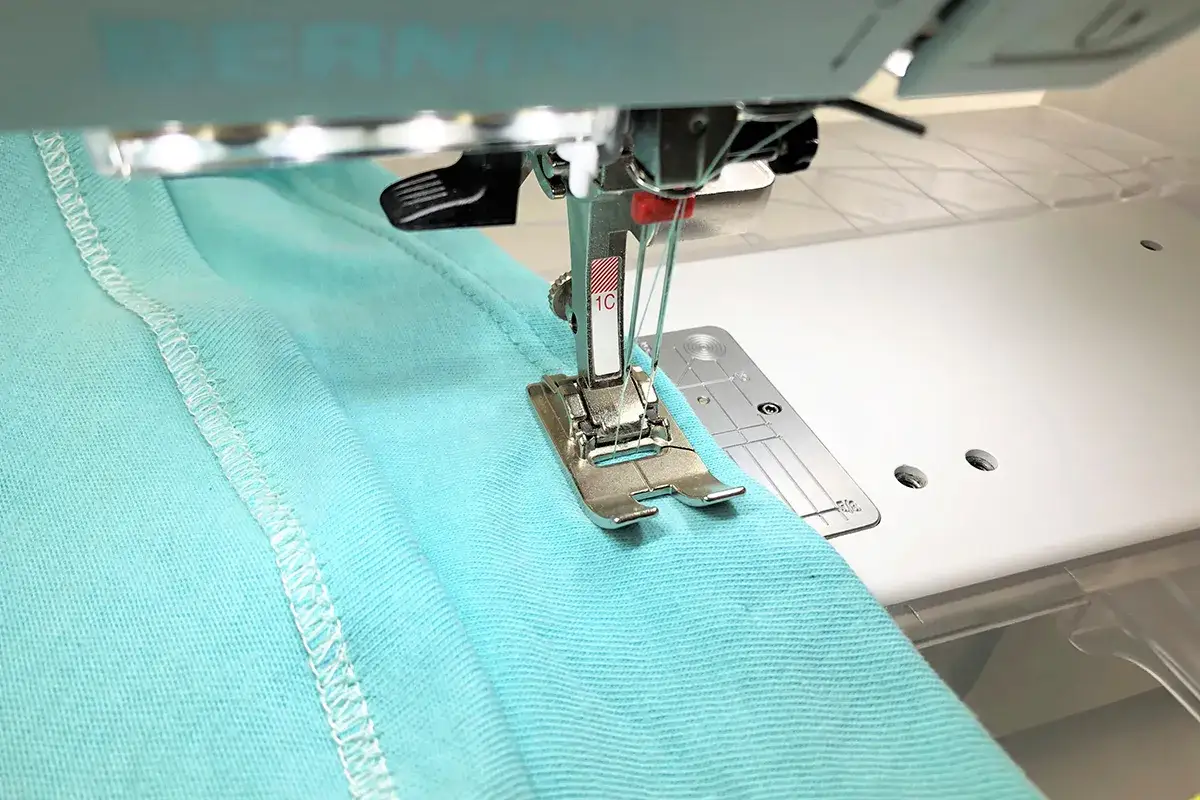
A standard machine is enough for most knit hems if you use the right needle and keep the fabric relaxed. I prefer a jersey or stretch needle, polyester thread, and a stitched sample before I commit to the real hem. On softer fabrics, I also keep a scrap of the same knit beside me so I can check tension and stitch balance without guessing.
Twin needle finish
This is my default for most knit trousers because it gives a neat, almost coverstitch-like look. Thread two top threads, use a stretch twin needle if the fabric is very elastic, and keep the hem folded evenly before you start. A stitch length around 2.5-3 mm is a sensible starting point, but I always test first because different knits react very differently.
The main problem with a twin needle is tunnelling, which is the raised ridge that appears between the two rows. When that happens, I usually stabilise the fold with soft stretch hem tape or fusible stretch interfacing, then sew again with a slightly longer stitch. It is often more effective to support the fabric than to fight the machine settings alone.
Zigzag finish
If the machine does not like twin needles, a narrow zigzag is the reliable backup. I use it most often on lounge trousers, casual jersey, and fabrics that still need some give but do not justify a more technical finish. A medium width, roughly 3 mm, and a length around 2.5-3 mm is a practical starting point on many machines.
The zigzag does not look as polished as a twin needle, but it is forgiving, and that counts for a lot when the fabric is slippery or uneven. It is also the method I recommend when someone is new to hemming knits and wants a lower-risk first attempt. Once the leg is hemmed cleanly with zigzag, the next upgrade is the blind hem.
Read Also: Invisible Denim Repair - Make Jeans Last Longer
Blind hem finish
I reach for a blind hem when the trousers are meant to look a bit smarter or more tailored. On the right fabric, it hides very well and still allows enough movement for a knit leg. It works best when the hem allowance has been pressed firmly in place and the fabric is stable enough not to drift while the stitch bites into the fold.
Blind hem is not the first choice for very soft jersey, but on ponte or firmer knit trousers it can be excellent. I also like it when I want the outside of the hem to stay visually quiet, especially on a pair that is meant to read more like smart trousers than casual loungewear. For the cleanest result, the edge still needs to be pressed well before stitching.
Use a coverstitch or overlocker when you want a cleaner edge
A coverstitch machine is purpose-built for stretch hems, which is why it is so good on knit trousers. It gives that ready-to-wear look with parallel lines on the outside and stretch on the underside. If you have one, the setup is usually worth the time, especially for garments you will wear often.
An overlocker, or serger, is not usually the finish itself for a standard trouser hem, but it can be useful for cleaning the raw edge before the hem is turned up. On thicker knits, that extra bit of edge control can stop bulk and make the fold sit flatter. I treat it as preparation rather than the whole answer unless the design is intentionally raw or decorative.
- Use a coverstitch for the most professional stretch hem.
- Use an overlocker to neaten the edge before folding if the fabric is bulky or frays.
- Stabilise the fold anyway if the knit is soft, because even a specialised machine can create ripples on the wrong fabric.
That leads straight to the part most people underestimate: the hem can look wrong even when the stitch is technically correct. The difference usually comes down to stabilising the fold and feeding the fabric evenly, which is where the next section matters most.
Stop waviness and tunnelling before they start
If a knit hem waves, it usually means the fabric was stretched while it was being sewn or pressed too aggressively afterwards. I keep the fabric flat, let the feed dogs do the work, and avoid pulling the hem from the back of the machine. On narrow hems, a regular presser foot often behaves better than a walking foot, because some walking feet struggle to stay properly engaged on a tiny fold.
- Use soft stretch hem tape, wash-away tape, or fusible stretch interfacing on unstable folds.
- Keep the hem close to the fold so it does not flip outward.
- Test the stitch on an offcut, not just on a tiny strip that behaves differently from the real hem.
- Press with steam, then let the fabric cool flat before moving it.
- Use a ballpoint or stretch needle so the needle penetrates the knit cleanly instead of punching holes.
Two terms are worth knowing here. Tunnelling is the ridge that forms between twin-needle lines, and feed dogs are the toothed parts under the presser foot that move the fabric forward. When those two things work against the fabric instead of with it, the hem starts to look homemade in the wrong way. If that happens, the fix is usually less dramatic than people think.
Fix the mistakes that usually show up at the hem
Most hem problems on knit trousers are repairable if you catch them early. I would rather unpick six inches and re-press than wear a hem that fights the rest of the garment every time I walk. The point is not perfection for its own sake; it is a hem that sits flat and keeps its shape through real wear.
- Uneven length - rehang the trousers, recheck the leg lengths, and trim only after both sides match.
- Popped stitches - the stitch is too rigid, so switch to a stretch-friendly option or lengthen the stitch slightly.
- Tunnelling - add stabiliser, reduce the temptation to tighten the tension too much, and test again on scraps.
- Hem flipping outward - move the stitching closer to the fold and press the hem more firmly before sewing.
- Skipped stitches - change to a stretch or ballpoint needle and check that the needle is suited to the fabric weight.
One small but useful habit is to inspect the hem from both sides before trimming thread tails. The wrong side often reveals whether the machine was pulling the knit too hard, and that tells you whether to adjust the settings or the preparation. Once the hem is behaving properly, the last question is whether a standard turn-up is even the best finish for the trousers at all.
Change the hem plan when the trouser style calls for it
Not every knit trouser should be treated the same way. Joggers with cuffs, slim leggings, wide-leg ponte trousers, and split-hem styles all have different needs, and forcing a single method on all of them usually gives a weaker result. I change the finish whenever the design asks for it, even if that means doing less hemming and more construction work.
- Cuffed joggers - shorten from above the cuff rather than cutting the cuff itself.
- Leggings - keep the hem narrow so it does not feel bulky at the ankle.
- Wide-leg knit trousers - use a deeper hem if the fabric needs weight to hang properly.
- Split hems or vents - finish the opening first, then hem each side so the detail stays clean.
- Raw-edge styles - only leave them unfinished if the fabric and design are meant to look relaxed, not because the hem was rushed.
My rule is simple: if the fabric wants structure, give it structure; if it wants drape, do not overbuild the hem. That is why a deeper finish often suits ponte and a lighter hand suits jersey. When the style and the stitch agree, the hem stops looking like an alteration and starts looking like part of the garment.
A finish that looks deliberate from the first wear
The best knit trouser hems are usually the ones that were decided before the scissors came out. Choose the stitch for the fabric, stabilise the fold, and test once on a scrap before you commit to the whole leg. That sequence does more for the final result than any amount of forcing the machine to behave.
If I had to reduce the whole process to one practical rule, it would be this: do not let the knit decide the length on its own. Mark it, press it, support it, and sew it with enough give for the garment to move naturally. That is the difference between a hem that merely holds and a hem that really finishes the trousers.
