
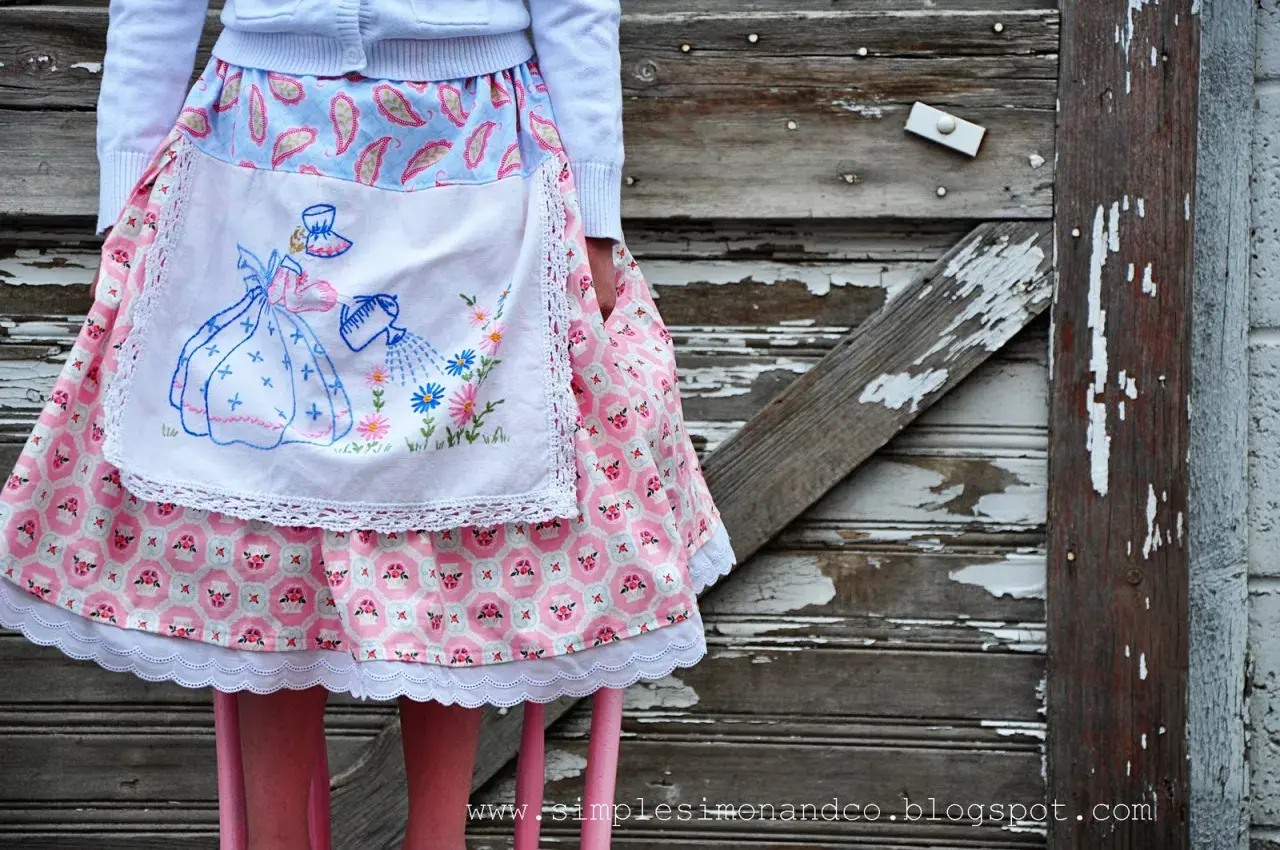
A well-made apron skirt brings together the ease of a work apron and the shape of a wearable skirt, which is why the cut needs to be clear before you start. In this guide, I’m focusing on the parts that matter in practice: choosing the right silhouette, taking the measurements that actually control fit, drafting the pieces, and cutting fabric so the finished garment hangs properly rather than fighting the body.
The essentials before you start cutting
- Decide first whether you want a half apron, a wrap version, or a cross-back style, because each one changes the template.
- Measure the waist position, full hip, and finished length before drawing anything on paper.
- Use 1.5 cm seam allowances and a 3-5 cm hem allowance as a practical starting point for most woven fabrics.
- Stable cloth such as cotton, linen, twill, or denim is easier to handle than slippery fabric for a first make.
- A quick toile in calico or muslin usually saves more time than unpicking a badly placed waistline later.
Choose the shape before you cut a single panel
The first decision is not the hem or the tie length; it is the shape. An apron-style skirt can be drafted in a few different ways, and the cut changes depending on whether you want something purely decorative, something practical for everyday wear, or something that feels more like a skirt with apron detailing. I prefer to sketch the silhouette first, because a good cut follows the way you want the garment to move.
| Style | What it looks like | How it is usually cut | Best for | Trade-off |
|---|---|---|---|---|
| Half apron skirt | Front panel with ties or waistband | Mostly rectangles, sometimes slightly flared | Beginner sewing, layered outfits, quick makes | Offers less movement than a full skirt |
| Wrap apron skirt | Front panel overlaps at the sides | Front piece plus overlap allowance | Adjustable fit and easy wear | Needs careful overlap planning so it does not gap |
| Cross-back apron style | Apron front with shoulder straps | Front panel, straps, and often no waistband | All-day comfort and a softer fit | Feels more like an apron dress than a skirt |
If you want a clean, everyday garment, the wrap version is usually the most forgiving. If you want the silhouette to read more like a skirt and less like utility wear, the half apron shape is tidier. Once the silhouette is fixed, the measurement work becomes much easier.
Measure the body, not the hanger
Fit starts with a few numbers, and they matter more than the paper template itself. I measure the body in the position where the garment will actually sit, because a skirt worn at the natural waist behaves differently from one worn lower on the hips. If you are between sizes, let the larger measurement win and build the shape with ties, overlap, or a little extra ease.
| Measurement | Why it matters | Useful starting allowance |
|---|---|---|
| Waist position | Sets the top edge and waistband placement | Measure where the garment will sit, not where a chart says it should sit |
| Full hip | Prevents the skirt from catching when you sit or walk | Add 4-8 cm ease for a close fit, more if the fabric is stiff |
| Waist to finished hem | Controls the overall proportion | Allow 3-5 cm for the hem and another 1.5 cm for the seam if needed |
| Overlap or wrap depth | Keeps a wrap front from opening at the side | Use 8-12 cm as a practical minimum |
| Tie length | Decides how the skirt fastens and how adjustable it feels | 45-70 cm per tie is common, depending on where you want the knot |
For length, I usually work from the waist down to the hem I want, then add the allowances. A knee-length version often lands around 50-60 cm; a midi version is more often 65-80 cm, depending on height and proportion. If the fabric has not been prewashed, I allow extra yardage or metres for shrinkage, because a 3-5% loss is enough to upset a carefully planned hem.
That gives you the body logic. The next step is translating those measurements into pattern pieces that cut cleanly and stay stable on the grain.
Draft the template and cut the pieces cleanly
A useful apron skirt template does not need to be complicated. In most cases, I start with a main panel, a waistband or facing, ties or overlap pieces, and optional pockets. The key is to draft each part with the grainline in mind. If the grain drifts, the garment can twist after the first wash, even when the stitching is technically perfect.
| Piece | How I draft it | Practical cut note |
|---|---|---|
| Main panel | Rectangle or gentle A-line shape based on the finished length | Keep the long edge parallel to the selvedge for stability |
| Waistband or facing | Strip drafted from the waist measurement plus fastening allowance | For a 4 cm finished waistband, cut 9 cm wide before seam allowances |
| Ties | Straight strip for structure | Cut 7-8 cm wide to finish around 3 cm wide |
| Pockets | Simple patch or in-seam pocket bags | Make them deep enough to hold a hand, usually 16-20 cm finished depth |
I also mark notches and the fold line before I cut. That sounds basic, but it is exactly what keeps the waistband centred and the front panel balanced. If your fabric has a print, stripes, or a visible nap, I would spend a few extra minutes placing the pattern piece instead of rushing to squeeze everything from the cloth. The finished garment will look calmer and more intentional.
For fabric amounts, a simple knee-length version in 140 cm-wide cloth often lands somewhere around 1.5-2 m, while a longer or fuller version can need 2-2.5 m. That range changes with size, pockets, and whether your ties come from the same fabric, so I treat it as a planning guide rather than a rigid rule.
Once the pieces are cut, the order of sewing matters just as much as the shape on paper.
Sew the structure in the order that keeps the shape clean
When I sew an apron-style skirt, I build it from the inside out so the visible lines stay neat. Pressing after each seam is not optional here; it is what gives the piece its crispness. If you want the garment to look polished rather than improvised, the sequence matters more than fancy finishing.
- Finish any pockets first, because they are easiest to place while the panels are still flat.
- Staystitch curved or bias edges if your design has them. Staystitching means sewing just inside the seam line to stop the fabric stretching out of shape.
- Join the main panels, then press the seams open or to one side depending on fabric thickness.
- Attach the waistband or facing and check that the front is centred before you commit to topstitching.
- Sew the ties or overlaps, trim the corners neatly, then turn and press them before attaching them to the body.
- Finish with the hem, ideally after hanging the skirt for several hours so any bias sections can settle.
Use fabric choices that support the template, not fight it
The template can only do so much if the cloth is wrong for the job. For a first make, I would reach for a medium-weight woven fabric with some structure: cotton poplin, cotton lawn with body, linen, chambray, denim, or twill. These fabrics hold the shape of the panel, cut predictably, and press well, which makes the lines of the skirt easier to control.
Very drapey fabrics such as viscose can work, but they behave differently. They soften the silhouette, which is attractive if you want movement, but they also stretch and shift more while cutting. If you choose a slippery cloth, use extra pins, handle it flat, and cut on a stable surface. For beginners, that extra handling often turns a quick project into a frustrating one.
For a more structured look, use a firmer cloth and a lightly interfaced waistband. For a softer, more relaxed version, reduce interfacing and let the fabric do more of the work. I tend to choose the fabric based on the job first, then style second. That order usually gives the better result.
Avoid the mistakes that show up after the first wear
Most problems with apron skirts do not appear on the worktable; they show up when the garment moves, sits, or gets washed. The good news is that the fixes are usually straightforward once you know what to watch for.
- The waist feels tight - add 2-4 cm of ease or extend the ties so the fit can be adjusted.
- The front panel pulls open - increase overlap, especially on wrap versions, or add a small internal anchor.
- The hem dips at the sides - let the skirt hang before hemming and true the edge with the body in mind, not just the pattern line.
- The ties twist - cut them on the straight grain and press them before turning; bias-cut ties look pretty but distort more easily.
- Pockets drag the side seam - move them slightly forward and keep them shallow enough not to weigh the fabric down.
- The waistband looks bulky - trim and grade the seam allowances, then press with steam so the layers settle.
The other mistake I see often is overconfidence in the first cut. People assume the pattern will fit because the measurements are close, then discover that the fabric, seam allowance, and fastening method all change the result. A quick toile in calico or old cotton is usually enough to catch that problem before the good cloth is cut.
The first version I would make for a dependable result
If I were making this project for the first time, I would keep the design plain and the fit adjustable. That means a medium-weight woven fabric, a straight grain main panel, a waistband or facing that can be pressed cleanly, and ties long enough to let the waist settle naturally. I would also keep the hem generous, because a 3 cm hem gives you room to correct the line if the skirt hangs unevenly after a day on the dress form or hanger.
My practical checklist for a first make is simple:
- prewash and press the fabric before cutting;
- mark the grainline and notches clearly on the paper pattern;
- allow enough overlap for sitting and walking;
- keep the finishing tidy rather than decorative;
- test the fit in calico if the measurement falls between sizes.
Once the template fits, you can change almost everything else: the length, the pocket shape, the trim, the weight of the cloth, even the mood of the garment. That is the value of a well-drawn apron skirt pattern: it gives you a reliable base, and from there the sewing becomes creative instead of corrective.
