
When sewing seams, the difference is rarely the stitch alone. A clean join depends on the seam allowance, the fabric weight, the edge finish, and how carefully the fabric is pressed at each stage. This guide walks through the seam types I reach for, how I choose between them, and the habits that make cleaner results much more repeatable.
The seam choices that matter most for neat, durable sewing
- A seam is the stitch line plus the allowance and finish; all three affect strength and appearance.
- In UK dressmaking, 1.5 cm (5/8 in) is still the default allowance you will see most often.
- French seams suit light fabrics, while flat-felled seams suit denim, shirts, and other hard-wearing pieces.
- An overlocker is excellent for tidying edges, but it does not replace accurate seam stitching.
- Pressing after each major step changes the final result more than most beginners expect.
What a seam is really doing
Most beginners think a seam is simply two pieces of fabric stitched together. In practice, three things decide whether it works: where the stitch line sits, how much allowance you leave, and what you do with the raw edges afterwards. I treat the seam allowance as working space, not spare fabric; it gives you room for accuracy, fitting adjustments, and a finish that suits the fabric.
On many commercial patterns, especially in the UK, the default allowance is 1.5 cm, which is the same as 5/8 in. Smaller allowances such as 1 cm or 6 mm are common on tiny pieces, curved areas, or delicate garments where bulk would be a problem. If the allowance feels unfamiliar, trace it onto a scrap first; it is much easier to trust the line when you have already seen how it behaves.
Once that distinction is clear, the next question becomes which seam construction the fabric can actually support.
Choosing the right seam type for the fabric
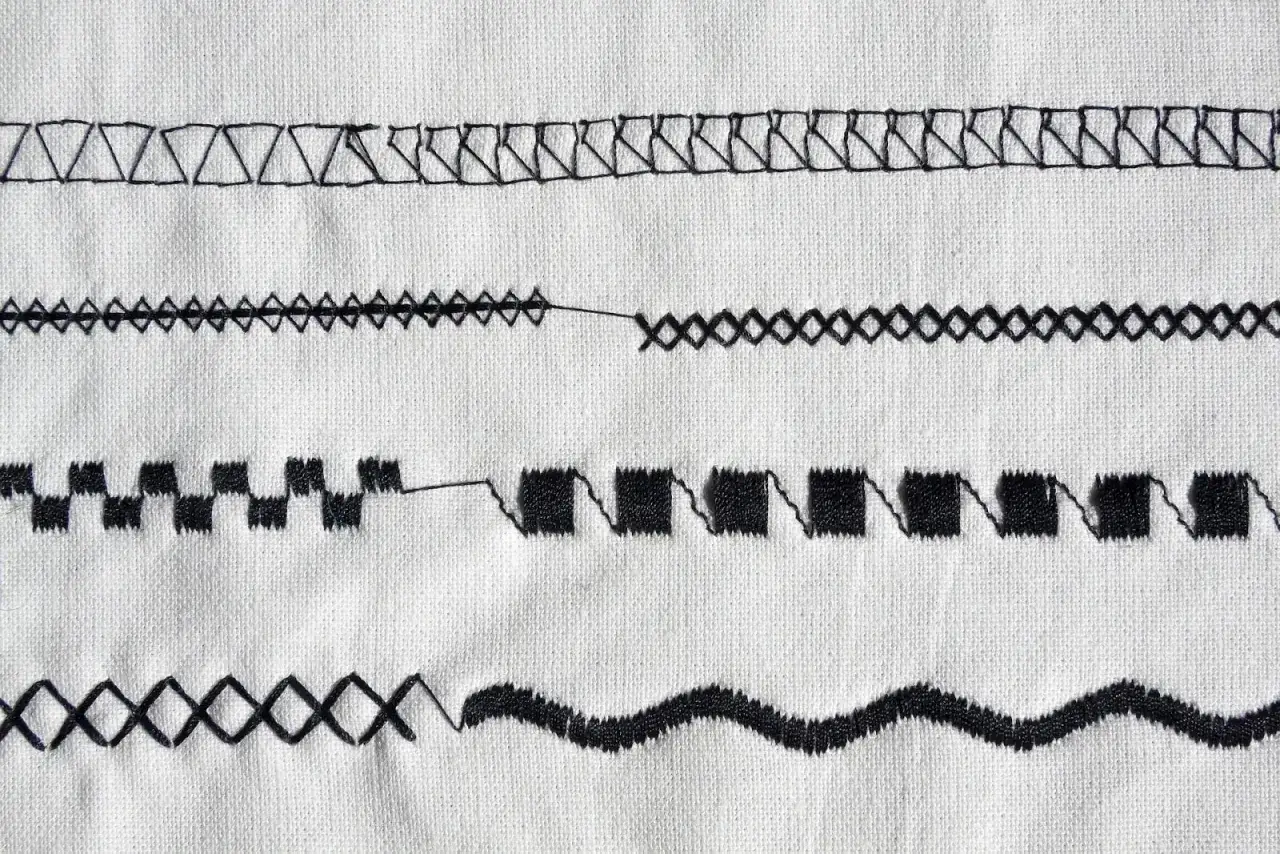
There is no single seam that suits every project. I choose based on fraying, bulk, stress, and whether the inside of the garment will be visible. A light blouse and a pair of jeans ask for very different answers.
| Seam type | Best used for | Why it works | Watch-outs |
|---|---|---|---|
| Plain seam | Everyday garments, most woven fabrics | Fast, simple, and easy to press open or to one side | Raw edges still need finishing on fraying fabrics |
| French seam | Sheer, lightweight, or easily fraying fabrics | Encloses the raw edge for a neat inside and outside | Needs accuracy and adds bulk on heavy cloth |
| Flat-felled seam | Denim, shirts, jackets, workwear | Very strong and hard-wearing, with enclosed edges | More steps, more pressing, and less forgiving on curves |
| Lapped seam | Visible topstitched seams, canvas, outerwear | Strong and stable, especially where layers are thick | Looks best when the stitching is even and intentional |
| Plain seam with a zigzag finish | Most stable woven fabrics and many knits | A quick way to stop fraying and tidy the inside | The finish helps the seam, but it does not create the seam itself |
If I want the inside of a garment to look crisp without adding much weight, I usually start with a plain seam and decide later whether to press it open, turn it to one side, or enclose the edges. That flexibility is why the plain seam is still the workhorse of dressmaking.
The important shift is to stop thinking of an overlocker as the answer and start thinking of it as one possible finish. The seam comes first; the edge treatment comes after.
How I sew a reliable basic seam
For a straightforward seam on woven fabric, I keep the process calm and repetitive. Speed comes later. The first job is to keep the fabric on grain and the allowance consistent so the garment can hang properly.
The settings I start with
On everyday cotton, I usually begin with a straight stitch around 2.4 mm long and a universal needle in the 80/12 range. On finer cloth, I shorten the stitch slightly; on denim or canvas, I go up a needle size and test a longer stitch first. Those are starting points, not laws, but they keep me from guessing blindly.
- Mark the seam line clearly and confirm the allowance before cutting.
- Match notches, grain lines, and any directional print so the two pieces sit the same way.
- Pin or clip the fabric without distorting the edge. On slippery cloth, use more pins or hand-baste first.
- Sew a test line on scrap fabric and check that the stitch length, tension, and needle are behaving.
- Stitch with steady speed, let the feed dogs, the toothed mechanism under the presser foot, move the fabric, and backstitch 2 to 3 stitches at each end.
- Press the seam flat first, then press it open or to one side depending on the pattern.
That last step matters more than most people expect. A seam that is pressed carefully can look sharper, lie flatter, and fit better even if the stitching was not perfect.
Knits need stretch, not force
For jersey and other stretch fabrics, I switch to a stretch stitch, a narrow zigzag, or the stitch recommended by the pattern. A straight stitch can snap when the fabric stretches, especially at shoulder seams, side seams, and underarm seams. The rule is simple: the seam has to move with the cloth, not hold it rigid.
Once the seam is sewn cleanly, the raw edge treatment becomes much easier to choose.
How to finish raw edges without adding bulk
Finishing is about controlling fray and keeping the inside comfortable. In UK sewing rooms, you will often see an overlocker, a zigzag stitch, or a neat fold-and-stitch finish used again and again. Each one has a place, and each one can be the wrong choice if the fabric does not suit it.
Read Also: Sewing by Hand - The Beginner's Guide to Perfect Stitches
When each finish makes sense
- Overlocked edges are fast and tidy on stable woven fabrics and many knits. They are ideal when you want speed and a clean interior, but they still depend on a correctly sewn seam underneath.
- Zigzag finishing is the best fallback when you do not have an overlocker. A medium-width zigzag works well on many medium-weight fabrics, although very light cloth may get pulled into the needle plate if you do not test first.
- French seams are one of the neatest answers for sheer or fragile fabrics. They enclose the raw edge completely, which is why I reach for them on blouses, lingerie-style makes, and lightweight garments that fray quickly.
- Flat-felled seams are worth the extra work when strength matters. They are the seam I trust most for jeans, shirts, and jackets because they resist wear and keep the inside tidy at the same time.
- Turn-and-stitch finishes, where you fold the raw edge under and stitch it down, are useful when you want a clean interior without special equipment. They work best on straight seams; on curves, they can become bulky or awkward unless the fabric is very cooperative.
If I use a zigzag finish, I leave at least 7 mm (1/4 in) of allowance and test the width so the right swing of the needle just reaches the edge without chewing it away. That gives the stitch enough fabric to grip while still stopping fray before it spreads. Pinking shears can slow fraying, but I treat them as a light helper rather than a serious finish for anything that will be washed often.
Once the edges are under control, the next problems are usually the mistakes that creep in before the garment is finished.
The mistakes that quietly ruin a seam
Most bad seams do not fail because the machine is incapable. They fail because one small part of the process was rushed. When I troubleshoot a project, I usually find the same handful of problems.
- The allowance is inconsistent, so the seam line wanders and the garment loses symmetry.
- The fabric was stretched while sewing, which is especially common on curves, knits, and slippery cloth.
- The seam was never pressed, so the garment stays puffy and the stitches look less accurate than they really are.
- The finish was too heavy for the fabric, which creates bulk on lightweight cloth and stiffness where you want drape.
- The finish was too weak for the fabric, which lets fray creep back through the seam after a few washes.
- The machine settings were never tested, so the stitch length, tension, or needle choice were fighting the fabric instead of supporting it.
Curved seams deserve special care. They often need shorter stitches, closer clipping, or extra easing so the fabric can sit smoothly without puckering. If a curve looks wavy after stitching, I do not assume it is ruined; I check whether it needs steam, a shorter stitch, or a more patient press first.
That leads naturally to the habits that make the next project easier before a single seam is sewn.
The habits that make fabric joins look intentional
Good seam work is mostly a collection of small, repeatable habits. I keep a seam gauge by the machine, I test stitches on scraps from the same fabric, and I press as I go instead of saving everything for the end. Those three habits alone remove a surprising amount of guesswork.
- Use the machine guides for 1 cm, 1.5 cm, and 2 cm allowances so you are not measuring every line by hand.
- Keep a small pressing cloth for delicate fibres and coated fabrics.
- Write down the stitch length and needle that worked on a difficult fabric so you can reuse the setting later.
- Choose the seam finish before cutting, especially when the fabric frays easily or the garment will be worn hard.
Once those choices become automatic, seam work stops feeling like guesswork and starts doing the real structural work of sewing: holding shape, controlling drape, and making the inside of the garment as sound as the outside.
