
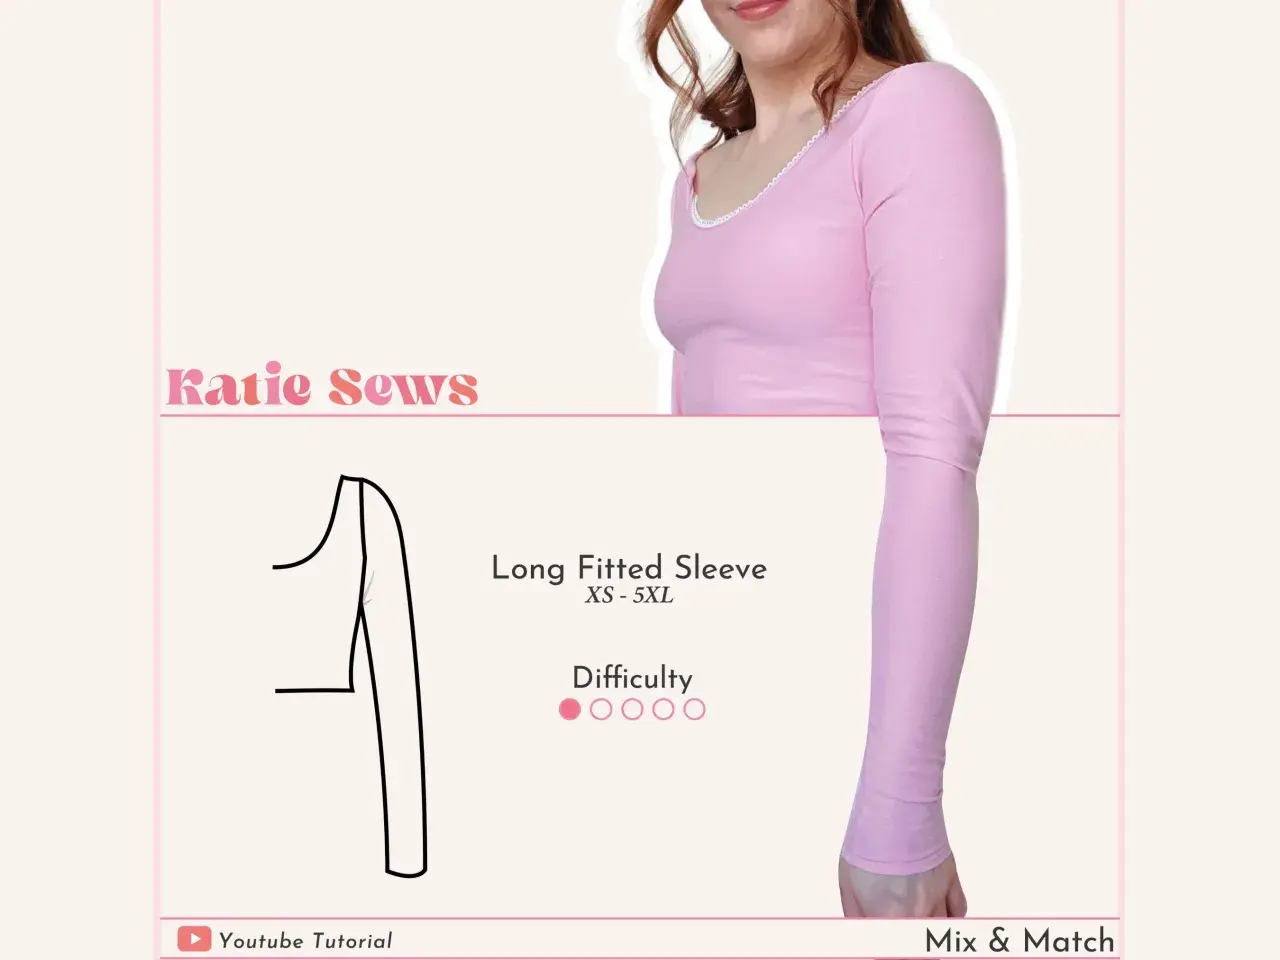
A long sleeve shirt pattern is only useful when the cloth, fit, and sleeve construction work together. I focus here on the pieces that actually shape the finished garment: what the template should include, how to choose fabric, how to check fit before cutting, and the order that keeps the sleeves and cuffs under control. If you want a shirt that looks sharp at the wrist but still moves comfortably through the shoulder, the details matter more than the label on the packet.
The cleanest result comes from matching structure, fit, and fabric before the first cut
- Most UK home dressmaking patterns include a 1.5 cm seam allowance unless the instructions say otherwise.
- For a classic shirt, woven fabrics usually behave better than knit fabrics because they hold collars, cuffs, and topstitching cleanly.
- Finished garment measurements matter more than size labels, especially through the bust, shoulder, and bicep.
- Grainline, notches, and staystitching are not optional extras; they keep the sleeve and neckline from drifting out of shape.
- A test in calico is worth the time if you are changing sleeve width, cuff style, or shirt length.
What the pattern should include before you cut
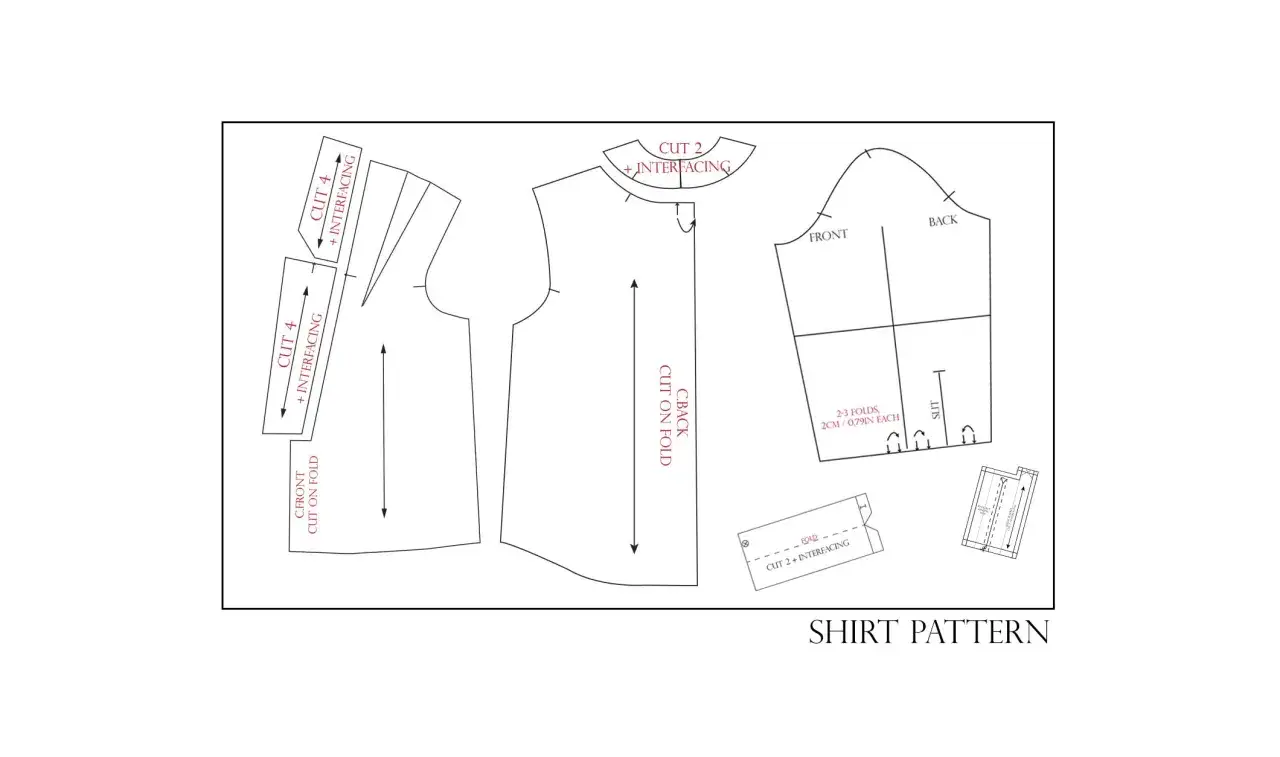
Before I cut anything, I want the pattern to tell me exactly how the shirt is built. A good template does more than show an outline; it gives me the information needed to place each piece correctly, match the sleeve cleanly, and finish the wrist without guessing.
| Pattern element | Why it matters | What I check |
|---|---|---|
| Front and back bodice | They set the shape, balance, and shoulder line. | Grainline, bust shaping, and whether the shirt has enough ease. |
| Sleeve | It controls arm movement and how the shirt hangs at the shoulder. | Sleeve cap height, bicep width, notch placement, and hem length. |
| Cuff and placket | They make the wrist opening practical and neat. | Whether the opening is wide enough for the hand and whether interfacing is included. |
| Collar or neckline finish | It frames the shirt and needs structure to sit flat. | Stand, collar points, neckline curve, and interface pieces. |
| Notches and markings | They show how pieces line up during assembly. | Shoulder marks, sleeve notches, fold lines, and any drill holes or pleat marks. |
I also check whether seam allowances are already included. On many UK dressmaking patterns, 1.5 cm is standard on adult garments, while hems are often wider, depending on the design. If the allowance is not printed on the piece, I add it before I cut, not after. Once those pieces make sense, the next question is whether the fabric can support them.
Choosing fabric that supports the shape
For a shirt with long sleeves, fabric choice changes everything. A crisp cotton can make the pattern look precise and tailored; a softer cloth can give the same pattern a more relaxed, drapey result. The wrong fabric will not just change the look, it will change how the collar, cuff, and sleeve cap behave.
| Fabric | Best for | Watch out for |
|---|---|---|
| Cotton poplin, Oxford, shirting cotton | Classic shirts with a clean finish | Can feel stiff if the cloth is too heavy or under-pressed. |
| Chambray or light denim | Casual shirts with more body | Bulk at seams and cuffs, especially if the sleeve is narrow. |
| Linen or linen blend | Relaxed shirts with breathable structure | Wrinkles easily and can shift while cutting if it is very loose woven. |
| Viscose twill or soft shirting | Shirts with more drape | Needs stronger interfacing so the collar and cuff do not collapse. |
| Jersey or stretch knit | Long-sleeve tops, not a classic woven shirt | Needs a different pattern shape and a finish that stretches. |
As a rough planning figure, I usually expect about 1.5 to 2.5 metres of 140 cm-wide fabric for a standard adult shirt, with more needed for larger sizes, directional prints, checks, or a deeper hem. That is only a guide, but it is useful when you are deciding whether the fabric on the table will actually be enough. For the shirt itself, I prefer a cloth that presses well and holds a line, because sleeves and cuffs show every weakness in the fabric. A good fabric choice makes the rest of the work feel deliberate rather than improvised.
Getting the fit right before you cut
I never trust a size label on its own. A shirt can be technically the right size and still feel wrong if the shoulder is narrow, the sleeve bicep is tight, or the wrist opening is awkward. The safest approach is to compare your body measurements with the pattern’s finished measurements before you trace or cut anything.
- Measure bust or chest, shoulder width, upper arm circumference, and sleeve length.
- Check the finished garment measurements, not just the body chart.
- Look at the sleeve bicep width if you want to move freely through the arm.
- Measure from shoulder point to wrist with your arm slightly bent, not straight down.
- Compare cuff circumference with the hand opening you actually need.
If you sit between sizes, I usually blend sizes rather than tracing one size from neckline to hem. That keeps the shoulder and sleeve in balance, which is where most of the comfort lives. A toile in calico is worth the effort when you are changing the sleeve shape, collar style, or overall length; for a simple shirt in stable cotton, a partial test in the bodice and sleeve can be enough. Once the fit makes sense on paper, cutting becomes much less risky.
How I lay out and cut the fabric
This is the stage where a neat shirt can quietly go wrong, because a grainline drift or sloppy notch transfer will show up later as twisting seams and a sleeve that refuses to sit properly. I like to slow down here. Cutting accurately is not a luxury; it is part of the fit.
- Prewash, dry, and press the fabric before it meets the pattern.
- Square the selvedges or cut a true edge so the fabric does not sit skewed on the table.
- Place each piece so the grainline arrow runs parallel to the selvedge.
- Cut mirrored pieces carefully, especially sleeves, cuffs, and fronts.
- Transfer all notches, fold lines, pleats, and drill holes before removing the pattern.
- Staystitch curved edges such as the neckline and armhole within the seam allowance if the fabric stretches easily.
When I am dealing with stripes, checks, or anything directional, I cut more slowly and often on a single layer. Matching a stripe at the shoulder or centre front is worth more than shaving a few minutes off the layout. I also label every piece as soon as it comes off the table, because once sleeve, cuff, and placket pieces are mixed together, errors multiply quickly. After the cutting is right, the sewing order can do its job.
Sewing the shirt without fighting the sleeve
The sewing order matters because a shirt with long sleeves creates bulk fast. I usually reduce that bulk as early as possible, then press each seam before moving to the next one. The result is not just cleaner; it is easier to control.
| Method | Best use | Why I use it |
|---|---|---|
| Body first, sleeves set flat | Beginners and softer fabrics | It is easier to press and check the shape before the sleeve is fully enclosed. |
| Sleeve set in the round | More tailored shirts and plackets | It gives a cleaner shoulder line when the sleeve cap needs controlled easing. |
My usual sequence is simple: interface the collar, cuff, and placket pieces first; sew darts or yokes if the shirt has them; join the shoulders; then handle the sleeves. If the sleeve cap needs ease, I use basting stitches between the notches and draw them in gently rather than forcing the cloth into place. That matters, because a sleeve cap that is dragged too hard will pucker no matter how carefully you stitch it down. French seams can work beautifully on fine cotton, but if the sleeve cap is heavily eased, I would rather use an overlocker or another clean finish that keeps the bulk under control. The final steps are the cuff, hem, and topstitching, done while the fabric is still easy to shape with the iron.
The mistakes that make a good pattern look wrong
Most shirt problems are not mysterious. They usually come from one of a handful of avoidable mistakes, and once you know them, they are much easier to spot before the garment is finished.
| Mistake | What it looks like | How I fix it |
|---|---|---|
| Ignoring grainline | The sleeve twists or the side seam pulls after sewing. | Recheck the pattern placement before cutting; recut if the drift is obvious. |
| Skipping staystitching | Necklines and armholes stretch out and never quite recover. | Staystitch curved edges immediately after cutting. |
| Choosing the wrong interfacing | Collars feel floppy or cuffs feel stiff and board-like. | Match the interfacing weight to the fabric, not to habit. |
| Trimming too early | Seam allowance disappears before the fit has been checked. | Leave enough allowance until you know the seam sits correctly. |
| Forcing the cuff opening | The wrist area puckers or the hand barely fits through. | Check the opening against the hand before sewing the cuff closed. |
A shirt that looks strangely tight or oddly sloped at the shoulder is usually telling you about the cut, not the stitching. I find that the pattern was the real problem in far more cases than the sewing machine was. Once you start spotting those signs early, the shirt becomes easier to trust. That leads naturally to the small alterations that can make the whole project feel custom.
Small alterations that change the whole shirt
One reason I like shirt sewing is that small changes have a visible effect. You do not always need to redraft the entire garment; often, the right adjustment in the sleeve, wrist, or body length is enough to change the feel completely.
- Add length at the sleeve hem if the cap and shoulder already fit well.
- Increase bicep width before widening the whole armhole, because that keeps the shoulder line cleaner.
- Shorten the torso at the hem rather than lifting the shoulder if the shirt is only too long overall.
- Adjust cuff depth if you want a sharper, more tailored wrist finish.
- Use a more stable interfacing when the shirt fabric is soft, rather than making the collar heavier by accident.
For a looser overshirt, I would increase body ease first and leave the sleeve balance alone until I had checked it on calico. For a closer shirt, I would do the opposite: protect the shoulder line and refine the sleeve and cuff fit. That is the part many beginners miss. The biggest changes do not always come from a bigger alteration; they often come from a cleaner one. With that in mind, the last check is simple and very practical.
What I would check one last time before cutting the fashion fabric
Before I touch the real cloth, I make myself run through three things: the seam allowance, the sleeve fit, and the grainline. If any of those is uncertain, I stop and solve it first, because fixing a small issue on paper is faster than fixing a twisted sleeve in the finished shirt.
- Confirm that every piece includes or has marked seam allowance.
- Check that the sleeve will pass through the wrist opening without strain.
- Verify that the collar, cuff, and placket are interfaced with the right weight.
That is the habit that saves the most time: cut once you know the shirt can actually be sewn comfortably, not when the pieces merely look right on the table. If I were starting a new shirt today, I would still make the same choices first: stable fabric, accurate layout, and a test piece where the sleeve and cuff matter most. That is what turns a good pattern into a shirt that feels considered the moment it is worn.
