
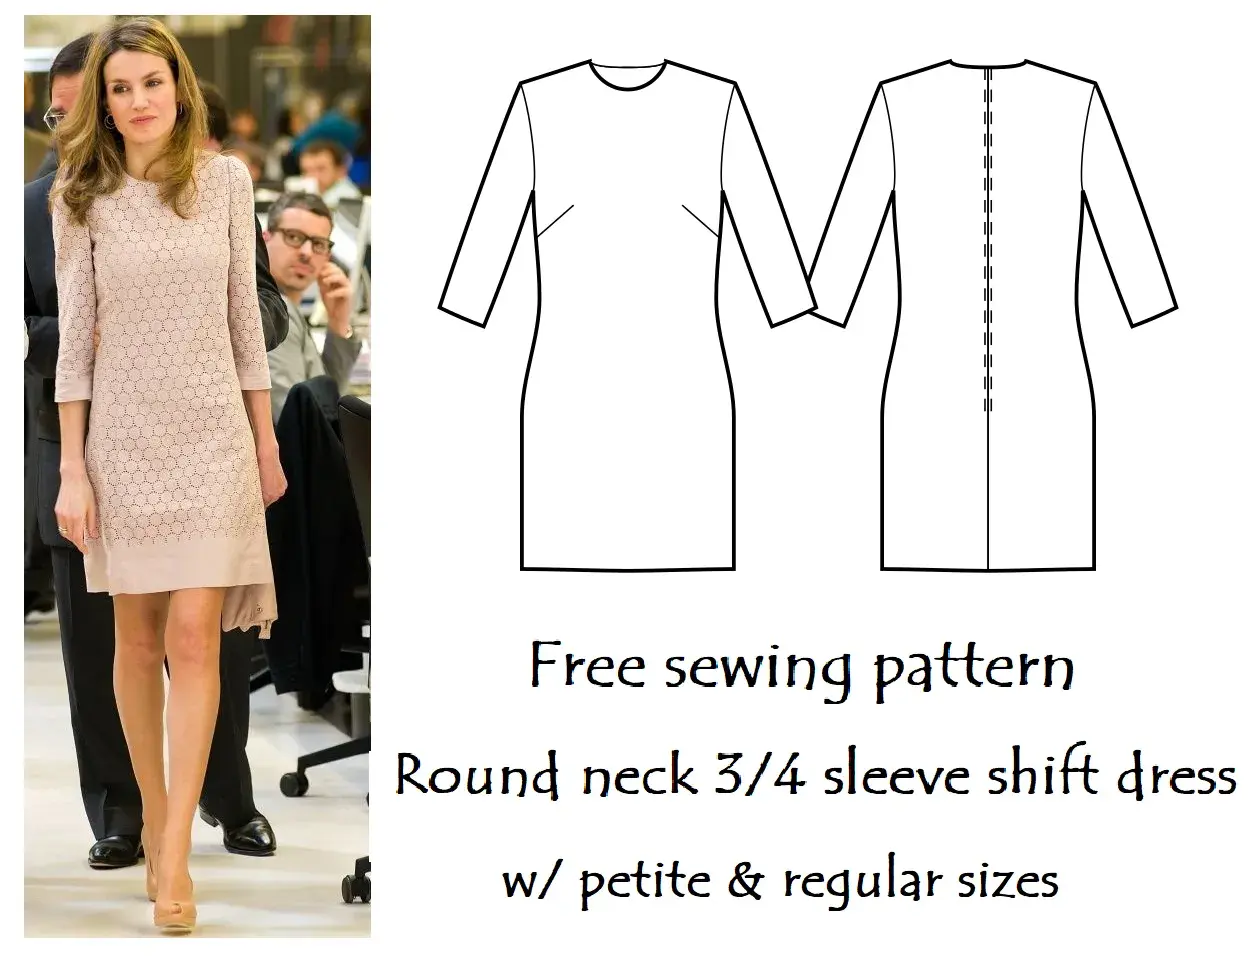
A shift dress pattern free to download can be a smart starting point, especially if you want a straight, wearable silhouette without paying for a full pattern library. The catch is that free files vary wildly: some are well drafted and genuinely useful, while others save money on the download and lose it later in fabric, time, and patience. Here I focus on what makes a free shift dress pattern worth your time, how to choose the right fabric, how to avoid fit mistakes, and when a free download is enough versus when a paid pattern makes more sense.
What matters most before you cut into the fabric
- Finished measurements, a test square, and clear assembly steps are the baseline I want from any download.
- Light to medium-weight woven fabrics usually give the cleanest shift-dress shape.
- The shoulders, neckline, and armholes matter more than the waist on this silhouette.
- Print at 100% and verify the scale before cutting any fabric.
- A toile is worth making if you are between sizes or sewing in an expensive cloth.
- Free is fine for a simple version; pay when you need better grading or more guidance.
What to look for before you download
I treat the file itself as part of the pattern. If it only gives me a pretty photo and a download button, I move on. The best free patterns are the ones that tell me exactly what I am getting before I commit paper, tape, and fabric.
These are the checks I make first:
| Check | Why it matters | My rule |
|---|---|---|
| Finished garment measurements | Body size and garment size are not the same thing; this is how you judge ease. | If I cannot see bust, hip, and length measurements, I am cautious. |
| Test square | Confirms the PDF printed at the correct scale. | I print one page first and measure the square before anything else. |
| Seam allowance | Tells you how much room the pattern expects you to keep at the edges. | I prefer it written clearly on the pattern or in the instructions. |
| Layered files and formats | A4, Letter, and ideally A0 make printing much easier in the UK. | If the download is only one awkward file, I expect extra work. |
| Fabric guidance | A shift dress looks good only when the cloth matches the draft. | I want fibre, weight, or at least a clear drape description. |
A technical drawing is also useful here: it is the flat sketch that shows seam lines and shape without styling tricks, and it usually tells you more than the model photo does. Once those essentials are in place, fabric choice becomes the next big decision.
Which fabrics give the cleanest shift dress shape
The shift silhouette is simple, which means the fabric does a lot of the visual work. If you want the dress to skim the body instead of sticking or ballooning, I usually reach for a light to medium-weight woven cloth with enough body to hold the lines.
For a current free download, I like the approach I saw in Mood Sewciety’s Lynx Mini Shift Dress: the instructions steer you towards light or medium-weight fashion fabrics, and that is exactly the right idea for this shape. A shift dress does not need a complicated cloth; it needs the right balance of drape and stability.
| Fabric | What it gives you | Watch out for | Best use |
|---|---|---|---|
| Cotton poplin | Crisp, stable, beginner-friendly | Can look boxy if the pattern is already very straight | Clean everyday shift with structure |
| Linen or linen blend | Breathable, relaxed, classic in the UK summer | Wrinkles quickly and may need careful pressing | Casual warm-weather dresses |
| Viscose or rayon | Soft drape and a smoother fall | Slippery to cut and sew; hems can stretch | Softer, more fluid shift dresses |
| Cotton lawn | Lightweight and neat | Can be too thin unless the pattern has lining or facing support | Airy summer versions |
| Wool crepe | Sharper drape with more polish | Better for a more advanced sew and a cooler season | Autumn or workwear shifts |
If a cloth is see-through, I line it or underline it; underlining is a hidden support layer that adds body without changing the outside finish. If I want the least drama, I choose cotton poplin or a linen blend. If I want a dress with more movement, I accept the extra handling that comes with viscose or rayon. Either way, the fabric has to match the amount of ease in the pattern, because fit is where a shift dress succeeds or fails.
How to get the fit right before you cut
A shift dress should skim the body, not cling to it, and not disappear into a sack either. I care most about shoulder fit, neckline depth, bust ease, and armhole shape; the waist is usually less important because many shifts are designed to hang straight. For a sleeveless version, I want the shoulder seam to sit near the edge of the shoulder, not drift halfway down the upper arm.
The quickest way to avoid disappointment is to compare your body measurements with the finished garment measurements, not with the size label. Body size tells you where to start; finished size tells you how the dress will actually wear. If you are between sizes or the pattern has a very narrow size range, I would make a toile first. A toile is a practice version sewn in cheap fabric so you can test the fit before cutting the real cloth.- If the neckline gapes, I pin out the excess at the shoulder before changing anything else.
- If the side seam pulls across the bust, I need more room above the waist, not just at the hem.
- If the armhole bites, I check the depth and the side seam position.
- If the hem swings forward or back, I balance the length before I finish it.
I also mark the grainline carefully. The grainline is the direction the pattern wants the fabric to run, and cutting off grain is one of the easiest ways to make a shift twist or hang badly. Once the fit is under control, the actual sewing order feels much less risky.
A sewing order that keeps the dress neat inside
Simple construction is the whole point of a shift, so I like a sequence that keeps the inside as tidy as the outside. The more carefully you handle the edges, the more expensive the dress looks, even when the pattern itself was free.- Print the PDF at 100% and tape the pages together after checking the test square.
- Cut the fabric on a flat surface and transfer notches, darts, and marks clearly.
- Sew darts or princess seams first, then press them in the right direction.
- Join shoulders and side seams, then try the dress on before finishing the edges.
- Finish the neckline and armholes with facings or bias binding. Facings are shaped inner pieces that turn the edge cleanly to the inside.
- Understitch the facing if the pattern allows it. Understitching is a row of stitches that helps the facing stay inside rather than roll out.
- Leave the hem until last, and let the dress hang for at least 24 hours if the fabric is drapey.
That last pause matters more than people expect. On soft viscose or linen, a hem can drop by 1 to 2 cm after the dress hangs, and if you hem too early, the final line can look uneven. A slow finish usually looks cleaner than a rushed one, and that is especially true on a plain silhouette where every line is visible.
The mistakes that turn a simple make into a frustrating one
Most shift-dress problems come from a few predictable places, and I see the same ones again and again. The good news is that they are easy to avoid once you know where the pressure points are.
- Choosing fabric by print or colour instead of drape.
- Ignoring finished measurements and sewing only to the size label.
- Using a heavy cloth for a pattern drafted to hang lightly.
- Skipping the test square and discovering the PDF printed small or large.
- Cutting before checking the grainline and the length.
- Hemming before the fabric has settled.
The most expensive mistake is usually not the download itself; it is cutting into good fabric with the wrong expectations. If you want to keep the process calm, I would rather spend 20 minutes checking the file than waste half a metre of cloth trying to rescue a poor first cut. That leads neatly to the bigger decision: when is a free pattern enough, and when is it smarter to pay?
When a free pattern is enough and when I would pay
Free is perfect for testing the silhouette, using fabric from the stash, or sewing a low-risk everyday dress. I stay with a free download when the drafting looks sensible, the instructions are clear, and I do not need multiple cup sizes or elaborate options.
| Situation | Free pattern works well | I would pay |
|---|---|---|
| First attempt at a shift dress | Yes, if the instructions are clear and the style is simple | Only if the free file is badly graded or hard to print |
| Using precious fabric | Maybe, but only after a toile | Yes, if the pattern has better shaping and fit notes |
| Need a narrow or broad size range | Sometimes | Yes, if inclusive grading matters |
| Want sleeve, hem, or neckline variations | Usually not | Yes, because you get more than one wear from the draft |
| Need a quick one-off summer dress | Absolutely | Not unless you want deeper instructions |
As a rough UK benchmark, I checked a polished paid shift-dress PDF at £15 from Sew Over It. That is about the point where the extra drafting detail starts to feel worthwhile if you know you will reuse the pattern or sew in a fabric that is not forgiving. Free gets you started; paid becomes better value when the fit, grading, or instruction quality matters more than the price tag.
The small checks I make before printing page one
Before I print anything, I do one last pass through the file: scale confirmed, layers selected, fabric recommendation understood, and length checked against my height. If the pattern offers A4 and A0, I choose the format that wastes the least time in taping and the least paper in testing.
That is the point of a good download: it should lower friction, not add it. If a pattern gives me clear measurements, sensible construction, and enough guidance to match the fabric to the shape, I keep it. If not, I treat it as a draft idea rather than a project, because a good shift dress is simple only when the groundwork has already been done.
