
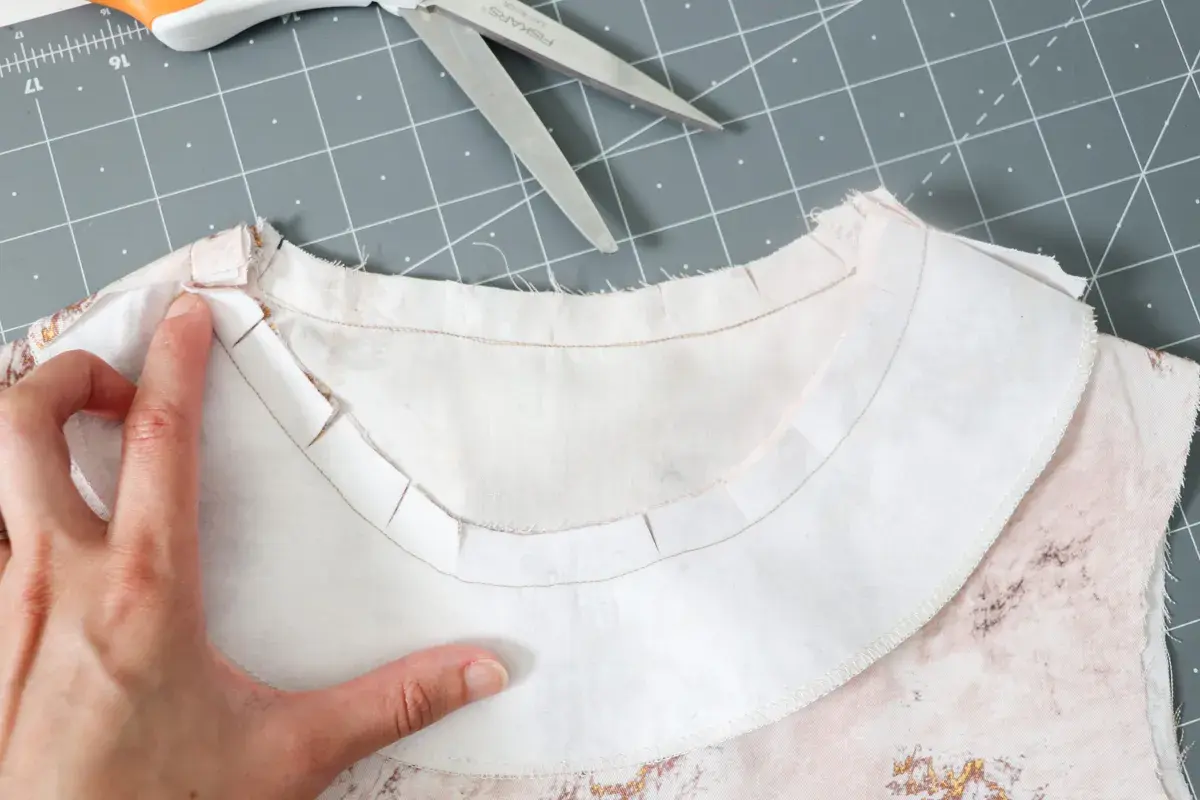
An inner facing is one of the cleanest ways to finish a neckline, armhole, or shaped opening without adding visible trim to the outside. It gives the edge support, hides raw seam allowances, and helps the garment keep its shape after pressing and wear. In this guide I explain when to use a facing, how to choose the right fabric and interfacing, and the small sewing steps that make the inside look truly professional.
The cleanest finish comes from matching support to shape
- A facing is a shaped piece of fabric that finishes raw edges from the inside without changing the look of the outside.
- It works best on necklines, armholes, button openings, and curved hems that need structure.
- The result depends on three things: fabric choice, interfacing, and careful pressing.
- Bias binding and linings solve different problems, so they are not direct substitutes.
- A good facing should lie flat, stay hidden, and feel comfortable against the skin.
Why a facing changes both the finish and the fit
I think of a facing as structure first and finish second. Yes, it hides the raw edge, but its real job is to help a curved opening hold its shape without pulling, stretching, or looking bulky from the outside.
That is why facings appear so often on woven tops, dresses, and sleeveless garments. A neckline facing keeps the curve neat, an armhole facing stops the edge from collapsing, and a hem facing can support a flared shape better than a narrow fold. If the piece is well planned, the facing disappears visually and lets the garment look more deliberate.
When a facing is badly planned, the opposite happens. It can show at the edge, roll outward after wear, or make the inside feel too heavy. Once you understand that, the next decision is less about the name of the piece and more about whether the fabric and shape can support it properly.
Choosing the right fabric and interfacing for the facing
For most woven garments, I keep the facing as close as possible to the main fabric in weight and behaviour. A crisp cotton top can usually handle a self-fabric facing with lightweight fusible interfacing, while a fluid viscose blouse often needs lighter support so the edge does not turn stiff and obvious. I also think about wash behaviour: if the facing fabric and the garment fabric shrink differently, the edge may twist after the first wash.
Interfacing matters just as much as the facing fabric itself. I usually choose the lightest support that still controls the edge, because too much stiffness is almost as troublesome as too little. On delicate or heat-sensitive fabrics, sew-in interfacing can be safer than fusible; on stable cottons, a good fusible is usually faster and perfectly reliable. I also test a 10 cm square on a scrap first, especially when the cloth has an unusual finish.
- Same fabric works well when you want the inside to blend in and the cloth has enough body.
- Lighter support fabric can reduce bulk inside narrow necklines or armholes.
- Fusible interfacing is efficient and stable on most woven garments.
- Sew-in interfacing is better when heat might distort the cloth or leave a mark.
Once the material choice makes sense, the sewing itself becomes much easier, which is where the inside finish really starts to look polished.
How I sew a neckline facing so it sits flat
Stabilise the pieces first
I start by staystitching the curved edge just inside the seam allowance so it does not stretch while I handle it. Then I apply interfacing to the facing piece, press it from the wrong side, and let it cool flat before I touch the shape again. Cooling matters more than people expect; warm fabric still moves, and that is how a neat edge turns into a wavy one.
Sew with accurate seam allowances
With right sides together, I match notches, shoulder seams, and centre marks, then stitch using the pattern’s allowance, which is often 1 cm or 1.5 cm in UK dressmaking patterns. Accuracy matters here more than speed, because a few millimetres off on a curved neckline can shift the whole edge and make it harder to turn cleanly.
Read Also: DIY Sports Bra - Build Real Support That Lasts
Clip, understitch, and press in stages
After sewing, I grade the seam allowances so the facing side is slightly narrower, clip concave curves every 1 to 2 cm, and notch any convex parts so the curve can turn smoothly. I understitch the facing side about 2 mm from the seam line whenever the machine can reach, then press the seam toward the facing and turn the edge over a tailor’s ham or rolled towel. If the neckline is sharply curved, I take the time to press in stages rather than forcing it into shape in one go.
If those steps are done well, the facing should disappear into the garment. The next question is whether it is the best finish for the project at all.
When a facing is the better choice than binding or lining
I reach for a facing when I want the outside to stay clean and the edge to hold a deliberate shape. Bias binding is lighter and more visible, while a lining is a bigger commitment that makes sense when the whole inside needs covering rather than just the edge.
| Method | Best for | What it gives you | Main compromise |
|---|---|---|---|
| Facing | Necklines, armholes, shaped openings, curved hems | Clean inside, controlled shape, little visible stitching | Can roll out or show if it is under-supported |
| Bias binding | Lightweight edges, casual garments, visible trim | Flexible and quick | Less structure and more visible edge treatment |
| Lining | Sheer fabrics, coats, garments that need full coverage | Covers seam allowances and improves comfort | More fabric, more fitting, more time |
An overlocker finish alone does not give the same shape control as a facing. It neatenes the raw edge, but it does not support the curve in the same way. For a summer blouse, I often prefer a facing because it keeps the neckline crisp without adding much weight; for a sheer dress or a coat, I would usually look at lining instead.
The mistakes that make facings twist, show, or bubble
Most facing problems are not mysterious. They usually come from a small decision earlier in the process that compounds once the garment is worn.
- Using the wrong interfacing weight can make the edge either too rigid or too soft. I want support, not cardboard.
- Ignoring the grainline lets the facing stretch out of shape, especially around necklines and armholes.
- Skipping clipping and grading leaves bulk in the seam allowance, which is one of the fastest ways to get a visible ridge.
- Forgetting to understitch lets the facing roll to the outside after a few wears.
- Not anchoring the facing at shoulder seams, side seams, or zips allows it to creep out of place.
If a facing bubbles after a few wears, I usually blame bulk or unstable fabric before I blame the machine. Heat can finish the job, but it cannot fully correct a poor cut or an unsupported curve. That is why I prefer to solve the problem at the pattern and pressing stage, not after the garment is already assembled.
The last checks I make before I close up a neckline
- The facing sits just inside the edge and does not peek out from the right side.
- The seam allowance feels flat, not lumpy, when I run my fingers along the inside.
- The neckline still hangs smoothly after a steam press and a full cool-down.
- The facing is anchored where it can move, especially at shoulders, zips, or underarms.
- The inside feels comfortable against the skin, with no rough edge rubbing against the body.
A good facing is the sort of detail you stop noticing once it is right, which is exactly the point. It should support the garment quietly, keep the neckline crisp, and survive real wear without fighting the fabric. If you match the cloth, stabilise the shape, and press with patience, the inside will look as deliberate as the outside.
