
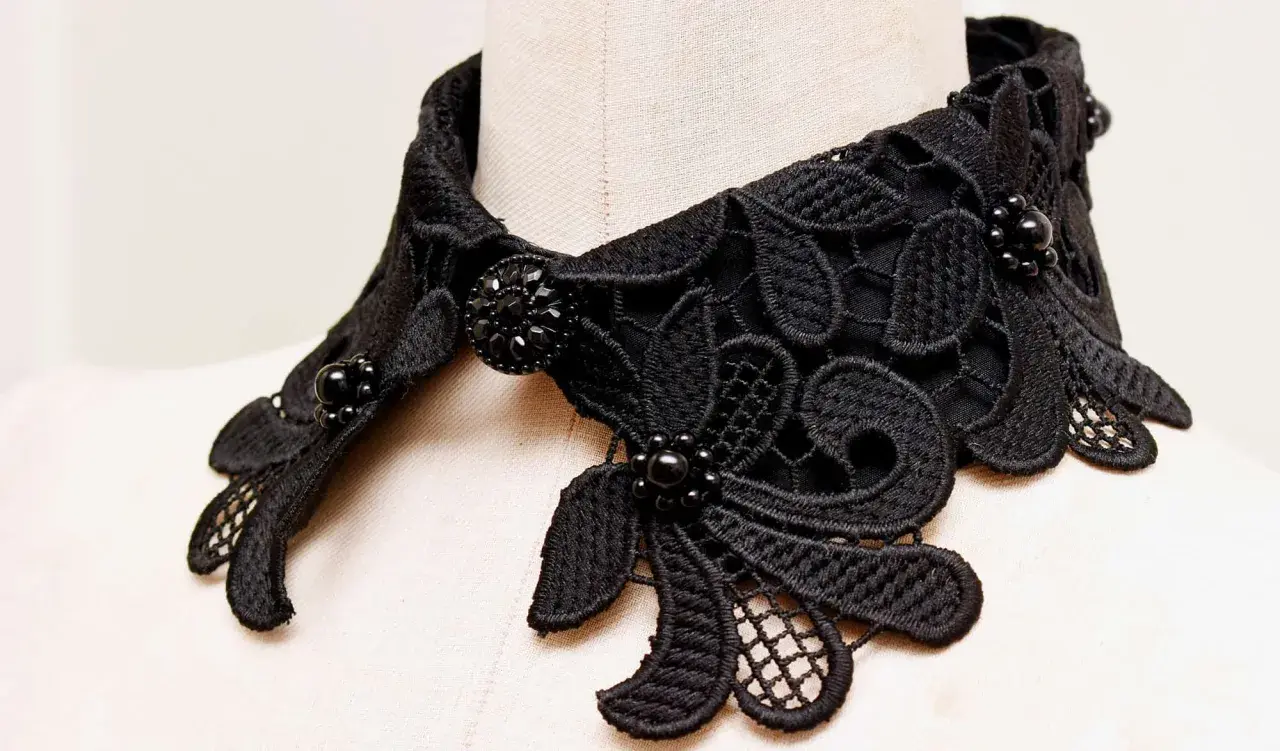
A lace collar works best when the shape, support, and finishing method all suit the lace rather than fight it. This guide explains how to make a lace collar that sits neatly, feels comfortable, and still keeps the delicate texture people want from lace. I’m focusing on the practical choices first: whether to make it detachable or sewn into a neckline, which materials hold shape, and how to finish it without crushing the detail.
The quickest route to a polished lace collar
- Start with the style decision: detachable collars are easier to fit; sewn-in collars need more precision at the neckline.
- Choose stable lace such as guipure, corded lace, or embroidered cotton if you want the collar to hold its shape.
- Make a paper pattern first so the motif placement and scalloped edge land where you expect them.
- Use lightweight support like interfacing or an underlining when the lace is too soft to behave on its own.
- Baste before you stitch because lace shifts more than plain woven fabric.
- Press gently with a cloth and low heat so you keep the texture instead of flattening it.
Choose the collar style before you cut
The first decision is not the lace itself but the kind of collar you want to wear. A detachable collar is the easiest route if you are learning, because you can fasten it with ribbon, ties, buttons, or a small hook-and-eye and adjust the fit later. A sewn-in collar looks more integrated, but it depends on the neckline being drafted cleanly and the collar lying flat without strain.
I usually recommend starting with a detachable version unless you are already comfortable with neckline construction. It gives you room to test the shape, the width at the front, and how much lace volume feels balanced on the body. If the garment underneath is plain, the collar can do more visual work; if the garment already has texture or print, a smaller and simpler collar is usually the stronger choice.
- Detachable collar: best for blouses, knit tops, dresses, and trial versions.
- Sewn-in collar: best when you want a permanent finish that behaves like part of the garment.
- Flat collar: simplest to shape and usually the most wearable.
- Rounded or Peter Pan shape: softer and more vintage in feeling.
- Pointed or Victorian-inspired shape: sharper, more decorative, and a little less forgiving if the cut is off.
Once the style is fixed, the next job is choosing lace that can actually carry that shape rather than collapse under its own weight.
Pick lace and support fabrics that can carry the shape
This is where most collars succeed or fail. Some lace is naturally stable and almost architectural; some is so soft that it needs backing to stop it from twisting. I like to think about lace in terms of structure first and prettiness second, because the prettiest lace is disappointing if it droops after one wear.
| Lace type | Best for | Main advantage | What to watch out for |
|---|---|---|---|
| Guipure or corded lace | Statement collars and sharper edges | Stable, sculptural, and easy to place | Can feel heavier and less fluid |
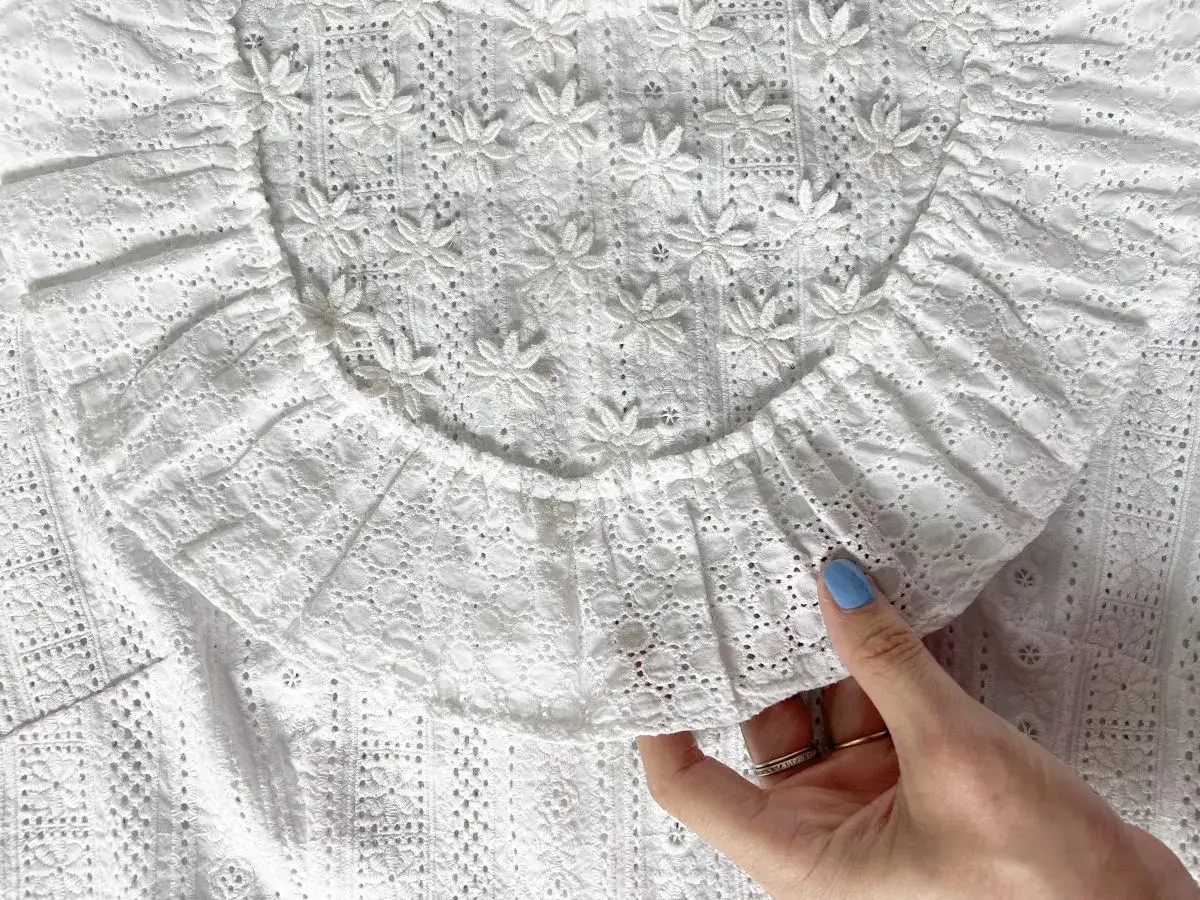
| Cotton eyelet or embroidered lace | Soft romantic collars | Comfortable, breathable, and easy to wear | Often needs interfacing or lining to keep its shape |
| Scalloped lace trim | Edged collars and decorative borders | The finish is built into the design | You have to plan motif placement carefully |
| Stretch lace | Close-fitting collar pieces | Moves with the body | Can distort quickly if you do not stabilise it |
A practical starting point for an adult detachable collar is usually 25-50 cm of lace fabric or enough lace trim to cover the neckline plus a little extra for matching and turning. Add 1 cm seam allowances for clean construction, or 1.5 cm if you want a little more room to trim and refine. For ties, 30-45 cm on each side is a sensible beginning, though the final length depends on how you want the collar to sit and knot.
With the materials chosen, the next decision is where the motifs sit, because lace has to be placed as carefully as it is sewn.
Draft the collar so the motifs land where you want them
I always start with paper. Lace forgives less than plain cotton, and expensive lace forgives even less. A paper pattern lets you check the neckline curve, the centre front, the collar width, and the way a scalloped edge falls before you commit a single cut.
- Measure the neckline or trace an existing collar that already fits well.
- Draw one half of the collar on paper and mark the centre front, centre back, and fold line clearly.
- Add seam allowance now, not later. For most collars, 1 cm is neat; 1.5 cm gives more room if the lace is delicate.
- Lay the lace flat in a single layer before cutting. This matters because motifs and scallops rarely sit well if the fabric is doubled and shifted.
- Place the pattern so the most decorative part of the lace lands at the outer edge or the centre front, where the eye naturally goes.
- If the lace is directional or asymmetric, cut the left and right sides separately from mirrored paper pieces instead of trying to force one cut piece to work both ways.
- Transfer marks to the support fabric where possible, not directly to the lace, because visible marks can be hard to remove cleanly.
If your lace has a scalloped border, plan around that first. The scallops are the visual edge of the collar, so I position them before I worry about seam allowances or fastenings. That small order-of-operations change makes the result look intentional rather than improvised.
Once the shape is set, sewing is mostly about controlling movement and preserving the edge.
Sew the collar in an order that keeps the lace calm
Lace shifts, stretches, and curls more easily than most collar fabrics, so the construction order matters. The goal is to fix the lace to something stable, sew the shape, then refine the finish without dragging the fabric out of alignment.
- If the lace is soft, fuse or stitch it to a lightweight support layer first. I prefer the lightest support that still gives the collar body.
- Baste the layers together with long hand stitches or a long machine stitch so the lace cannot slide while you sew.
- Place the collar pieces right sides together and stitch the outer edge first, leaving a turning gap of about 4-5 cm.
- Clip curved seam allowances carefully so the collar turns smoothly. On sharp corners, trim the bulk without cutting into the stitches.
- Grade the seam allowances if there are several layers. That means trimming each layer slightly differently so the edge lies flatter.
- Turn the collar through the opening, push the corners out with a point turner or blunt knitting needle, and check that both sides match.
- Press with a pressing cloth and low heat. Lace can flatten quickly, and once that texture is gone, it is hard to recover.
- Close the turning gap by hand or with a very neat edge stitch, then add your fastening method.
If you are attaching the collar to a garment, treat it like a miniature shirt collar: collar to neckline first, then facing or stand, then any understitching that helps the edge roll inward. That order keeps the inside tidy and gives the lace a cleaner outer line.
After the main seam is secure, the edge finish decides whether the collar looks airy or clumsy.
Finish the edges so the lace still looks delicate
Different laces need different finishing methods, and I would never force one treatment on every type. A stable guipure collar can tolerate more direct stitching. A sheer embroidered lace usually needs a softer finish, often with a backing layer or a narrow turned edge.
| Edge condition | Best finish | Why it works |
|---|---|---|
| Stable guipure or corded lace | Trim close to the motif and secure with a narrow zigzag or appliqué stitch | Keeps the sculptural outline visible |
| Fine embroidered lace | Back it with a light lining or facing | Stops the lace from collapsing and adds comfort |
| Scalloped border | Leave the scallop visible and finish only the inside edge | Protects the decorative edge the eye expects to see |
| Very sheer lace | Use underlining plus a narrow casing or binding | Creates body without making the collar look bulky |
One thing I would avoid is overpressing. A lace collar should look shaped, not ironed into submission. If you want a softer, more vintage result, let the front sit a little fuller and keep the neckline edge neat rather than heavy. If you want a sharper look, reduce bulk at the seam and keep the collar points precise.
The final check is fit, because a collar can look perfect on the table and still sit awkwardly on the body.
The refinements that make it look made to measure
This is the part that saves a project. A lace collar is small, but small pieces expose mistakes quickly. If the shape is slightly off, the eye sees it immediately. That is why I always do a try-on before I call the piece finished.
| Problem | Likely cause | Practical fix |
|---|---|---|
| Collar waves away from the neckline | Not enough stabilising or too much ease | Use a firmer backing and re-baste with shorter, more even stitches |
| Lace looks puckered | Stitches were too tight or pressing was too aggressive | Lengthen the stitch, ease the fabric more gently, and press through cloth |
| One side sits higher than the other | Pattern not mirrored correctly or centre marks were ignored | Recut from paper and match centre points before sewing again |
| Neckline feels scratchy | Seam allowances or lace motifs sit directly against the skin | Add a soft facing, lining, or a narrow binding |
| Collar droops after a few wears | Support fabric is too soft for the lace | Choose a firmer underlining or reinforce the neckline edge |
For styling, I keep the rest of the outfit restrained. Plain poplin, fine wool, linen, or a simple knit gives lace room to read properly. If the garment underneath is already busy, the collar starts competing with the outfit instead of finishing it. That is the difference between a decorative accent and visual clutter.
If you only remember one thing, make the first version from scraps or a cheaper trial fabric. It tells you quickly whether the neckline is too tight, the collar too wide, or the lace too soft for the shape. Once the mock-up behaves, the final collar becomes straightforward, and the lace can do what it does best: add detail without looking forced.
