
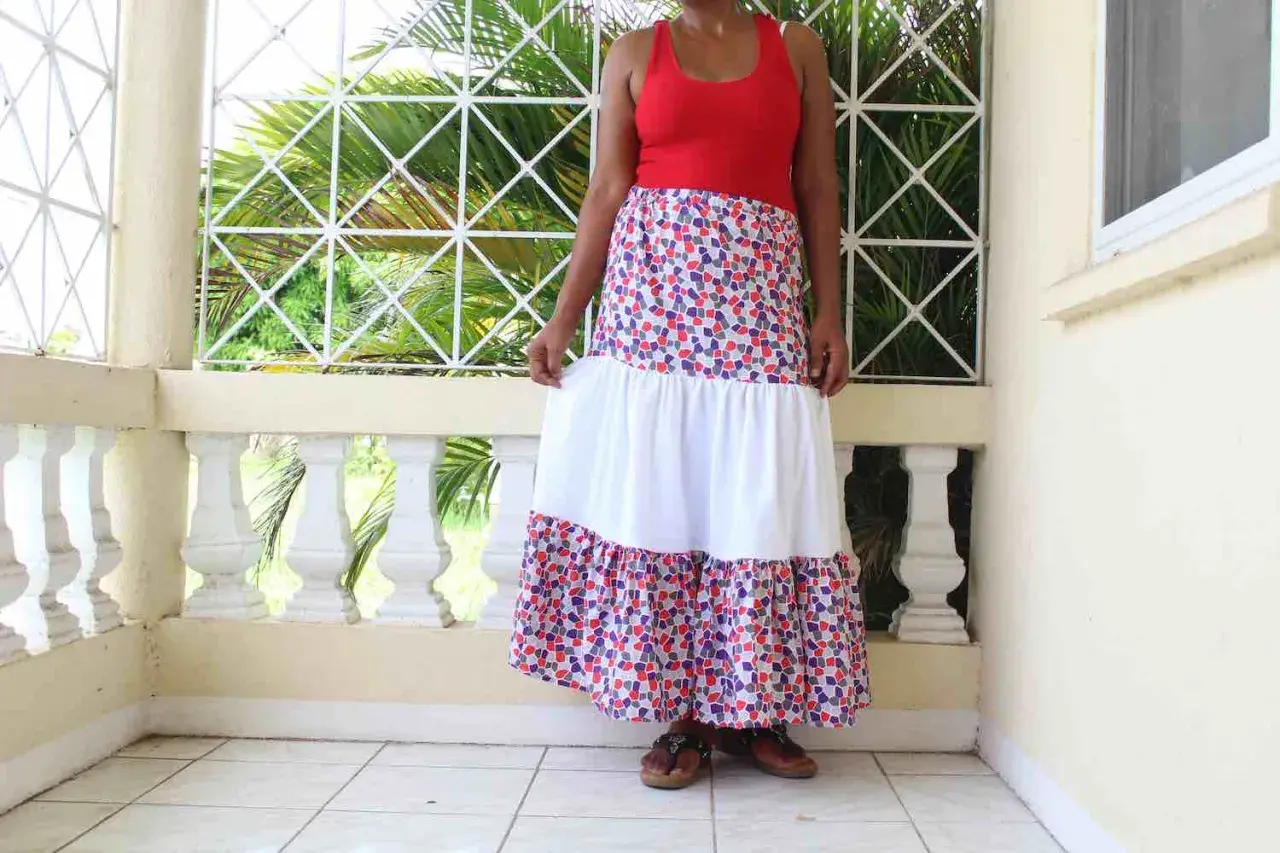
A tiered skirt is easiest to get right when the proportions are planned before you cut a single rectangle. A tiered skirt pattern is less about complex shaping than about balance: how wide each layer should be, how much fullness the fabric can handle, and how the tiers should fall so the skirt moves instead of puffing up. In this guide I focus on the decisions that matter in real sewing, from fabric choice and drafting to gathering, pressing, and the fixes that keep the finished skirt looking deliberate.
The practical rules that matter most
- Two or three tiers is the sweet spot for most skirts; more layers add seam bulk quickly.
- Choose lightweight woven fabric if you want soft movement and easier gathering.
- Plan the finished length first, then divide the usable skirt depth across the tiers.
- A gathering ratio of 1.5x to 2x is a safe starting point for everyday wear.
- Pressing each seam changes the final silhouette more than most beginners expect.
Why tier count and proportion matter more than fancy drafting
In practice, the main question is not whether the skirt can have layers, but how many layers still look clean on the body. Sew Essential’s advice matches what I see most often: two or three tiers are usually enough unless you want a very dramatic shape. Once you move beyond that, seam bulk, fabric weight, and hem control start to matter much more.
| Tier count | Best for | What changes |
|---|---|---|
| 2 tiers | Quick makes and softer volume | Fewer seams, less fabric, a cleaner line |
| 3 tiers | Most everyday skirts | Good swish without overwhelming the shape |
| 4 or more tiers | Statement skirts and maxis | More gathering, more fabric, more bulk at the joins |
I usually start with three tiers when I want the skirt to feel balanced. If you are making a children’s skirt or a very light summer version, two tiers can be enough; if you want real drama, use light cloth and keep the seam finishes thin. That brings us to the fabric, because the material will decide whether the tiers float or fight each other.
Choose a fabric that lets the gathers move
The fabric does most of the visual work in a tiered skirt. Lightweight wovens such as cotton lawn, viscose, rayon challis, chambray, and fine linen blends gather well and keep their movement. Heavier denim, thick linen, or stiff canvas can work for a sculptural version, but they make the skirt heavier, bulkier at the seams, and less comfortable the lower you go.
As a rough planning guide, a modest midi in 140 cm-wide fabric often lands around 2.5 to 3.5 m, while a fuller maxi can easily pass 4 m. The exact figure depends on the number of tiers, the gathering ratio, and how much of the skirt length you give to each layer.
| Fabric | How it behaves | Use it when | Watch out for |
|---|---|---|---|
| Cotton lawn | Light, neat, easy to control | You want a crisp summer skirt | May need lining if it is sheer |
| Viscose or rayon | Fluid, drapey, soft | You want movement and a dressier fall | It can shift on the cutting table |
| Chambray | Relaxed, slightly structured | You want everyday wear with a little body | Too many tiers can start to feel heavy |
| Lightweight linen blend | Breezy and textured | You want a casual, breathable skirt | Wrinkles and seam bulk need attention |
| Cotton poplin | Stable, tidy, slightly crisp | You want visible tier lines | Too much stiffness can make the skirt stick out |
One thing I always check is opacity. If the skirt is light in colour or made from a translucent cloth, lining the upper part or wearing a separate slip is often cleaner than trying to solve the problem with heavier fabric. The other check is quantity: tiered skirts are fabric-hungry, so plan from the widest lower tier, not from the waistband upward. Next, I would draft the layers from measurements rather than guesswork.
Draft the tiers from your measurements
I draft these skirts from finished measurements, not from guesswork. The simplest method is to decide the final length, subtract the waistband and hem allowances, then divide the remaining length across the tiers. If the skirt sits at the natural waist, the hip measurement only matters if the top tier has to pass over the hips; with an elastic waist above the hips, the waist is usually enough.
By Hand London’s example uses a top tier cut at 2.5 times the waist and a lower tier at 1.5 times the one above it, which is a useful starting point if you want fullness without losing control. I would treat that as a practical baseline, not a rule carved in stone.
| Decision | Practical starting point | Why it works |
|---|---|---|
| Tier depth | Divide usable skirt length equally, then adjust the lowest tier if you want more swish | Keeps the proportions readable |
| Top tier width | 1.5x to 2x the waist | Enough comfort without a puffed waistline |
| Lower tiers | 1.5x to 2x the tier above | Builds fullness gradually |
For example, if your finished length is 78 cm and you allow 4 cm for the waistband and 2 cm for the hem, you have 72 cm left for the skirt body. Split that into three tiers and you get 24 cm per tier before seam allowances. If you want a softer look, keep the first tier a little shorter and give the extra depth to the bottom tier; that makes the silhouette less boxy. I also make a scrap test strip when I am changing ratios, because a quick mock-up tells me more than a guess ever will.
- Mark the grainlines on every tier so the skirt hangs straight after gathering.
- Add seam allowance and hem allowance now, not after you start sewing.
- Check your widest tier first; if it does not fit the fabric width, plan for piecing before you cut.
Once the measurements make sense, the sewing itself becomes much calmer. The order of assembly is what keeps the volume under control.
Sew the layers in the order that keeps the volume under control
The order of construction matters because every extra seam makes the skirt harder to handle. I prefer to finish each raw edge first, sew the side seams in the upper tier, then gather and attach one tier at a time. On slippery viscose I baste by hand or use two rows of machine basting so the gathers stay even; on cotton lawn, a gathering foot or long basting stitches is usually enough.
| Waist finish | Why I use it | Trade-off |
|---|---|---|
| Elastic casing | Fast and forgiving | Less tailored |
| Flat waistband | Sharper finish | Needs more precise fitting |
| Drawstring casing | Comfortable and adjustable | Looks more casual |
- Finish the lower edges before assembly if the fabric ravels easily.
- Sew and press each tier into a loop, checking that the side seams match.
- Gather one layer at a time and distribute the fullness between notches or quarter marks.
- Stitch with the gathered piece on the bottom so the feed dogs help control the fullness.
- Press the seam towards the lower tier unless the fabric is too delicate, in which case use a press cloth and light pressure.
- Hem last, and keep the hem narrow on lighter fabrics so the skirt does not lose movement.
On lightweight cloth I usually keep the hem between 1 cm and 1.5 cm, because a heavy hem can drag the lower tier down. If you want a cleaner finish inside, French seams are excellent for light fabrics, while an overlocker or narrow zigzag is more practical for everyday woven cotton. That leads straight into the mistakes that show up when the skirt is almost right but not quite.
Fix the mistakes that make the skirt look bulky
The most common failures are not dramatic; they are subtle shape problems. The skirt still fits, but it looks heavy, uneven, or slightly reluctant to move. Nearly always, that comes from one of five things: too much fabric weight, too much gather ratio, tier depths that are too similar, weak pressing, or a hem that is too bulky for the cloth.
| Problem | Likely cause | What I would change |
|---|---|---|
| Skirt drops and loses swish | Fabric is too heavy for the number of tiers | Use fewer tiers or a lighter cloth |
| Waist looks puckered | Gathering ratio is too aggressive | Move from 2.5x to 1.5x-2x |
| Shape looks boxy | All tiers are the same depth | Give the lower tier a little more depth or width |
| Seams look lumpy | Bulk has not been trimmed or pressed down | Trim seam allowances carefully and press after each join |
| Hem flares strangely | Hem is too deep for the fabric | Use a narrower hem or a softer fabric |
I also watch the grain. If one tier is off grain, the skirt can twist once it hangs for a few hours, and that is hard to fix later. When the cloth is slippery, the best cure is patience, not force: baste first, press in stages, then trim only after you are sure the tier is sitting correctly. That leads naturally to the final checks I make before I cut anything expensive.
The last checks before you cut and sew
Before I cut dress fabric, I check three things: that I have enough cloth for the widest lower tier, that the waistband plan matches how I actually want to wear the skirt, and that the fabric can handle the amount of gathering I am asking from it. If any of those answers feel shaky, I simplify the design before I start. A cleaner skirt is usually the one with fewer compromises, not the one with the most layers.
- Confirm the widest tier fits the fabric width cleanly, or plan to piece it deliberately.
- Cut and label the tiers in order so you do not mix up the lengths after gathering.
- Keep seam finishes slim if the skirt is long or heavily layered.
- Test the hand of the fabric with a small gathered sample before committing to the whole project.
When the proportions are calm, the fabric is light enough, and the seams are handled neatly, a tiered skirt looks polished without trying too hard. That is the version I would make for everyday wear, because it still feels generous and swishy, but it also behaves like a garment I will actually reach for.
