
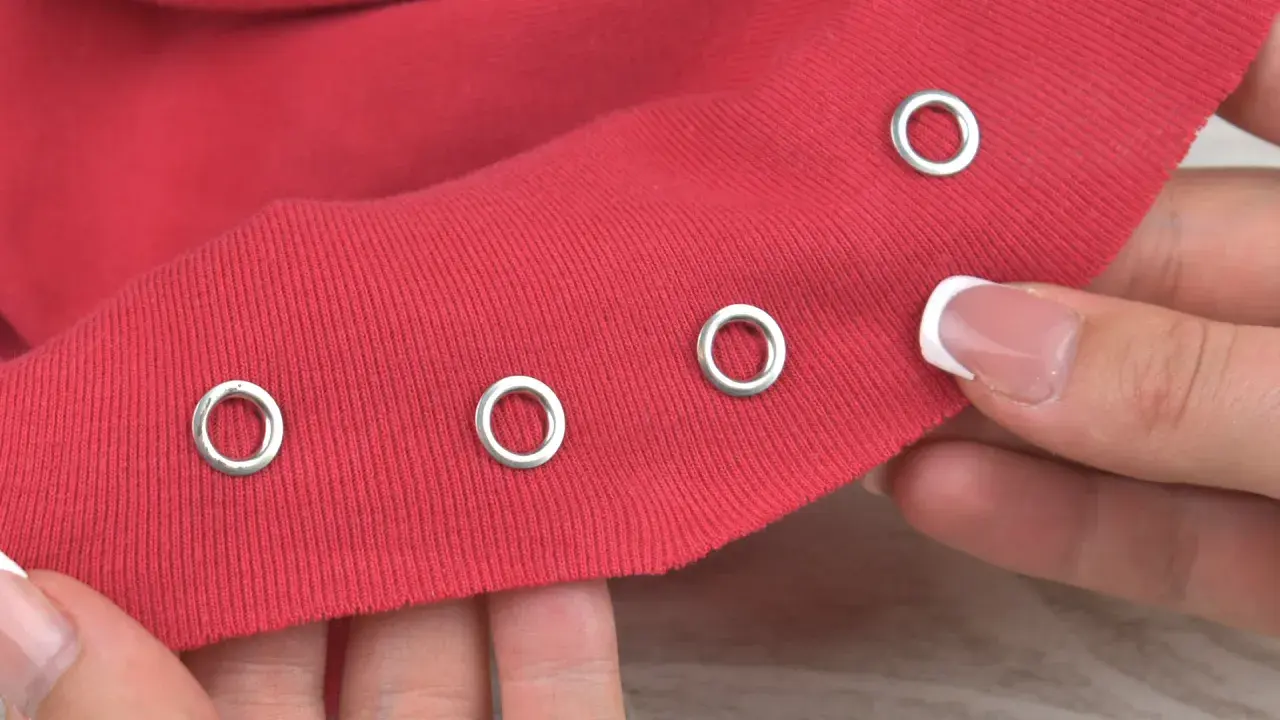
Metal rings only look simple from the outside. In practice, the result depends on the hardware size, the fabric weight, and how well the opening is reinforced before you press anything through it. This guide explains how to put metal rings in fabric cleanly, when to choose eyelets rather than larger grommets, and how to avoid the pull-outs, puckering and ragged holes that spoil a finished piece.
The essentials at a glance
- Use an eyelet for smaller lacing or cord openings, and a grommet when the hole needs more strength.
- Reinforcement is doing the real work here, especially on light wovens, canvas and any fabric that frays easily.
- Match the hole size to the hardware set instead of guessing, because an oversized hole is the main reason rings fail.
- In UK haberdashery shops, basic eyelet pliers often start around £9.50, punch pliers around £19.50, and multi-tool presses from about £16.50.
- Test on scraps first; the right pressure on denim is not the same as the right pressure on cotton lawn.
What the hardware actually does in the fabric
What most sewists call a metal ring is usually an eyelet or a grommet. I treat eyelets as the smaller, lighter option for ribbons, cords and lacing, while grommets are the sturdier choice when the hole will take more strain. If the ring is only decorative, I sometimes skip piercing the fabric altogether and sew on a ring tab or use a visible ring trim instead.
| Option | Best use | What it gives you | Limitation |
|---|---|---|---|
| Eyelet | Drawstrings, lacing, lighter decorative openings | A neat, compact hole with a clean finish | Less forgiving on weak or stretchy fabric |
| Grommet | Heavier cords, curtain headings, bags, corsetry | A stronger, more load-bearing opening | Needs better support and a more controlled setting |
| Sewn-on ring trim | Decoration only | A metallic detail without piercing the cloth | Does not reinforce a functional opening |
I start with the load, not the look. That one habit saves more projects than any fancy tool, because the right hardware makes the rest of the job straightforward, which is why size and backing come next.
Choose the right size and support for the cloth
The ring has to suit both the cord and the fabric. A 3 mm ribbon needs a very different opening from a thick drawstring, and a lightweight blouse fabric needs more help than denim does. As a rough working guide, I keep the opening just large enough for the cord to move comfortably, not so large that the ring can wobble.
| Cord or use | Practical ring size | My rule of thumb |
|---|---|---|
| Thin ribbon or narrow tie | 4-5 mm eyelet | Give the tie just enough clearance to move freely |
| Standard drawstring | 8 mm eyelet | Good for casual wear, bags and light lacing |
| Heavier cord or load-bearing opening | 11-14 mm grommet | Better when the opening will be pulled often |
| Decoration only | Sewn-on ring or trim | Use metal for the look, not for the stress |
I also pay attention to placement. On light fabrics, I aim to keep the centre of the ring at least 10 mm from an edge or seam; on stress points, 15-20 mm is safer. That margin matters more than people expect, because a ring that is too close to a hem or seam allowance can tear the fabric long before the hardware itself fails.
Once the size is right, the real work is giving the fabric a backing that can actually hold the metal.
Prepare the fabric so the ring has something to grip
Reinforcement is the part that makes the installation last. For ordinary cottons and linens, a medium-weight woven fusible interfacing is usually enough. For denim, canvas and upholstery-weight cloth, I like an extra patch on the back. For sheer or delicate wovens, I use sew-in organza or a light cotton patch, because a heavy fusible block can show through and flatten the drape.
- Cut the backing patch at least 25 mm larger than the hardware area in every direction.
- Place the reinforcement on the wrong side before you punch any hole.
- Press the area flat so the fabric does not shift while you mark it.
- Keep the opening away from darts, seam allowances and bulky joins.
- Avoid stretch jersey unless the area is heavily stabilised or the ring is purely decorative.
For most woven fabrics, a single stabilising layer is enough if the hardware is small. On a bag flap, corset front or curtain heading, I often stack two layers of support: one inside the garment or project, and one directly under the visible layer. That extra thickness looks boring on paper, but it is exactly what stops the ring from cutting through later, which brings us to the actual setting process.
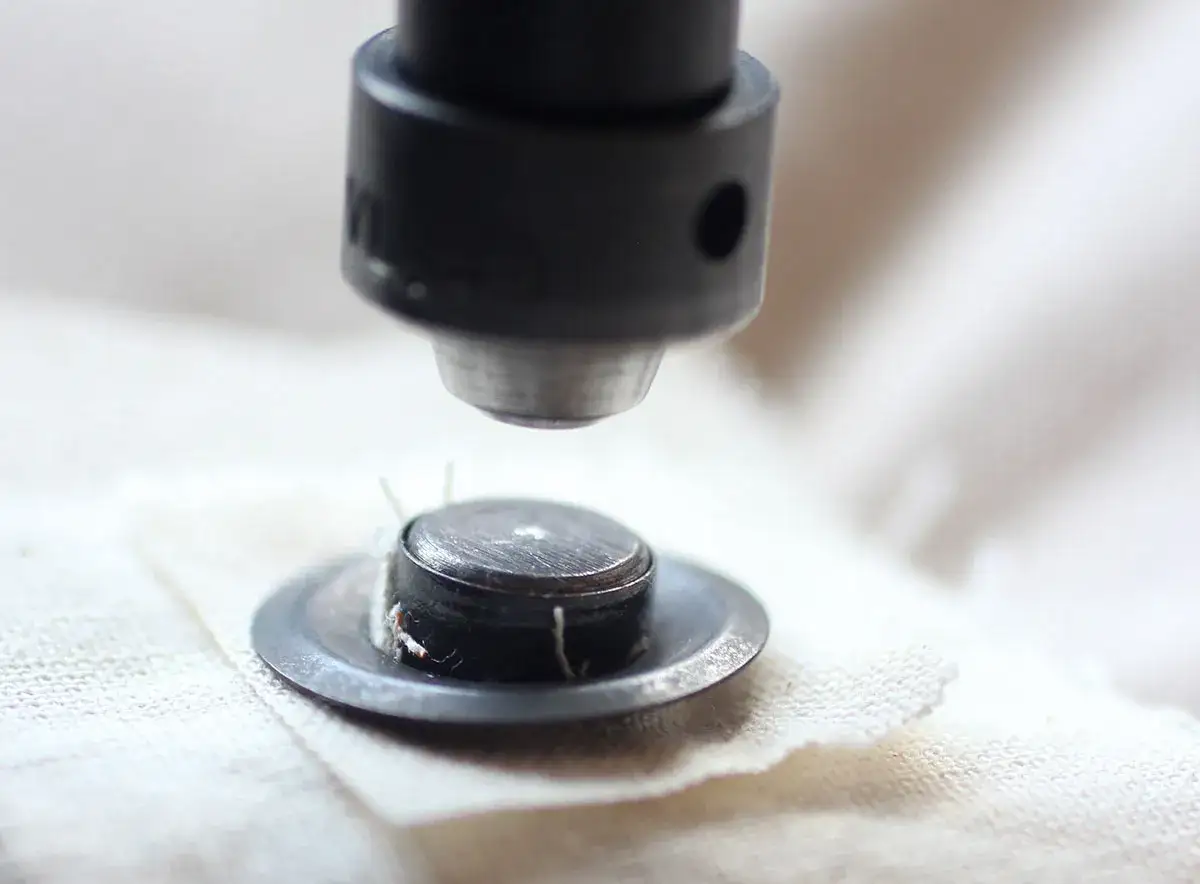
How I set eyelets and grommets without crushing the fabric
The tool matters, but the sequence matters more. Cheap kits work fine if the hole is correct and the fabric is supported; expensive tools just make the same process easier to repeat. In UK shops, simple eyelet pliers are often around £9.50 to £20, punch pliers sit near £19.50, and multi-function press tools start around £16.50 and rise from there.
| Method | Best for | Typical UK price | What I think |
|---|---|---|---|
| Hammer and anvil kit | Occasional repairs and one-off makes | About £8-£20 | Cheap and workable, but it needs a steady hand |
| Eyelet pliers | Small runs, bags and costumes | About £9.50-£20 | Fast, tidy and easier for beginners |
| Multi-tool press | Repeated work and thicker fabrics | About £16.50 and up | Best consistency when you are setting several rings |
Some plier systems punch 3 mm or 4 mm holes, while revolving punch pliers often cover several sizes, typically from 2.5 mm to 5 mm. I do not chase the biggest hole available. I use the size that matches the ring set the maker supplied, because mixed systems are where most alignment problems start.
- Mark the spot on both sides and check the spacing against your pattern piece or template.
- Fuse or baste the reinforcement patch in place before you cut anything.
- Make a small starter hole with the matching punch, not with scissors.
- Insert the eyelet or grommet parts so the smooth finished face sits on the right side of the fabric.
- Set it on a hard, flat surface with the matching setter, anvil or press.
- Test it by tugging gently in several directions and checking for movement, puckering or a split edge.
If the ring rocks, the hole is too large or the set is incomplete. A clean setting should sit flat, feel firm and resist twisting. I would rather remove a bad ring and start again than try to rescue a distorted one, because the second attempt usually damages the cloth more than the first.
The mistakes that make the ring fail later
Most bad eyelets do not fail because the hardware was poor. They fail because the fabric was not ready for it, or because the setting step was rushed. When I see a ring tear out, the cause is usually obvious once I look closely at the hole and the backing.
- The hole is oversized - the hardware twists and the edge frays faster. Punch smaller and enlarge only if the set instructions require it.
- There is no stabiliser - the opening stretches and puckers. Add a backing patch at least 25 mm larger than the ring area.
- The fabric is too close to an edge - hems and seams split under load. Leave 10 mm on light fabrics and 15-20 mm on stress points.
- The work surface is soft - the ring never rolls or crimps properly. Use a steel block, heavy tile or proper anvil.
- The fabric is stretch knit - the opening grows over time. Stabilise heavily or choose another closure.
- The setter does not match the hardware - the ring may look closed but still move under pressure. Keep the parts as a matched set.
Once you know what fails, the next question is whether metal rings are even the best finish for the project. That is where a bit of judgment saves time and fabric.
When a different finish is the better call
There are plenty of moments when a ring is not the smartest answer. On a sheer blouse or a soft dress, I usually prefer a buttonhole or a bound opening because it drapes better and does less damage to the cloth. On stretch jersey, I lean towards snaps or a reinforced binding, because the knit moves and a metal hole often grows with it.
| Situation | Better finish | Why I would choose it |
|---|---|---|
| Lightweight blouse, dress or sheer layer | Buttonhole, bound opening or stitched eyelet detail | Less strain, less bulk and a cleaner drape |
| Stretch jersey or activewear | Snap fastening or reinforced binding | The knit moves; metal openings often distort |
| Heavy curtain, canvas bag or corsetry | Grommet or reinforced eyelet | Better load-bearing and easier lacing or hanging |
| Decoration only | Sewn-on ring, ring tab or metal trim | No hole is needed, so there is less risk of fraying |
In structural projects, hardware earns its place. In decorative work, it should stay out of the way unless it adds something the stitching cannot. That distinction sounds small, but it is the difference between a neat finish and a ring that starts to bite into the fabric after a few wears.
The finish I trust when the piece will be worn hard
- Match the hardware to the fabric weight instead of choosing the biggest ring available.
- Reinforce first, then punch, because the backing is what keeps the opening stable.
- Use a matched setter and hardware set, especially when you are working on a project with multiple rings.
- Test the installed ring on a scrap before you commit to the final fabric.
