
Learning how to take in leggings is mostly about choosing the smallest alteration that still respects stretch. A clean result depends less on heavy sewing and more on reading where the extra fabric sits: the waist, seat, thighs, or lower leg. In this guide I’m focusing on practical methods that make leggings fit more snugly without turning them into stiff, uncomfortable trousers.
The smallest clean alteration usually gives the best fit and the least damage to stretch
- Start with the problem area before you touch a seam; loose waist and loose legs need different fixes.
- Side seams and the centre back seam are usually the safest places to remove width.
- Use a stretch stitch, narrow zigzag, or overlocker so the seam can still move with the fabric.
- Baste first and try them on again before trimming any excess.
- Fix the waistband on its own if the legs already fit well.
Start by finding where the leggings are actually too big
I always begin with the fit issue, not with the scissors. If the waistband slides down but the legs feel fine, you do not need to take in the whole garment. If the fabric bags at the hips or seat, the extra room is lower than the waist and needs a different treatment.
Here is the quickest way I assess a pair:
- Loose waist only means the waistband or elastic is the problem.
- Loose hips and thighs usually call for side seam reduction.
- Bags under the seat point to the back rise or centre back seam.
- Gathering below the knee can mean the leg line is simply too generous for the fabric.
That distinction matters because leggings rely on recovery, which is the fabric’s ability to spring back after stretching. If the knit is soft and tired, a small alteration may help a lot; if recovery is poor, taking it in too aggressively can expose the seams or make the fabric go sheer. Once I know where the looseness lives, I can choose the least visible seam to open.
Choose the seam that gives the cleanest result
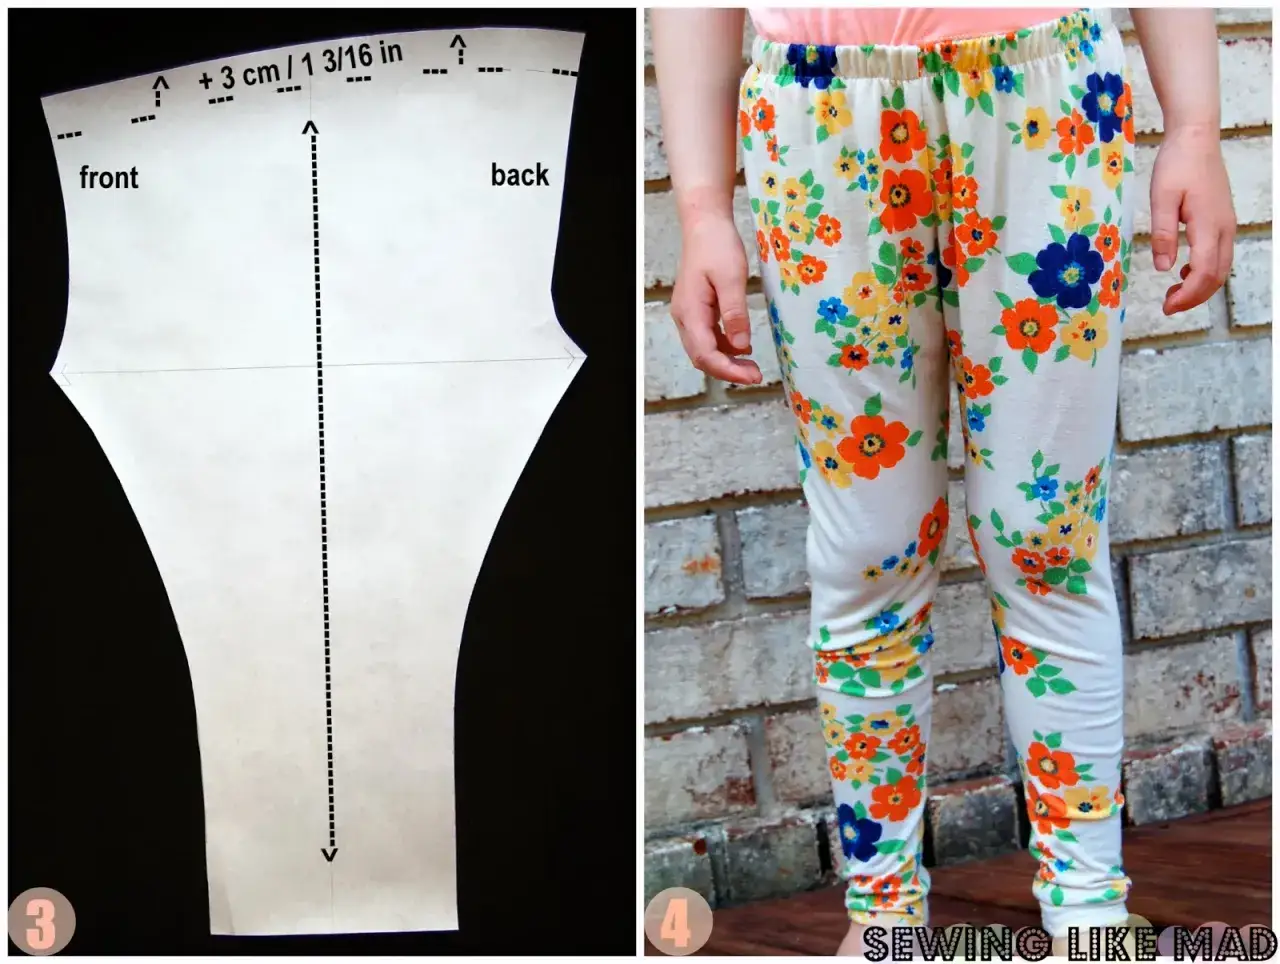
Not every seam is equally useful. When I alter leggings, I look for the seam that removes width without changing the shape of the leg more than necessary. A slight reduction at the side seam is often invisible. A bigger change at the crotch or rise can work, but only if the problem is clearly there.
| Alteration point | Best for | Difficulty | Watch out for |
|---|---|---|---|
| Side seams | General looseness through the hip and thigh | Easy | Can shift the leg line if you take off too much at once |
| Inseam | Extra room in the inner leg or calf | Easy to moderate | Can feel awkward if the original inseam is already flat and narrow |
| Centre back seam | Gaping waist, seat, or small-of-back fullness | Moderate | Needs careful balancing so the back rise still sits naturally |
| Waistband only | Legs fit well but the top edge slips | Moderate | Do not remove so much elastic that the waistband loses recovery |
My rule of thumb is simple: if you only need a light adjustment, remove about 6-8 mm from each relevant seam and reassess. Once you are over roughly 2.5 cm in total reduction, the balance of the leggings starts to change, and I become much more cautious. The more the garment depends on stretch, the more important it is to preserve the original shape.
Take them in at the side seams or inseam
This is the method I reach for most often because it is controlled and predictable. It works especially well when the leggings are just a touch too roomy, or when the looseness is spread evenly through the leg rather than concentrated at the waist.
- Turn the leggings inside out and put them on carefully, or pin them over another pair that already fits well.
- Pin along the area you want to remove, keeping both sides balanced.
- Mark the new seam line with tailor’s chalk, soap, or a washable fabric pen.
- Baste the seam first with a stretch stitch or a long narrow zigzag.
- Try them on again before cutting anything away.
- Once the fit is right, stitch the final seam, then trim and finish the raw edge if needed.
I prefer to start from the hip and taper gradually, rather than taking the same amount out from top to hem. That keeps the leg line natural. If the leggings have a lot of print or a side panel, follow the design lines carefully so the alteration does not look twisted from the front.
For stitch choice, a regular straight stitch is usually the wrong answer on stretch fabric. A narrow zigzag, stretch stitch, or overlocker seam will move with the knit instead of snapping the first time the leggings are pulled on. If your machine struggles with slippery jersey, a walking foot can help feed the fabric evenly. After sewing, I press gently with steam rather than dragging the iron, which helps the seam settle without stretching it out again. Once the seam is stable, the waistband becomes the next thing to check.
Fix the waistband when the legs already fit
If the legs fit well and only the top edge is loose, I leave the leg seams alone and work on the waistband. That is usually the cleaner option, because taking width out of the whole garment can make the hips or thighs too tight just to solve a waist issue.
There are three common waistband fixes:
- Reduce the waistband seam if there is enough seam allowance and the looseness is small.
- Replace or shorten the elastic if the elastic has relaxed and no longer holds shape.
- Reshape the band with a slight curve or centre-back adjustment if the waist gapes at the back.
When I replace elastic, I usually start by cutting it just 5-10% shorter than the opening it needs to support, then testing the tension before final stitching. A 6 mm clear elastic can also help keep the top edge from rolling or collapsing. If the waistband is contoured, remember that the back rise is often higher than the front; forcing both sides to behave the same usually creates new problems. A little patience here saves a lot of unpicking later, especially once the fit issue is actually at the back rise rather than the waist itself.
Reshape the seat and rise when the back is the real problem
Some leggings look loose only because the back rise is too long or the seat has extra room. In that case, taking in the side seams alone can make the front feel fine while the back still sags. I watch for horizontal folds below the waistband, pooling under the seat, or fabric that collapses at the small of the back.
The most useful fixes are:
- Take in the centre back seam for a gaping back waist or extra width through the seat.
- Remove a small amount of back rise length if the fabric pools under the waistband.
- Leave the front mostly alone unless the front crotch is also baggy.
This is the point where I slow down. The rise controls how the whole garment hangs, and it is easy to overcorrect. If you pinch out too much at the back, the leggings can pull at the crotch, ride up, or feel shorter than they should. A small centre back adjustment is often enough; a deep reshaping is only worth it when the original fit issue is obvious and consistent. Once the back balance is right, the last job is making sure the new seam behaves like knitwear rather than woven cloth.
Use the right stitch and fabric handling so the alteration lasts
The seam can be perfectly placed and still fail if the stitch is wrong. Knit fabric needs flexibility, and the sewing machine settings matter more than many people expect. I keep a few basics in mind every time I alter leggings:- Needle: a stretch or jersey needle in size 75/11 or 80/12 is a solid starting point.
- Stitch: a narrow zigzag or stretch stitch usually gives the best balance of strength and give.
- Stitch length: around 2.5-3 mm is a sensible test range for most stretch seams.
- Testing: sew on scraps from the same fabric before touching the garment.
- Pressing: use steam lightly and avoid pulling the seam open while it is still warm.
If the knit is thin and highly elastic, I am careful not to over-trim seam allowances. A little extra allowance can be useful if the leggings need another fit tweak later. If the fabric is already delicate or has weak recovery, I also avoid making the new seam too tight, because the garment may look smaller in the mirror but fail in movement. In activewear especially, comfort and mobility matter just as much as appearance. That leads to the final question I ask before I finish any pair: which fix gives the best return for the least disruption?
Keep the alteration as small as the fit problem allows
For most leggings, I would rather take out a little width at the side seam than rebuild the whole garment. If the waistband is the only issue, I fix the band only. If the back is baggy, I work at the centre back before touching the front. That approach keeps the stretch where the body needs it and avoids turning soft knitwear into something awkward and overworked.
- Minor looseness: take in the side seams first.
- Waistband slip: repair or shorten the elastic.
- Back gaping or seat pooling: adjust the centre back and rise.
- Poor recovery fabric: keep the alteration modest or consider replacing the pair.
The best result is not the smallest possible pair, but the pair that sits close to the body, moves comfortably, and still looks clean after several wears. That is the standard I use every time I alter leggings, and it is usually what saves a pair that would otherwise be pushed to the back of the drawer.
