
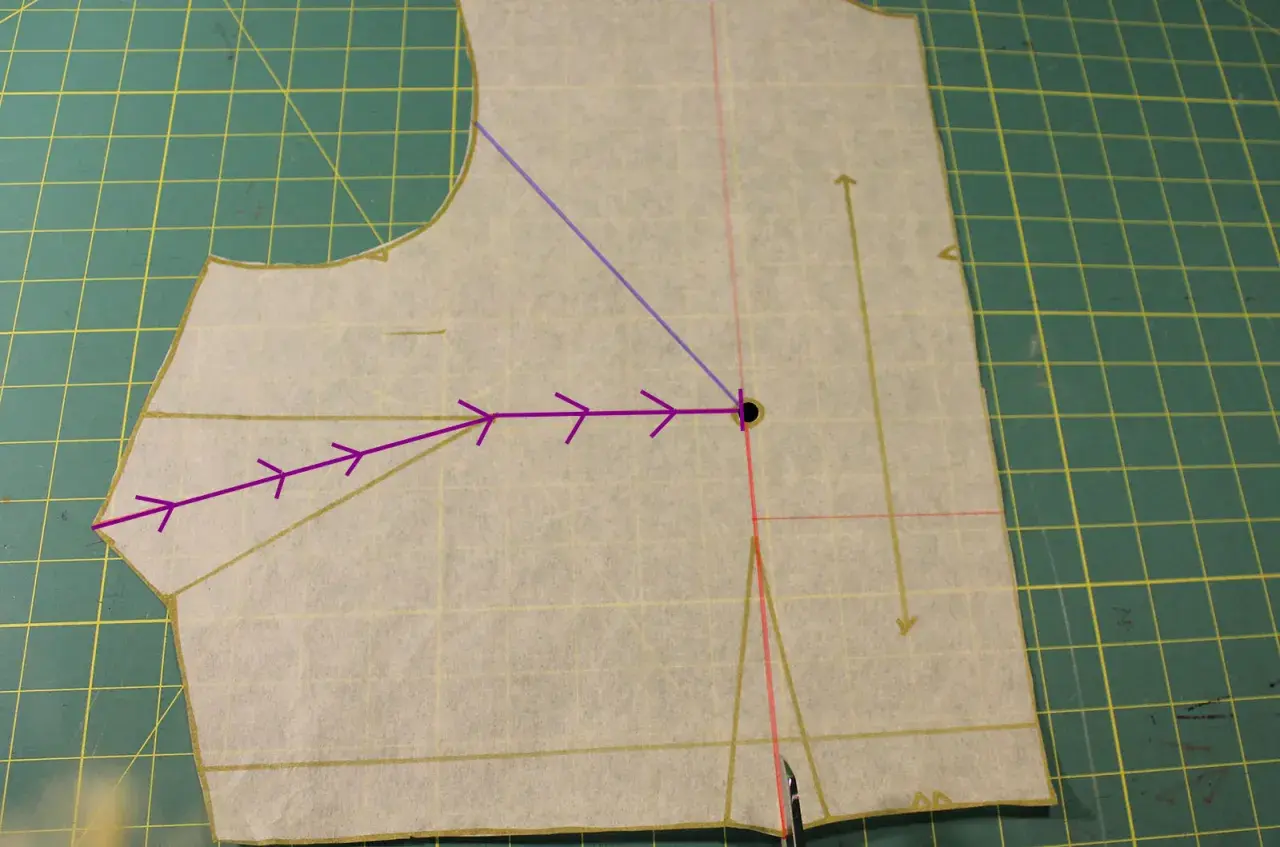
Shaping the bust is one of the fastest ways to make a bodice look deliberate rather than homemade. Bust darts are one of the simplest tools for doing that, because they remove the extra fabric that would otherwise pool across the front and help the garment follow the body instead of fighting it. In this guide, I cover what they do, where they belong, how I sew them cleanly, and when it makes more sense to reshape the pattern instead of forcing the seam line.
The fitting facts that save time at the machine
- A dart is a wedge of fabric removed to create three-dimensional shape in a flat pattern.
- The tip should stop short of the bust apex, usually about 2.5-5 cm (1-2 in) away, depending on bust size and fabric.
- Clean stitching and pressing matter as much as placement; a good dart can still look messy if it is sewn or pressed badly.
- If the bodice pulls or gaps, moving the dart or doing a full bust adjustment is often better than sizing up the whole garment.
- Princess seams can replace a dart when you want shaping and a more visible style line.
What a dart does in a bodice
A dart is not decoration first. It is a shaping device that turns flat cloth into a form that can sit over a curved chest without wrinkles or drag lines. In plain terms, the dart removes fullness where the body does not need it and aims the remaining fabric towards the bust curve.
I think of it as a controlled fold. The wider the wedge, the more fabric is taken out; the narrower the wedge, the gentler the shaping. That is why a well-drafted bodice can look smooth from the side seam, shoulder, or waist while still fitting the front of the body correctly.
This matters most on woven fabrics, where there is little natural stretch. Once you understand that the dart is simply managing excess cloth, the next job is placing it in the right place.
How to mark the placement before you sew
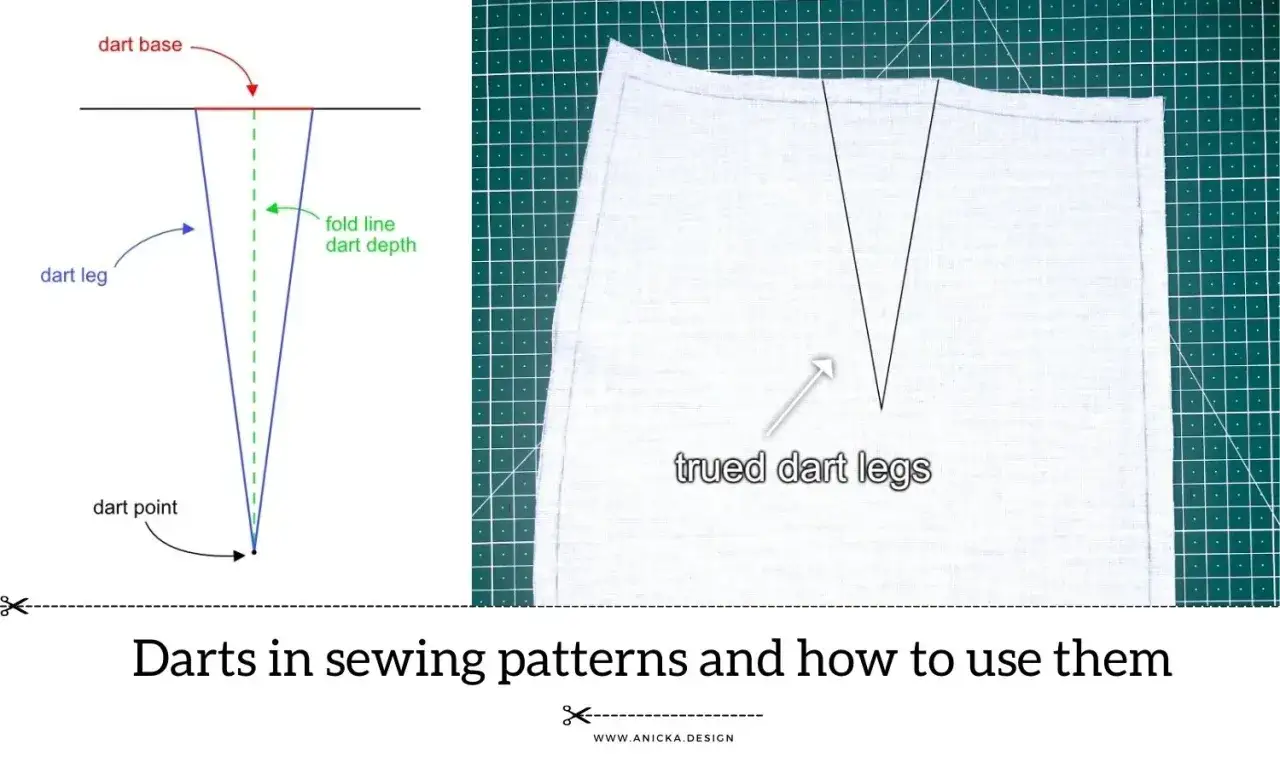
The biggest mistake I see is treating dart placement like a fixed rule. It is not. The dart needs to point towards the bust apex, but the point should stop short of it so the fabric can still curve smoothly over the fullest part of the bust.
My process is simple and works well on most woven bodices:
- Put the pattern or toile on the body, or work from measurements you already trust.
- Find the bust apex on the pattern piece and mark it clearly.
- Draw the dart legs so they aim at that point.
- Shorten the tip so it ends about 2.5-5 cm (1-2 in) before the apex, adjusting for bust size and fabric weight.
- Check that the line is balanced on the grain and that both sides of the garment match.
For a smaller bust, the tip can sit a little closer; for a fuller bust, I usually give it more breathing room. The pattern should guide the cloth over the curve, not stab directly into it. After marking, the sewing method decides whether the shaping disappears cleanly into the bodice.
How I sew a clean dart line
A neat dart is mostly about control. I fold on the centre line, match the legs exactly, and pin or hand-baste before stitching if the fabric is slippery or the dart is long. That small extra step saves me from uneven edges and a point that twists at the end.
The stitching sequence matters too:
- Start at the wider end of the dart and stitch towards the point.
- Keep the first part of the seam steady, then gradually taper the stitches as you near the tip.
- Do not backstitch at the point; instead, leave thread tails and secure them neatly if needed.
- Press the dart over a tailor’s ham so the curve matches the shape of the body.
Pressing is not an afterthought. On fitted bodices, I decide the direction by how the garment hangs, the thickness of the fabric, and the style of the finished piece. The goal is always the same: remove bulk without creating a ridge or a shadow line. Once the stitching is clean, fit becomes the next question, because placement still has to suit the body.
When to move, lower, or reshape the dart
Even a well-sewn dart can be wrong if the bodice was drafted for a different shape. If the tip sits on the bust point, the fabric often puckers. If it stops too high, the front can feel strained or look flat above the fullest part. If it sits too low, the shaping drops and the garment can look heavy across the chest.
These are the signs I look for in a fitting toile:
- Diagonal drag lines from the dart towards the bust usually mean the point is misplaced.
- A small bubble or dimple at the tip usually means the dart ends too abruptly.
- Gaping at the neckline or armhole can mean the front needs more shaping, not a bigger size.
- Pulling across the bust with otherwise loose shoulders often means the pattern needs a full bust adjustment.
The useful rule of thumb is that fuller busts usually need the dart point a little further away from the apex than smaller ones, but that is only a starting point. Body shape, bra support, fabric weight, and garment ease all change the result. Once the dart is in the right place, the next decision is whether a dart is still the best shaping tool for the design.
Which shaping method fits the garment
Not every bodice needs the same kind of shaping. Sometimes a standard dart is the cleanest answer. Sometimes a princess seam gives a better line. And sometimes the best fix is not another seam at all, but a full bust adjustment that changes the pattern before you cut the cloth.
| Method | Best for | What it changes | Trade-off |
|---|---|---|---|
| Side bust dart | Simple tops, blouses, and fitted bodices | Removes fullness from the front without changing the rest of the garment much | Can be visible if the fabric is bulky or the placement is off |
| Waist dart | Bodices that need both bust and waist shaping | Takes in excess fabric through the torso and gives a more fitted silhouette | Can look severe if the waist suppression is too strong |
| French dart | Wrap styles, elegant tops, and softer tailoring | Moves shaping diagonally from the side seam toward the bust | Needs careful placement to avoid pulling at the armhole |
| Princess seam | Close-fitting dresses, jackets, and style lines that need shaping | Replaces the dart with a longer curved seam | More pieces to sew and true, so accuracy matters more |
I reach for a princess seam when I want shaping to become part of the design, not just a hidden construction detail. I reach for a regular dart when the garment is simpler and the fit job is smaller. Either way, the seam choice should serve the body and the fabric, not the other way round. The last step is avoiding the mistakes that make all this work look less effective than it should.
The mistakes that cause the fit problems people blame on the pattern
Most dart problems are not mysterious. They are usually caused by one of a few predictable errors, and once you know them, they are easy to spot.
- Letting the tip land on the bust apex instead of short of it.
- Sewing a sharp, abrupt point instead of a smooth taper.
- Pressing the dart flat without shaping it over a ham.
- Using a dart where the pattern really needs a larger front adjustment.
- Changing the bust area but forgetting the rest of the bodice balance.
The most expensive mistake is usually sizing up the whole pattern when only the front needs more room. That can widen the shoulders, change the neckline, and create a garment that is bigger but not better shaped. A good toile saves money here, because it tells you whether you need to move the dart, deepen it, or change the pattern draft altogether. Before I cut good fabric, I always make one last check on the sample.
The fitting checks I make before cutting fashion fabric
Before I commit to the final cloth, I want to see three things: the front should hang smoothly, the bust shaping should look intentional, and the neckline and armhole should still sit where they belong. If those basics are wrong, I do not blame the fabric first; I go back to the pattern.
- Confirm that the dart point stops short of the bust apex.
- Check that the front grain still falls straight.
- Make sure the bodice does not pull at the armhole or gape at the neckline.
- Look for smooth fabric flow from shoulder to bust and from bust to waist.
When those checks pass, the dart has done its job quietly, which is exactly what I want. The best shaping is the kind you barely notice: the garment fits, the bust is supported, and the fabric behaves as if it was made for the body from the start.
