
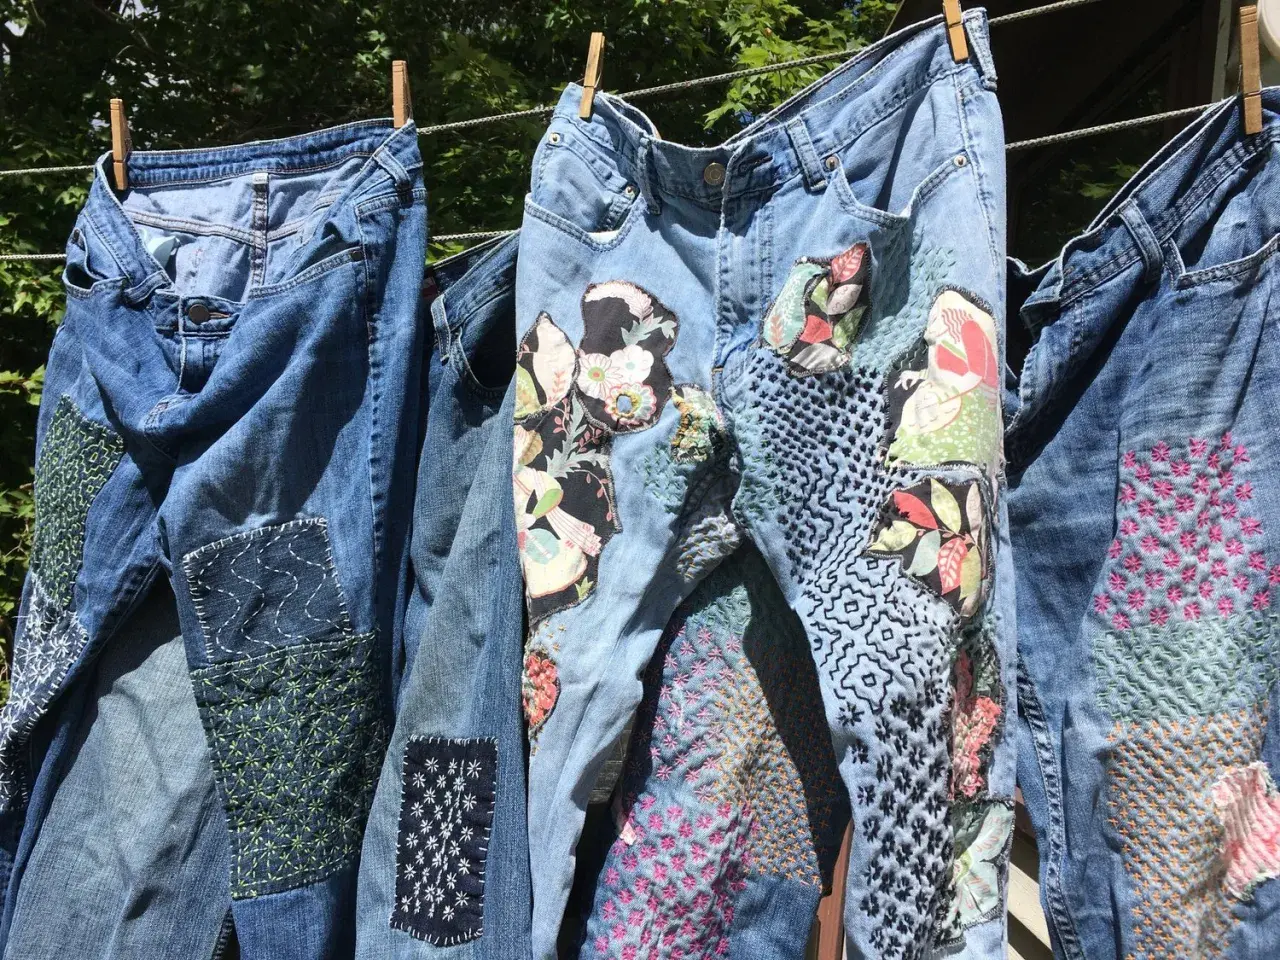
Darning is one of the most practical repairs I keep coming back to because it does more than hide damage: it rebuilds worn fabric with thread. Instead of adding a patch, you create a new structure that takes the strain away from the hole or thin spot. This guide explains how to darn, which fabrics it suits best, what tools make the job easier, and the mistakes that usually shorten a repair.
The essentials before you start mending
- Darning creates a new thread grid over damaged fabric, so the garment can keep wearing.
- It works best when you anchor the repair into sound fabric at least 1 cm beyond the hole.
- A darning needle, matching thread, and a rounded support make the stitches easier to control.
- Woven cloth, socks, and jumpers all need slightly different tension and thread choices.
- For frayed or shredded fabric, patching may be stronger than a purely woven mend.
What darning actually does to fabric
At its simplest, darning is a woven repair. I am not replacing the cloth with a separate piece; I am rebuilding the missing structure with rows of thread that cross each other and hold the worn area together. That makes it ideal for holes, thin heels, scuffed elbows, and small moth damage where the surrounding cloth is still sound.
| Repair method | Best for | What it gives you | Main trade-off |
|---|---|---|---|
| Woven darning | Denim, linen, sturdy cotton, workwear | A strong thread grid that can blend in or stand out | Very little stretch |
| Knit-friendly darning | Socks, jumpers, cuffs | Better movement on knitted fabric | Needs careful tension control |
| Machine darning | Thick denim and hard-wearing garments | Fast, dense coverage over a damaged area | Can feel bulky on fine cloth |
| Patch repair | Large tears or fabric that has become fragile | Covers damage when there is not enough sound cloth left | Usually less discreet |
The catch is stretch. A woven darn is strong, but it has little give, so I avoid putting it exactly where a knit garment needs to flex. If the fabric moves a lot when you wear it, I either change the method or make the mend larger and softer. That is why the setup matters so much: the right support and thread choice make the difference between a neat repair and a lumpy one.
Tools and fabric prep that make the repair last
I keep the toolkit small: a darning needle, thread, scissors, and a support that holds the fabric steady. For socks, a darning mushroom or egg is ideal, but a smooth spoon bowl, a rolled towel, or even a small jar can work in a pinch. What matters is a firm curve under the hole so the fabric stays under light tension while you stitch.
- Thread - match fibre first, then weight. Wool thread on wool, cotton on cotton, and a strong polyester blend only when the garment can take it.
- Needle - choose a large eye and a point that does not split the yarn too aggressively.
- Support - use a mushroom, egg, hoop, or other smooth surface that keeps the hole open and visible.
- Scissors - trim loose ends cleanly before you start, but do not clip healthy fabric.
- Learning thread - a contrast colour is easier to see while you are practising; once the motion feels natural, you can match the colour more closely.
Before I stitch, I wash and dry the garment, then inspect the edge of the damage with my fingers as well as my eyes. If the fabric is fraying, I plan to anchor the darn into sound cloth a little farther out than feels necessary, because the weak edge is usually the first place a repair fails.
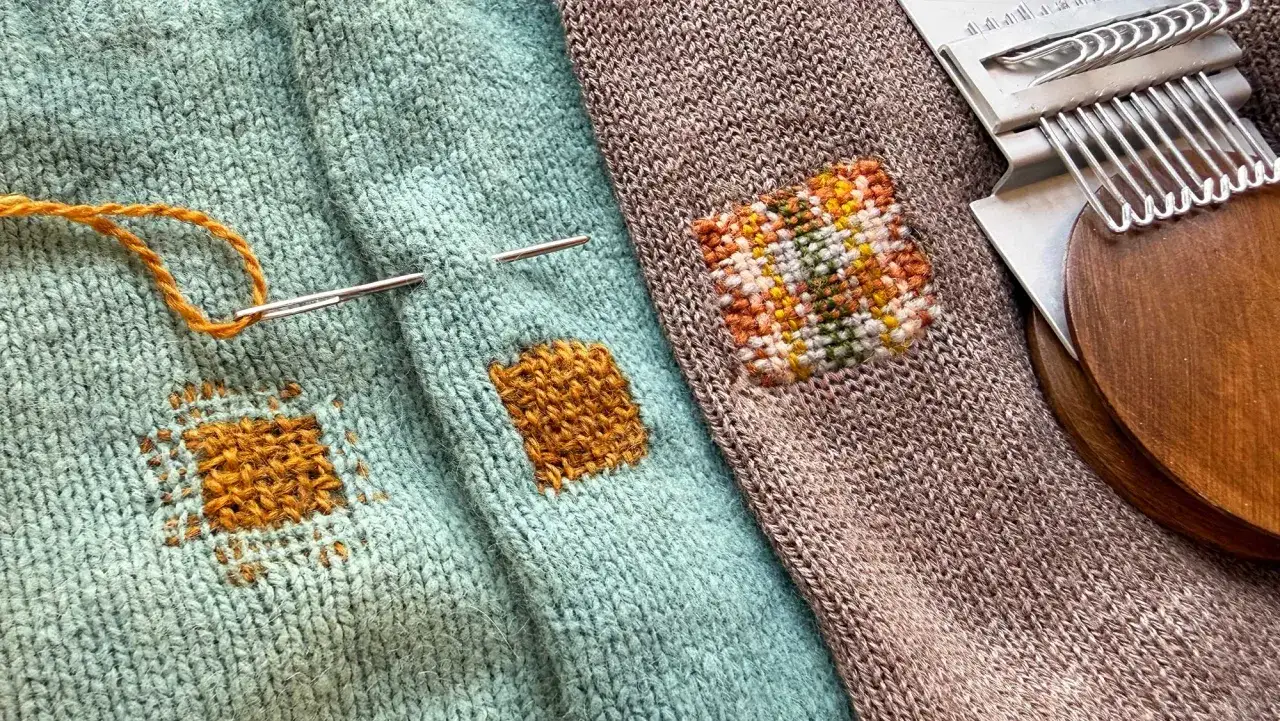
How to darn by hand step by step
Once the fabric is prepared, the repair becomes a controlled weaving exercise. I like to think of it as building a tiny grid over the damaged area, then locking that grid into the garment so it can carry wear again.
- Set the fabric on a support. Turn socks or jumpers inside out and stretch the hole over the mushroom. For woven cloth, use a hoop or a flat surface that keeps the area steady.
- Thread a single strand. I usually cut about 50 cm of thread. Longer than that and it tangles faster than it helps.
- Build an anchor around the hole. Sew running stitches 1-2 cm outside the damage, making a square or oval that sits on solid fabric.
- Lay the first set of bars. Stitch back and forth across the opening in parallel lines. Keep the rows even, but do not pull them tight enough to pucker the cloth.
- Weave at right angles. Pass the needle over and under the first set of threads to make a grid. This is the part that recreates a stable surface.
- Secure the ends on the wrong side. Take a few tiny stitches into healthy fabric, then weave the tails back through the repair before trimming them.
If the hole is irregular, I still think in terms of a simple shape. A square or oval is easier to reinforce than a jagged outline, and it gives the repair a cleaner edge. Once the grid is in place, the job is less about sewing a hole and more about controlling the finish. That finish matters because a neat repair can still fail in the wash if the thread ends or tension are wrong.
Finish and care for the repair
The repair is not finished the moment the last stitch goes in. I check the back of the work, weave any tails through at least 2-3 cm of fabric, and make sure no knot will rub against skin or shoe lining. On socks, that detail matters more than most people expect because bulk is what makes a mend annoying to wear.
- Gently press from the wrong side if the fabric allows it.
- Do a first wash on a mild cycle or by hand, then check whether the repair has puckered.
- If the cloth has stretched or the edge is still weak, add a second line of stitches around the perimeter rather than tightening the original ones.
- For wool, avoid harsh heat; let the repair dry flat so the shape stays even.
I also look at the repaired area under good light before putting the garment away. If the grid looks too loose, I can still add another pass now; once the garment has been worn hard again, the weak point is harder to rescue. That brings us to the simplest way to choose the right method for each garment.
Match the repair to the garment
Not every fabric asks for the same treatment. I decide between a discreet repair, a visible one, or a different method by asking one question: does the cloth need stretch, strength, or both? A quick comparison helps when you are standing in front of a damaged jumper, pair of jeans, or shirt with a hole in the cuff.
| Garment or fabric | Best approach | Why I use it | When I would choose something else |
|---|---|---|---|
| Cotton socks | Fine hand darning over a mushroom | Keeps the heel comfortable and durable | If the knit is badly stretched, a patch may hold better |
| Jumpers and cardigans | Knit-friendly darning that follows the loops | Preserves more movement in the cloth | If the area must stretch a lot, I switch to a more flexible knit repair |
| Denim and work trousers | Woven darning or machine darning | The dense grid suits heavy cloth well | Very large tears often need a patch as well |
| Linen and cotton shirts | Fine woven darning | Can stay discreet on stable fabric | If the fibres are threadbare across a wide zone, backing fabric is safer |
I usually keep the thread close to the garment colour when I want the mend to disappear. When I want the repair to become part of the design, I switch to contrast thread and accept that the stitches will be seen. Either choice can be right, but the fabric still has to be strong enough to hold it, which is why the most common mistakes are worth naming directly.
The mistakes that weaken a darn
- Making the repair too small. The edge of the hole keeps fraying if the stitches only touch the damage instead of surrounding it.
- Pulling the thread too tight. This puckers the cloth and removes the give that makes the garment comfortable.
- Using the wrong thread weight. Thick thread on fine cloth feels stiff; very fine thread on heavy denim wears through too quickly.
- Ignoring stretch direction. A rigid weave across a high-movement area can crack again after a few wears.
- Leaving loose tails on the inside. They rub, snag, and eventually work free.
- Trying to rescue fabric that has already disintegrated. If the cloth turns to dust when you handle it, patching is usually the better fix.
The practical rule is simple: the repair should sit on firm fabric and move with the garment, not fight it. If you keep that in mind, the last thing I recommend is building a small habit around the technique so you are ready the next time a favourite piece starts to wear through.
A repair routine that keeps clothes in rotation
When I want darning to become second nature, I start with one garment at a time and I keep the first repair modest. A heel hole in a sock, a small moth nibble on a jumper, or a rubbed patch on denim teaches more than a perfect practice square ever will. The goal is not to make the mend invisible on day one; it is to keep the clothing useful, comfortable, and worth wearing.
- Keep a small mending kit together so the repair happens before the hole grows.
- Practise first on a visible area of denim or a spare scrap, where tension is easier to judge.
- Match fibre and weight as closely as you can, then adjust the colour for either discretion or contrast.
- Stop at the point where the fabric feels stable, not overworked.
Once you can do that, the technique becomes far less intimidating: it is simply a controlled way of rebuilding fabric with thread, and that is exactly why it remains one of the best basic sewing skills to keep clothes in use.
