
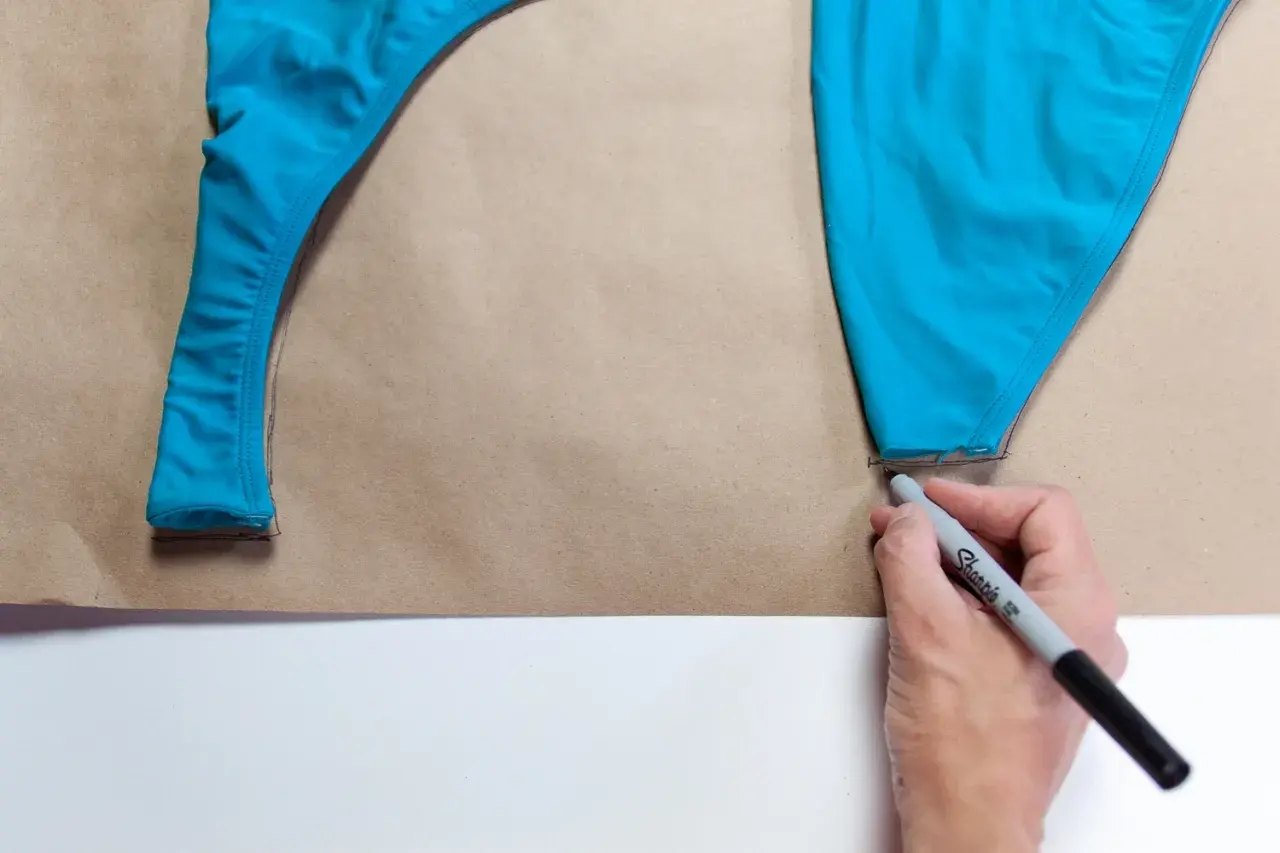
Learning how to make a swimsuit is mostly a lesson in stretch, support, and restraint. The right fabric, elastic, stitch choice, and fit check matter far more than fancy extras, and those are exactly the decisions this guide walks through. I’m keeping it practical so you can sew a custom suit that feels secure, wears well, and looks deliberate rather than improvised.
The safest path is four-way stretch fabric, swim elastic, and a careful fit check
- Choose a swimwear pattern drafted for stretch, not a woven pattern adapted at random.
- Use four-way stretch fabric with matching lining and swim-specific elastic.
- Cut on a single layer with a rotary cutter so slippery fabric does not drift out of shape.
- Sew with a stretch needle and a stitch that can move with the body.
- Expect negative ease: the finished suit should look smaller on the table than your body measurements.
- Rinse the suit after chlorine or salt water if you want it to last beyond a few holidays.
Choose the right fabric and pattern before you cut anything
The easiest way to waste time on swimwear is to start with the wrong cloth. I always look for a pattern designed for swimwear first, because the shape, ease, and seam allowance are built around stretch fabric rather than a woven garment. A good swim pattern will already assume negative ease, which simply means the finished garment measures smaller than your body because the fabric is meant to stretch on wear.
For fabric, I would prioritise a four-way stretch knit with strong recovery. In practice, that means a nylon/elastane or polyester/elastane swim fabric that stretches both lengthwise and crosswise and springs back after a pull. As a rule of thumb, I look for around 50% stretch in both directions or better. For lining, choose a swim lining or power mesh with similar stretch; if the lining is much less stretchy than the outer fabric, the suit can sag, twist, or feel unexpectedly tight.
| Part | What I would buy | Why it matters | Typical UK price in 2026 |
|---|---|---|---|
| Outer fabric | Four-way stretch nylon/elastane or polyester/elastane | Holds shape in water and recovers after wear | About £16-£22 per metre |
| Lining | Swim lining, Helenca-style lining, or power mesh | Adds comfort, support, and opacity | About £3-£16 per metre, depending on type |
| Elastic | Swimwear or rubber elastic, usually 8-10 mm wide | Helps edges keep their shape in chlorine and salt | About £0.95-£1.99 per metre, or £5 for 5 metres |
| Thread | 100% polyester thread | Lasts better than cotton in water and sun | Usually a few pounds per spool |
| Needle | Stretch needle or ballpoint needle | Reduces skipped stitches and tiny holes | About £3-£5 per pack |
For budgeting, I would expect a simple custom swimsuit to cost roughly £30-£60 in materials if you buy sensible mid-range supplies. A one-piece usually takes around 1.5-2 metres of main fabric, while a bikini often needs less, though the exact amount depends on the pattern, size, and whether you add support pieces. Once the materials are right, the real job is fitting them to the body without losing stretch, which is where the next step matters.
Measure and fit the pattern against real stretch
Swimwear fit is more unforgiving than it looks on the hanger. Because the garment has to hug the body without gaping, I never rely on a dress size alone. I measure bust, underbust, waist, hips, and torso length, then compare those numbers to the pattern’s finished measurements rather than the size label. That extra step saves a lot of guesswork, especially if you are between sizes.If you already own a suit that fits the way you want, I would use it as a reference. Try it on, mark where the straps sit, note whether the leg openings ride up, and take a couple of photos so you can compare shapes later. Minor changes are often enough: a little extra length through the torso, a touch more room at the bust, or a slightly higher rise at the leg. If the bust differs from the pattern draft by more than about 1-3 inches, I would consider a fuller bust adjustment or extra length in the front bodice rather than hoping the fabric will somehow fix it.
One thing I would not do is make a cotton muslin and assume it tells the whole story. Swimwear needs stretch, so if you want a test, use scrap fabric with similar recovery, or at least mock up the worst trouble spots. If you plan to use power mesh or a self-lined finish, expect the suit to feel a little firmer, and be ready to size up if the lining reduces stretch more than expected. Once the fit direction is clear, cutting becomes much easier to manage.
Cut swimwear fabric accurately and stop it shifting
Swim fabric is slippery, and once it starts moving, it tends to move in the least helpful direction. I cut most swimsuit pieces on a single layer with the printed side facing up, a rotary cutter, and plenty of pattern weights. That takes a little longer than folding the fabric in half, but the accuracy is worth it, especially on small pieces like straps, gussets, or bikini bottoms.
Pay close attention to the grainline and the pattern’s direction of greatest stretch. Designers place pieces very deliberately, and turning a piece the wrong way can completely change how the suit feels on the body. I also prefer clips or ballpoint pins rather than standard sharp pins, because ordinary pins can leave obvious marks or tiny holes in delicate swim fabric. If your pattern uses notches, keep them small and precise; overcutting is a fast way to create visible weak points.
- Cut one layer at a time if the fabric is shifty.
- Place weights close to the edge of each piece.
- Keep the greatest stretch in the direction the pattern asks for.
- Mark as little as possible, but mark clearly.
- Do not stretch the fabric while you cut.
That careful prep pays off immediately when you start sewing, because the machine can only correct so much. The stitching stage is where most first-time swimwear projects either become wearable or start to feel fragile.
Sew the body with stitches that can stretch
For swimwear, I treat the stitch as part of the design, not just a hidden technical choice. A straight stitch is too rigid for the final garment and will often pop when the suit is worn, so I reserve it for temporary basting at most. Instead, I use a zigzag, triple zigzag, lightning stitch, or an overlocker for seams that need to move with the body.
| Stitch or machine | Best use | Why I like it | Watch out for |
|---|---|---|---|
| Zigzag stitch | General construction and elastic attachment | Flexible, easy to test, works on most home machines | Settings vary, so test on scraps first |
| Triple zigzag or lightning stitch | Seams that need extra stretch and strength | More secure than a standard straight seam | Can look bulky if the tension is off |
| Overlocker | Internal seams and quick construction | Clean finish, fast sewing, good stretch | Not essential, and small pieces can be awkward |
| Straight stitch | Temporary basting only | Simple and quick | Usually too rigid for the final suit |
If you are making a one-piece, I usually sew the side seams first, then the crotch, then the shoulders, with the lining handled separately and basted to the outer layer once both shells are assembled. For a bikini, I keep the top and bottom as separate fitting problems: the top needs support and enough room through the bust, while the bottom needs a stable waist and clean leg openings. In both cases, I test the stitch on offcuts before I touch the actual garment, because every machine, needle, and fabric combination behaves a little differently.
One practical rule helps a lot: do not pull the fabric taut while you sew. Let the feed dogs move it through the machine, and guide it lightly rather than stretching it into place. If the seam ripples, the tension or elastic handling is probably the problem, not the fabric itself. Once the body is sewn, the suit starts to look real only when the elastic and edges are finished properly.
Add elastic, lining, and clean edges without killing the stretch
The edges are where swimwear either feels professional or looks homemade in the wrong way. Swimwear elastic is not a luxury extra; it is what keeps the neckline, leg opening, and armhole from becoming limp after a few wears. I would use a swim-specific rubber or chlorine-resistant elastic every time, usually 8-10 mm wide, rather than standard polyester elastic that was never designed for pool water or salt water.
A good starting point is to cut the elastic to about 25% shorter than the opening it will sit against. In other words, if the leg opening measures 40 cm, the elastic starts around 30 cm, then I fine-tune from there if the pattern or the stretch ratio needs it. Pin the elastic to the inside edge, keep it a couple of millimetres from the raw edge, and stitch it down with a zigzag or overlocker while giving it a controlled, gentle pull. The goal is even tension, not gathering.
Then fold the edge to the inside, hide the elastic, and topstitch the fold with another zigzag. That two-step finish is simple, but it is what gives the edge a neat, secure look. I also avoid heavy pressing here. Swim fabrics are synthetic, and too much heat can flatten, distort, or even damage them. If I need a seam to sit flat, I finger press it or use a very low heat setting, then secure it with stitching instead of trying to force it with the iron.
For lining, I would match stretch as closely as possible. A 100% nylon swim lining works well, power mesh adds support where you want it, and self-lining with the main fabric can create a smooth reversible finish if you do not mind a bit more bulk. The important thing is consistency: if the lining is much less stretchy than the outer fabric, the suit can feel smaller than intended and may need a size-up to behave properly. After the edge finishing is in place, the final job is less about sewing and more about honest fitting and care.
Fix the fit before the first swim and make the suit last
I would always do one careful fitting pass before calling a swimsuit finished. Try it on, sit down, lift your arms, bend forward, and check whether the leg openings cut in, the bust pulls, or the straps slide. A suit can look perfect standing still and still fail the moment the body moves, so the test needs to be a little more aggressive than a glance in the mirror.
The most common mistakes are usually preventable. I see them over and over:- Using fabric with not enough stretch or recovery.
- Substituting regular elastic because it was already in the stash.
- Sewing while pulling the fabric so the seams ripple.
- Ignoring torso length and bust depth until the fit is already off.
- Pressing synthetic swim fabric too hard with a hot iron.
After the suit is worn, care matters almost as much as construction. Chlorine, salt, and sun all shorten the life of swimwear, even when the sewing is excellent. I rinse mine in cool water as soon as I can after swimming, sometimes soaking it for about 30 minutes if it has had a full day in the pool or sea, then I let it dry flat out of direct sun. That habit does more for longevity than most people expect, and it is the easiest way to protect the work you have just put into the garment.
If I were making one from scratch today, I would keep the design simple, spend the money on better fabric and elastic, and give myself one honest fitting session before the final seam. Those three choices do more for the finished result than decorative details ever will, and they are the difference between a swimsuit that merely exists and one you actually want to wear.
