
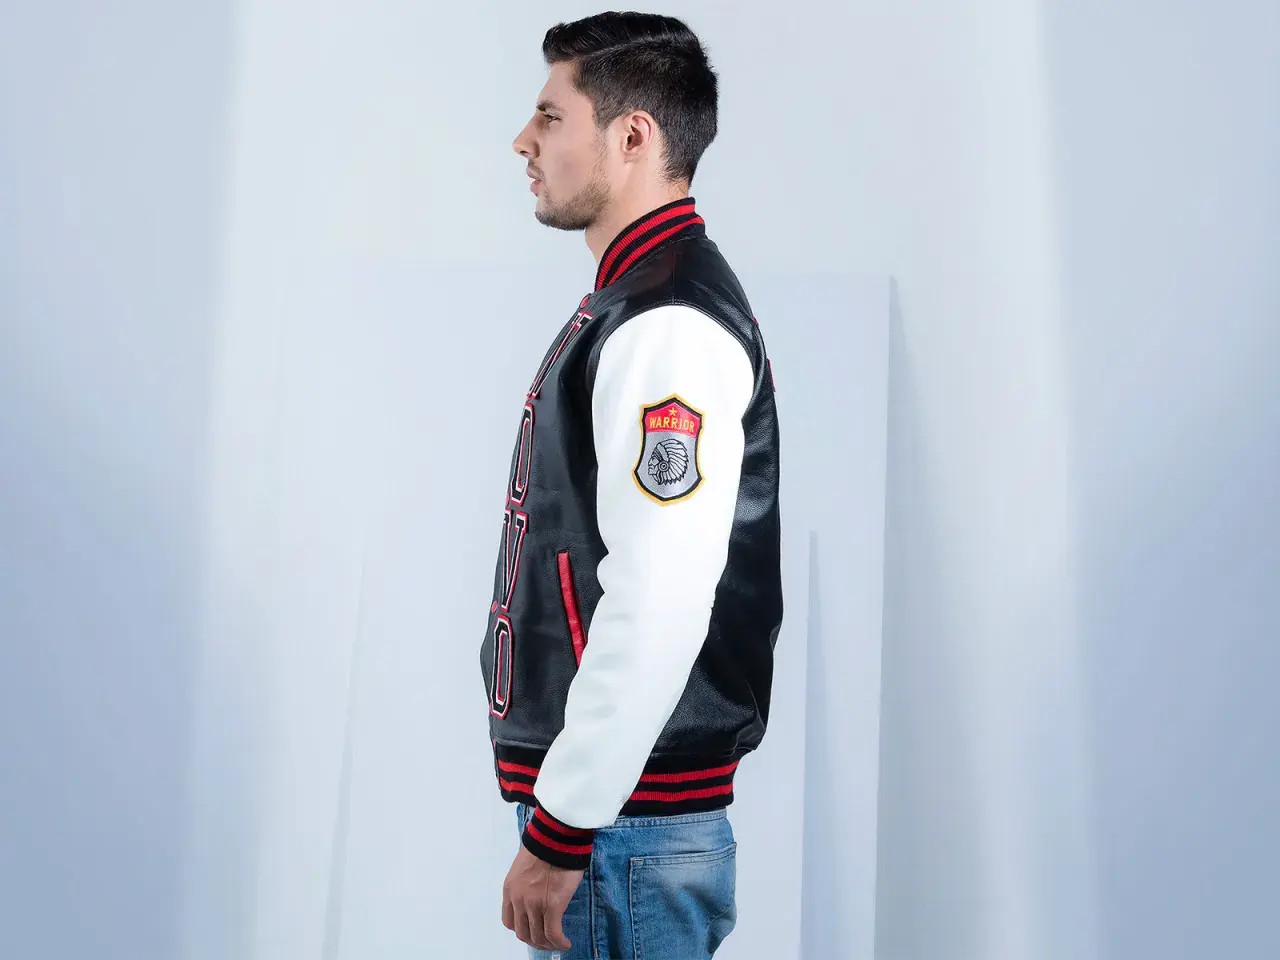
A DIY letterman jacket works best when the shape is simple and the finishing is deliberate. In this guide I cover the easiest ways to make one at home, which fabrics hold the silhouette, and how to add letters or patches without making the jacket look overworked. The goal is a piece that reads as proper outerwear, not a costume.
The fastest route to a polished jacket is the one that matches your fabric and your machine
- For the most authentic look, use wool melton or boiled wool for the body, with rib knit cuffs, hem, and collar.
- A snap-front closure looks more classic than a zip unless you want a bomber-style hybrid.
- Most adult jackets need roughly 1.5-2 m of body fabric, 0.75-1.25 m of sleeve fabric, and 0.5-1 m of lining.
- Upcycling a plain jacket is the easiest route; sewing from scratch gives the cleanest result.
- Chenille or felt letters look traditional, but stitched appliqué lasts better than glue alone.
- If your machine struggles with thick layers, simplify the fabric stack before you start.
What gives a varsity jacket its shape
The classic look comes from four things: a slightly boxy body, contrast sleeves, ribbed trims that pull the jacket back in, and a front closure that sits flat. If one of those elements is wrong, the jacket can slide into bomber, sweatshirt, or costume territory very quickly. I usually tell people to protect the silhouette first and save the decorative work for last.
For fit, think structured but not tailored. You want room for a jumper underneath, enough depth at the armhole for comfortable movement, and a hem that does not cling at the hips. Raglan sleeves are a forgiving option if you want a sporty line and easier shoulder movement, while set-in sleeves can look sharper but demand better pattern work. Once the silhouette is clear, the next decision is how ambitious the build should be.
Choose the build method that matches your skill level
There is no single right way to make this jacket. The best route depends on how much drafting you are comfortable with, how strong your machine is, and whether you want a true made-from-scratch garment or a clever refashion.
| Method | Best for | Typical cost | Difficulty | What you get |
|---|---|---|---|---|
| Upcycle a plain jacket | Beginners and fast projects | £30-£70 | Easy | Quickest way to get the look, but the fit is limited by the base jacket |
| Use a commercial pattern | Most home sewers | £60-£140 | Intermediate | Clean shape, better sizing control, and fewer guesswork steps |
| Draft from scratch | Confident garment makers | £80-£180+ | Intermediate to advanced | The most custom result, but also the most time-consuming |
If I were choosing for a first attempt, I would usually pick a commercial pattern or a hybrid route, because it keeps the proportions sensible without forcing you to draft every curve yourself. That choice matters because the fabric stack, not the decoration, decides whether the jacket behaves like outerwear or like a craft project. Once you know the route, you can buy the right materials for it.
Materials and tools that actually matter
In outerwear sewing, the fabric choice does more work than people expect. A classic jacket body wants substance, the sleeves need contrast without collapsing the shape, and the ribbing has to spring back after wear. In the UK, I would buy rib knit by the metre rather than repurposing sweatshirt cuffs, because jacket trims need better recovery and a cleaner edge.
| Component | What I would choose | Why it works |
|---|---|---|
| Body | Wool melton, boiled wool, or a heavy coating wool | Holds the boxy shape and presses well |
| Sleeves | Faux leather, wool contrast fabric, or a sturdy twill | Creates the classic two-tone varsity look |
| Rib trim | 2x2 rib knit or striped cuffing with strong recovery | Keeps cuffs, hem, and collar close to the body |
| Lining | Polyester lining, cupro, or satin | Makes the jacket comfortable and easy to pull on |
| Closure | Metal snap fasteners | Looks more authentic than a zip |
| Support | Fusible woven interfacing | Stabilises fronts, facings, and areas that take strain |
For a medium adult size, I would roughly allow 1.5-2 m for the body, 0.75-1.25 m for the sleeves, 0.5-1 m for lining, and about 0.5 m of ribbing depending on width and pattern shape. Add a little more if you are making a longer body or mixing fabrics with a directional pile. The tools matter too: sharp shears, clips for faux leather, a press cloth, a walking foot if you have one, and a clapper or wooden block for flattening bulky seams will save you a lot of frustration. With the materials chosen, the cutting stage becomes much easier to control.
Cut and assemble the shell with confidence
This is where the project starts to feel real. If you want a neat result, work in the correct order instead of sewing pieces together as you find them. I also recommend checking seam allowances before you cut; 1 cm is a sensible default for many garment patterns, and 3-4 cm at the hem gives you enough room to adjust the rib trim later.
- Prepare the fabric first. Steam wool carefully and test a scrap before committing. If you are using faux leather, do not pin through visible areas and keep the iron off the face side.
- Trace and mark everything. Grainlines, notches, pocket placement, and the front opening all matter more than they do on a simple top. Staystitch curved edges so they do not stretch out while you handle them.
- Cut the body, sleeves, ribbing, lining, and facings separately. I would never cut ribbing casually; the length and recovery of that trim decide whether the jacket looks polished or saggy.
- Sew the shell before the lining. Join shoulders, attach sleeves, then close side seams and under-sleeve seams. Press after every major seam, because outerwear rewards patience.
- Build the rib collar, cuffs, and waistband. Attach these with even stretch, not heavy tension. You want the trim to sit snugly, not to pucker the body.
- Finish with the lining and closure. A facing is the inner strip that hides raw edges around the opening. Once the lining is in, install the snaps and topstitch where needed.
If your pattern calls for real leather sleeves, reduce stitch length slightly, use a leather needle, and test on scraps first because every hole remains visible. If you are using faux leather, a longer stitch and a lighter hand on the presser foot usually give a cleaner result. The construction stage is straightforward once the order is clear, and after that the jacket becomes a surface-design project.
Add letters, patches and other details with restraint
The decoration is what most people notice first, but it should never rescue a poorly built jacket. One strong letter, crest, or patch is usually enough. If you stack too many motifs, the piece stops reading as a classic varsity jacket and starts looking crowded.
| Decoration method | Look | Skill level | Best use |
|---|---|---|---|
| Chenille appliqué | Most traditional | Intermediate | Initials, school letters, bold chest motifs |
| Felt appliqué | Clean and affordable | Beginner-friendly | Simple letters and badges |
| Machine embroidery | Precise and durable | Intermediate to advanced | Small logos, names, and fine detail |
| Patchwork appliqué | Creative and modern | Beginner to intermediate | Personalisation without overcomplicating the jacket |
My rule is simple: if you use iron-on backing, still stitch it down. Glue alone is rarely enough on a garment that gets worn, washed, and pulled at the cuffs. Keep the placement balanced too; a left-chest letter, one sleeve motif, or a small back crest usually looks more confident than a full collage. That restraint becomes even more important when you start spotting the common mistakes that can flatten the whole design.
The mistakes that make the result look off
Most disappointing jackets fail for the same few reasons, and none of them are mysterious. The good news is that each one is fixable if you catch it early.
- Weak ribbing. If the rib knit has poor recovery, the hem and cuffs will bag out quickly and the jacket will lose its shape.
- Too much shine. Very glossy sleeves or lining can push the garment towards costume rather than clothing.
- Overfitting the body. A varsity jacket should skim, not cling. Too little ease makes it feel wrong at once.
- Skipping pressing. Thick seams need to be flattened as you go, or the jacket will look bulky and unfinished.
- Choosing decoration too early. Fit the shell first, then add letters and patches. Otherwise you may place details on a jacket that still needs resizing.
- Using the wrong closure. A zip is practical, but it changes the character of the jacket. If you want the classic feel, snaps are the better choice.
If you want one realistic shortcut, it is this: keep the fabric stack simple. Wool body, faux leather sleeves, quality ribbing, and a lined interior are enough for a very convincing result. From there, it helps to know what the project will actually cost and how long it will take.
What to budget and how long to set aside
The time and cost depend heavily on whether you are remaking an existing jacket or sewing from scratch. In a home studio, I would plan for more time than you think you need, because outerwear involves pressing, fitting, and finishing at a slower pace than a shirt or dress.
| Project type | Estimated cost | Time estimate | Best for |
|---|---|---|---|
| Upcycled base jacket with added trims and letters | £30-£70 | 3-6 hours | Fast personalisation and low-risk experimentation |
| From-scratch jacket in wool and faux leather | £80-£140 | 8-12 hours | A polished result without premium materials |
| Premium version with wool body, leather sleeves, and custom chenille | £150-£300+ | 12-20 hours | A more traditional, high-end finish |
Accessories add up quickly. In particular, striped cuffing, high-quality lining, and custom letters can add £15-£40 before you realise it. That is why I prefer deciding the decoration plan before buying fabric, not after. Once you know the budget, the final question is what first version will give you the best odds of success.
The first version I would sew if I wanted a believable result
If I were making one for the first time, I would keep the design deliberately controlled: a dark wool body, lighter sleeves, one good rib knit colour, a lined interior, and a single chest letter. I would skip welt pockets, complicated inserts, and any shaping detail that competes with the varsity silhouette. The jacket would still feel personal, but the proportions would stay easy to read.
That approach is strong because it puts the effort where it matters most. You spend your time on fit, fabric stability, and clean finishing, which is what makes the jacket look expensive rather than busy. Once that version works, you can start changing the colour blocking, adding sleeve stripes, or experimenting with embroidered patches. A thoughtful first build usually teaches you more than an overcomplicated one, and it leaves you with a jacket you will actually wear.
