
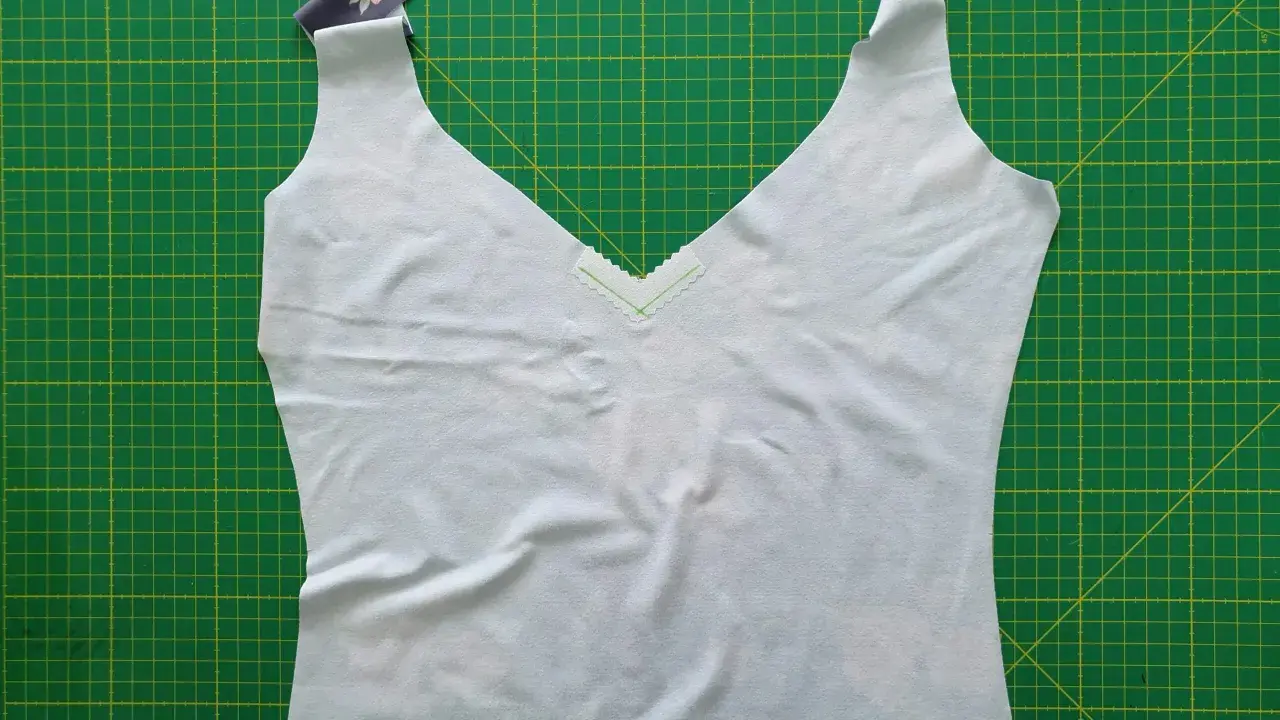
A V neckline changes more than the opening at the front of a garment. It changes the balance of the bodice, the way fabric hangs at centre front, and the overall mood of the piece. In this article I focus on the parts that matter in real sewing: choosing the right finish, keeping the point crisp, and adjusting the shape so it works on the body, not just on paper.
What to keep in mind before sewing a V neckline
- The point needs stabilising first, especially on knit or bias-cut fabric.
- Woven fabrics usually behave best with a facing; knits often need a neckband or another stretch-friendly finish.
- A sharp V comes from accurate marking, careful clipping, and controlled pressing, not from forcing the seam.
- Changing the depth by even 3 to 5 cm can alter the balance of the whole bodice.
- Most problems come from stretch, bulk, or weak understitching rather than from the shape itself.
What a V-neck neckline changes in a garment
I treat a V neckline as a structural choice, not just a style detail. A shallow V gives a softer line and is forgiving on everyday tops; a deeper one lengthens the torso and can make a simple dress feel more deliberate. The exact effect depends on three things I always check together: depth, width, and fabric weight.
On a stable cotton poplin, a moderate V can look sharp and tailored. On a loose viscose or a knit, the same line can look relaxed or even collapse if the opening is not stabilised properly. The shape also affects how the eye moves: it draws attention to the centre front, can balance broad shoulders, and often gives the upper body a longer silhouette.
- A narrow, deep V creates a more direct, elongating line.
- A wider V feels softer and less severe, but it can lose definition if the point is not clean.
- A shallow V is easier to wear every day and usually sits well under layers.
- The more open the neckline, the more the finishing method matters.
Once the shape is clear, the next decision is how to finish the edge so that the neckline keeps that line in wear and after washing.
Choosing the right finish for woven and knit fabrics
The finish should suit the fabric before it suits the design. I do not use the same method for a crisp shirt and a jersey tee, because they behave differently around the point and across the shoulders. The table below is the comparison I find most useful when planning a V neckline.
| Finish | Best for | Strengths | Watch out for |
|---|---|---|---|
| Facing | Woven blouses, dresses, structured tops | Clean inside finish, good support, sharp appearance | Can feel bulky if it is not graded and understiched well |
| Bias binding | Lightweight fabrics, sheer fabrics, casual finishes | Less bulk, flexible around curves, neat on the inside | Can round off the point if the binding is too wide or stretched |
| Neckband | Jersey tops, T-shirts, stretch garments | Comfortable, quick, and stable when the ratio is right | Too long gives ripples; too short pulls the V open |
| All-in-one facing | Garments that need a smooth, quiet interior | Good support and a polished result | Needs careful pressing and a well-shaped pattern |
If I’m sewing a woven blouse or dress, I usually start with a facing. For knits, I look first at stretch recovery and then decide whether a neckband is the cleanest option. A finish that fights the fabric will almost always distort the point of the V, which is why fabric behaviour matters as much as stitch length. Once that choice is made, the actual sewing becomes much more controllable.
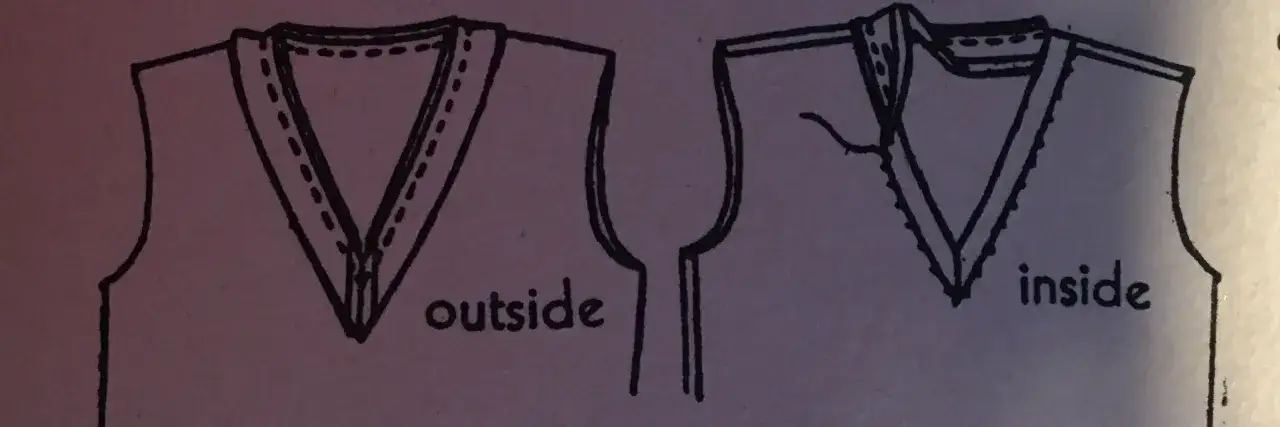
How I sew a clean V neckline
The cleanest V necks I sew are never rushed. I mark carefully, stabilise before stitching, and press every stage as if that is where the result is decided. When the point looks blunt, it is usually because one of those stages was treated as optional.
- Mark the point and stitch line clearly. I mark the centre front, the point of the V, and the seam allowance before I sew anything. If the pattern uses 1 cm seam allowances, I stay within that system rather than guessing later.
- Staystitch the neckline early. On woven or bias-cut pieces, I staystitch about 2 to 3 mm inside the seam line to stop the neckline stretching out while I handle the garment.
- Stabilise the point if the fabric needs help. On soft or slippery fabric, I add a narrow strip of interfacing or stabilising tape near the point. I keep it light so the neckline does not become stiff.
- Sew the facing, binding, or band with accuracy at the point. The tip of the V is where the seam lines must meet exactly. If I am using a band on a knit, I stop with the needle down, pivot at the point, and keep the fold line crisp.
- Clip carefully into the point. This is where many beginners become too cautious or too brave. I clip almost to the stitch line, but never through it. If I leave too much bulk there, the point will never lie flat.
- Grade and trim the seam allowance. I reduce bulk by trimming the facing seam allowance slightly narrower than the garment seam allowance. That small difference helps the edge turn cleanly.
- Understitch whenever the finish allows it. Understitching keeps the facing on the inside and stops it rolling out. It is one of the simplest ways to make the outside look more professional.
- Press with intent. I press the seam flat first, then press it toward the inside using a tailor’s ham or point presser if needed. A final press from the right side settles the line without crushing the shape.
Before I cut into the real fabric, I also check the pattern shape itself, because a neat finish cannot rescue a badly balanced opening.
How to alter the depth and shape before you cut
Most neckline problems start at the pattern stage, not at the sewing machine. If you want a deeper V, a softer angle, or a narrower point, it is better to redraw the line before cutting than to try to correct it later with stitching. I usually treat the front neckline as a proportion problem: the change has to suit the shoulder width, bust shaping, and intended wear.
When I adjust depth, I work in small steps. A change of 3 to 5 cm gives a noticeable difference without completely changing the garment’s character. A deeper, more open V often needs 6 to 10 cm, but that depends on the style, the body, and how much coverage the wearer wants. If the neckline is too low, the issue is not always the point itself; often the shoulders are too wide, the bust shaping is off, or the curve into the V is too straight.
- For a narrower V, I redraw from the shoulder area down to the original point so the line still feels intentional.
- For a deeper V, I extend the centre front point first, then true the curve or straight line back into the shoulder area.
- For a converted crew neck, I check that the new facing or band is also redrawn, because the neckline length changes.
- If the fabric is expensive or drapey, I make a toile before cutting the final version.
That pattern work saves more time than any amount of careful unpicking later. It also reveals the handling mistakes that flatten the point or distort the shape, which is the next thing I look at.
The mistakes that flatten the point or distort the neckline
When a V neckline looks wrong, the cause is usually simple and surprisingly repeatable. I see the same handful of errors again and again, especially when the fabric is soft or the seam allowance is narrow.
- Skipping staystitching. A neckline cut on bias can stretch within minutes, and once that happens the point is harder to rescue.
- Clipping too far into the point. If the clip reaches the stitching, the tip weakens and may split with wear.
- Using too much interfacing. Heavy support can make the neckline rigid, which is just as distracting as a stretched one.
- Not understitching. Without it, the facing often rolls to the outside and softens the V into something less defined.
- Ignoring seam bulk at the tip. Several layers meeting at one point can create a little lump that shows through immediately on light fabric.
- Choosing the wrong finish for stretch. A woven-style facing on jersey often fights the fabric, while a loose band on a stable woven can look unfinished.
Once those handling problems are under control, the final question is whether a V is the right visual tool for the garment you are making.
When a V works better than a round or square opening
I choose a V when I want direction, length, or a bit more openness at the front of the garment. It is often a strong choice for blouses, wrap-style dresses, sleeveless tops, and layered pieces where a neckline needs to sit neatly under a jacket or cardigan. A round neckline feels softer and more casual; a square neckline feels more architectural. A V sits between those two, which is why it is so useful.
- Everyday tops. A shallow V gives shape without looking fussy, and it usually wears well with a bra or camisole underneath.
- Shirts and blouses. A medium V sharpens the neckline and pairs well with a collar or facing.
- Dresses. A deeper V can make the bodice look lighter, but it needs stable construction so it does not gape.
- Layered outfits. A V gives space for a pendant, scarf, or open shirt front without crowding the neck.
Where I become cautious is on very soft fabrics with a deep opening, because the neckline can start to look improvised instead of designed. In those cases I either strengthen the inside with a better facing or add a modesty layer, depending on the garment’s purpose. If you keep those decisions in order, the neckline stops feeling tricky and starts becoming a reliable design tool.
The finishing details that make the neckline look professionally sewn
The last difference between an acceptable neckline and a polished one is rarely dramatic. It is usually the accumulation of small things: symmetry at the point, balanced seam allowances, a clean press line, and enough stability to survive wear. I always check the neckline on the body or on a well-shaped hanger before I call it done, because fabric can tell a different story once it is hanging freely.
- Check that both sides of the V meet the centre point at the same angle.
- Look at the neckline from a distance, not just flat on the table.
- Press again after the first try-on, because the edge often settles after handling.
- If the fabric is costly or slippery, make a toile and test the point before cutting the final version.
If I had to reduce the whole process to one rule, I would say this: stabilise early, sew slowly around the point, and press as carefully as you stitch. That is what turns an ordinary opening into a neckline that looks intentional from the outside and tidy on the inside.
