
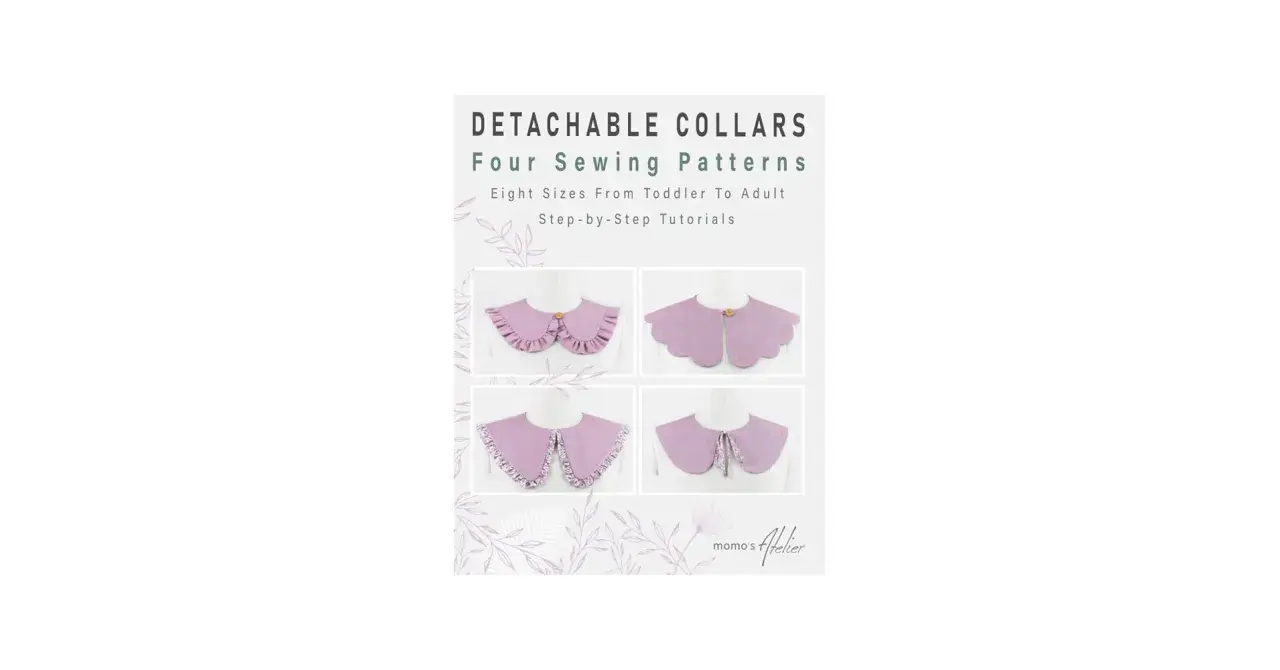
DIY detachable collars are one of the quickest ways to change the mood of a plain top without altering the garment itself. In this guide, I cover how to choose a shape, draft the pattern, pick the right fabric and interfacing, and finish the collar so it sits neatly and fastens cleanly. I’m keeping it practical, because the difference between a collar that looks charming and one that actually gets worn is usually in the construction.
The practical basics you need before you cut the fabric
- A removable collar works best on a stable neckline and usually needs interfacing for structure.
- Most first versions use about 30-45 cm of fabric and 20-30 cm of interfacing.
- Ribbon ties are the simplest fastening, snaps look the neatest, and button loops feel the most polished.
- A paper mock-up is worth the extra 15 minutes, especially if you are changing neckline shape or collar depth.
- A straightforward collar usually takes 1.5-3 hours, depending on the closure and any trim.
Which collar shape will actually get worn
The best collar is not the fanciest one; it is the one that makes sense with the clothes already hanging in your wardrobe. I always start by asking where the collar will live: over a knit jumper, inside a dress neckline, on a simple blouse, or as a statement piece that does the job of jewellery. That decision affects the depth, width, and fastening long before I touch the scissors.
| Collar shape | Best use | Why it works | Trade-off |
|---|---|---|---|
| Rounded Peter Pan | Crew neck tops, cardigans, softer outfits | It sits gently and is forgiving on first attempts | Can look too childish if it is oversized |
| Pointed | Shirts, jumpers, sharper silhouettes | It gives more visual structure and lengthens the neckline | The points need careful clipping and pressing |
| Bib style | Dresses, knitwear, layered looks | It covers more of the chest and feels more like an accessory | Uses more fabric and can shift if the fastening is weak |
| Stand collar | Minimal outfits, cleaner lines, higher necklines | It looks polished and frames the face neatly | Needs accurate neckline measurement |
| Ruffle or lace collar | Occasion wear, romantic styling, costume-inspired looks | It adds texture fast and makes good use of scraps | Can overwhelm printed fabrics or busy outfits |
I usually recommend starting with a rounded or pointed shape if this is your first removable version. They are easier to balance, easier to press, and much easier to pair with everyday clothes. Once the silhouette is clear, the next question is what it needs to stay crisp rather than floppy.
What I put on the cutting table
For most collars, I keep the material list short on purpose. Too many layers can make the edge bulky, especially at the centre front and around any curved points. In the UK, this is the kind of project where a small trip to the haberdashery is enough; you do not need a large fabric haul.
- Outer fabric - cotton lawn, poplin, chambray, linen, broderie anglaise, velvet, or lace, depending on the look you want.
- Lining or facing fabric - usually the same as the outer fabric for a clean finish, or a lighter cotton if the outer fabric is delicate.
- Interfacing - lightweight fusible for crisp cottons, or sew-in interfacing for fabrics that dislike heat or need a softer hand.
- Fastening - ribbon ties, small snaps, a button and loop, or hook-and-eye closures.
- Tools - paper, ruler, French curve, fabric scissors, marking tool, pins or clips, needle, thread, and an iron.
As a rough budget, a stash-friendly collar can cost under £10, while buying fabric, interfacing, and notions new usually lands somewhere around £15-£30. If you are working in a heavier fabric or adding lace, beads, or trim, I would budget a little more because embellishment is where costs creep up. With the materials sorted, the pattern itself becomes a controlled tracing job rather than guesswork.
How I draft the collar pattern
I draft removable collars from the garment neckline, not from the body measurement. That distinction matters because the collar has to sit on the clothes, not on the neck itself. If you skip that step, the finished piece often looks right on paper but sits awkwardly in real life.
- Lay the garment flat and trace the neckline edge carefully, marking the centre front, centre back, and shoulder points.
- Decide how much coverage you want. A narrow collar feels neat; a deeper bib-style version makes more of a statement.
- Draw the outer collar shape on top of the traced neckline. I like to keep the first draft simple and adjust the curve after the test fit.
- Add fastening allowance where the closure will sit. For a centre-back closure, I usually allow an extra 2-3 cm of overlap if I need room for snaps or a button loop.
- Add seam allowance, usually 1 cm, unless your chosen pattern method already includes it.
- Cut a quick toile in calico or any cheap woven fabric with similar weight. This is the fastest way to catch a neckline that is too tight, too deep, or too wide.
- Refine the final paper pattern before cutting the real fabric. A few millimetres make a visible difference around the curve.
For a classic finished edge, I build the collar in three layers: outer fabric, interfacing, and lining or facing. The facing is the inner piece that finishes the edge; the undercollar is the layer that sits underneath and helps the collar roll or sit cleanly. On a small project like this, a tiny amount of shaping in the undercollar often makes the difference between “home made” and “properly made.”
If I am making a pointed collar, I keep the points slightly sharper than I think I need, because turning and pressing always softens them a little. If I am making a rounded collar, I focus more on the smoothness of the curve than on perfect symmetry at the first draft. Once the shape is right, the sewing is mostly about order and pressing.
How I sew and finish it cleanly
Most of the quality comes from the finishing, not from complicated stitching. I use a short, steady stitch length, press at every stage, and avoid forcing bulky seams through the machine. That sounds obvious, but it is exactly where many first collars go wrong.
- Fuse or stitch the interfacing to the wrong side of the outer pieces, depending on the fabric and the interfacing type.
- Place the outer fabric and lining right sides together, then stitch around the collar edge, leaving a turning gap of 5-7 cm.
- Clip curved seams and trim corners before turning. On pointed shapes, trim the seam allowance diagonally near the tip, but do not cut into the stitching.
- Turn the collar right side out and press it flat with steam and a pressing cloth.
- Use understitching if the design allows it. Understitching means stitching the seam allowance to the lining so the edge naturally rolls inward and stays neat.
- Topstitch only if it suits the fabric and style. I like topstitching on cotton and denim-weight collars, but I skip it on delicate lace or very soft fabrics.
- Close the turning gap by hand or with a nearly invisible machine stitch, then add the fastening and test the fit on the intended garment.
If the collar needs extra body, I prefer a second layer of interfacing over a heavier outer fabric, because heavy fabric alone can make the edge collapse in odd places. If it needs to feel softer, I scale the interfacing down instead of removing it completely. That balance matters more than most beginners expect, and it leads straight into the fastening choice.
The fastening method changes the whole result
The collar can be beautifully sewn and still fail if the fastening is awkward. I think of the closure as part of the design, not as an afterthought. If the fastening is too visible, too bulky, or too fiddly, the collar stops feeling like a versatile accessory and starts feeling like a craft sample.
| Fastening | Best for | Advantages | Watch out for |
|---|---|---|---|
| Ribbon ties | Light collars, romantic styles, one-off outfits | Easy to sew, adjustable, gentle on fabric | Can shift if the bow is too loose |
| Snaps | Everyday wear and a clean finish | Discreet, quick to fasten, reliable | Need precise placement |
| Button and loop | Polished shirts, retro styles, handmade gifts | Looks intentional and neat | Requires accurate overlap and a secure loop |
| Hook and eye | Tiny back openings or narrow closures | Flat and hidden under the collar edge | Not ideal for heavy collars |
| Hook and loop tape | Costumes, children’s wear, very quick prototypes | Fast and easy to adjust | Bulky and visually rough for refined pieces |
If I want the collar to work across several tops, I keep the fastening on the collar itself rather than modifying every garment I own. That makes the piece truly removable. If I am making it for one specific dress or blouse, I will sometimes anchor it more precisely to the neckline, but only when the fit really justifies it. With the fastening sorted, the remaining problems are mostly beginner mistakes that are easy to avoid.
The mistakes I would avoid on the first attempt
The first version is rarely ruined by one big error. More often, it is a cluster of small decisions: a neckline traced too tightly, a collar that is too tall for the outfit, an interfacing choice that is too heavy, or a closure placed where it pulls the fabric out of shape. I would rather make a plain collar that fits well than a decorated one that fights the garment.
- Tracing the body instead of the garment - this usually makes the collar too small.
- Skipping a mock-up - even a rough toile reveals whether the depth and curve are flattering.
- Using stretchy fabric without stabilising it - jersey can work, but only if you are deliberate about support.
- Forgetting seam allowance at the closure - a collar may close on paper and fail in real life because the overlap is too short.
- Overloading the edge with trims - lace, beads, braid, and ruffles all add bulk fast.
- Pressing too late - once the layers have been sewn and cooled, it is harder to shape the edge neatly.
My own rule is simple: if the collar looks slightly too plain before the final trim, I am usually in safe territory. It is much easier to add a ribbon, contrast stitching, or a narrow lace edge than to rescue a collar that has become heavy and awkward. That is why I treat the first make as a working sample, not a final verdict on the idea.
What makes a small collar project worth the effort
A well-made removable collar gives you flexibility that attached collars do not. It can sharpen a sweater, soften a dress, or turn a basic top into something that looks deliberately styled. That is why I like this project for scrap fabric, small pieces of lace, and leftover interfacing that are too good to throw away.
If I were making one today, I would start with a neutral shape in a stable woven, keep the fastening simple, and test it against at least two outfits before decorating it. That approach keeps the project wearable rather than merely decorative, which is exactly what makes a handmade collar useful long after the first try.
